🌌Borrower Portal
The Borrower Portal is accessible via a link provided to your borrower, allowing them to upload any necessary documents. Customizing the Borrower Portal to align with your company's branding is important. In this phase, we'll create your borrower portal, upload your company logo, define primary and secondary brand colors, deploy the site's link, and tailor the site's sharing settings.
✏️Creating the Borrower Portal
Click on “Create Portal”:

Click “New” from the Digital Experience Page

In the “Digital Experiences” window, select “New.”

The following page will open:
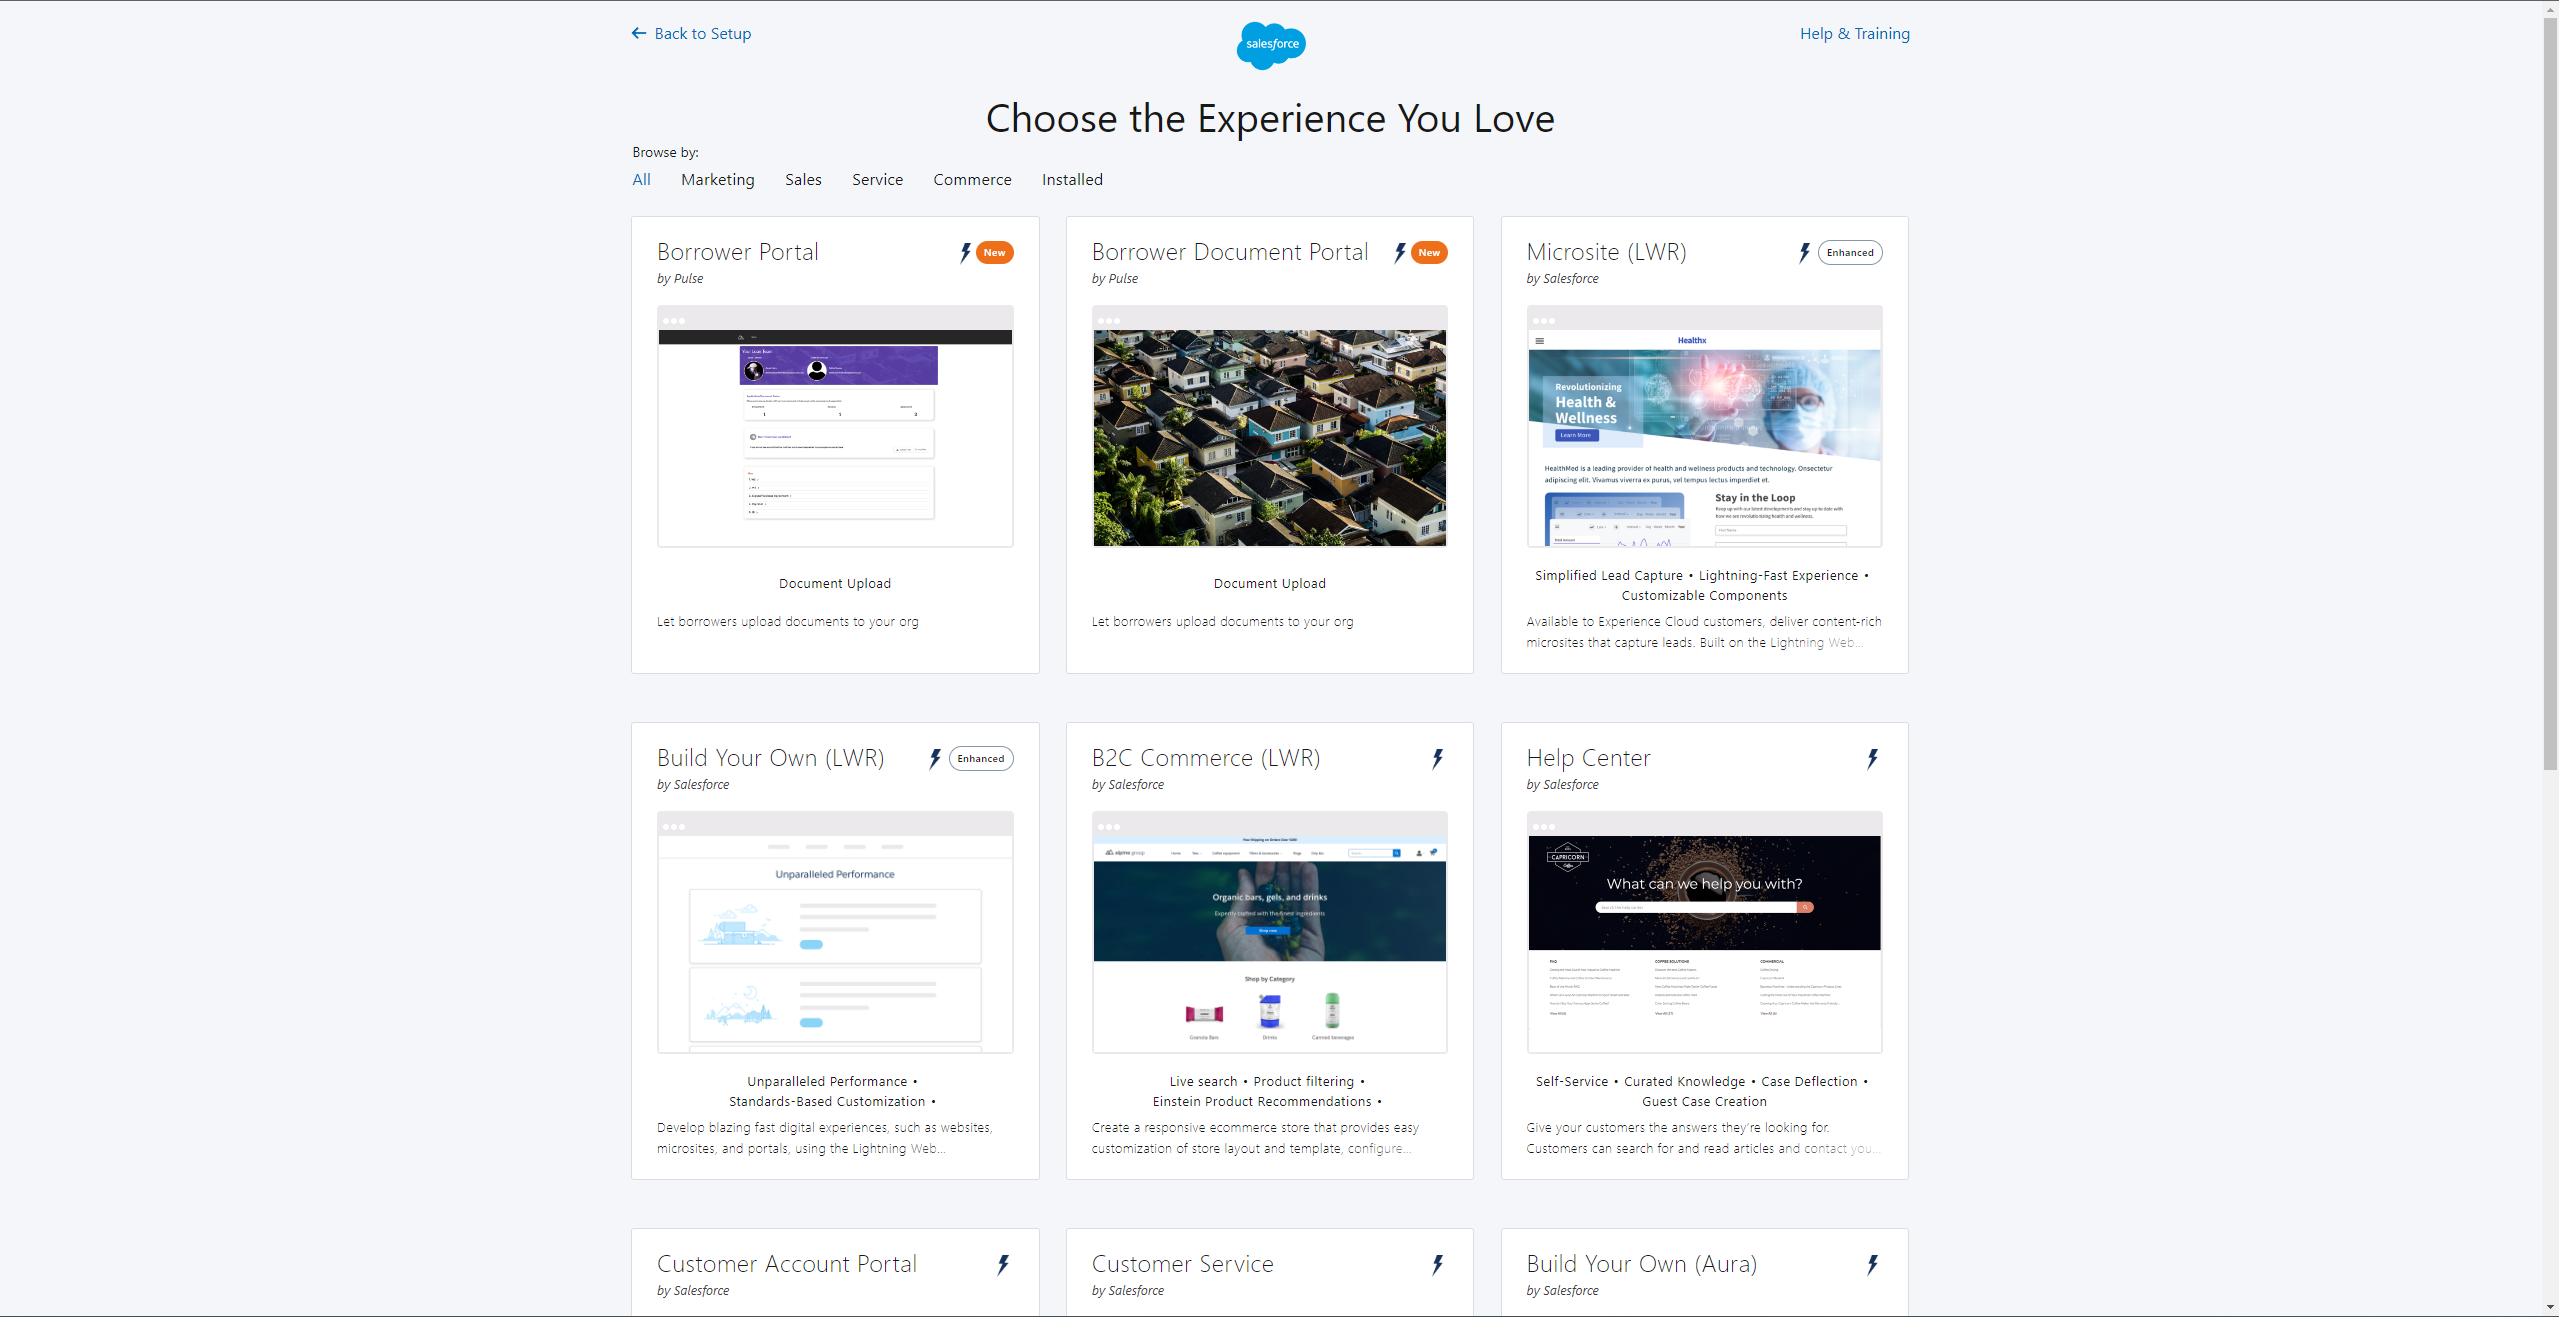
Select the “Borrower Portal” template from the available templates
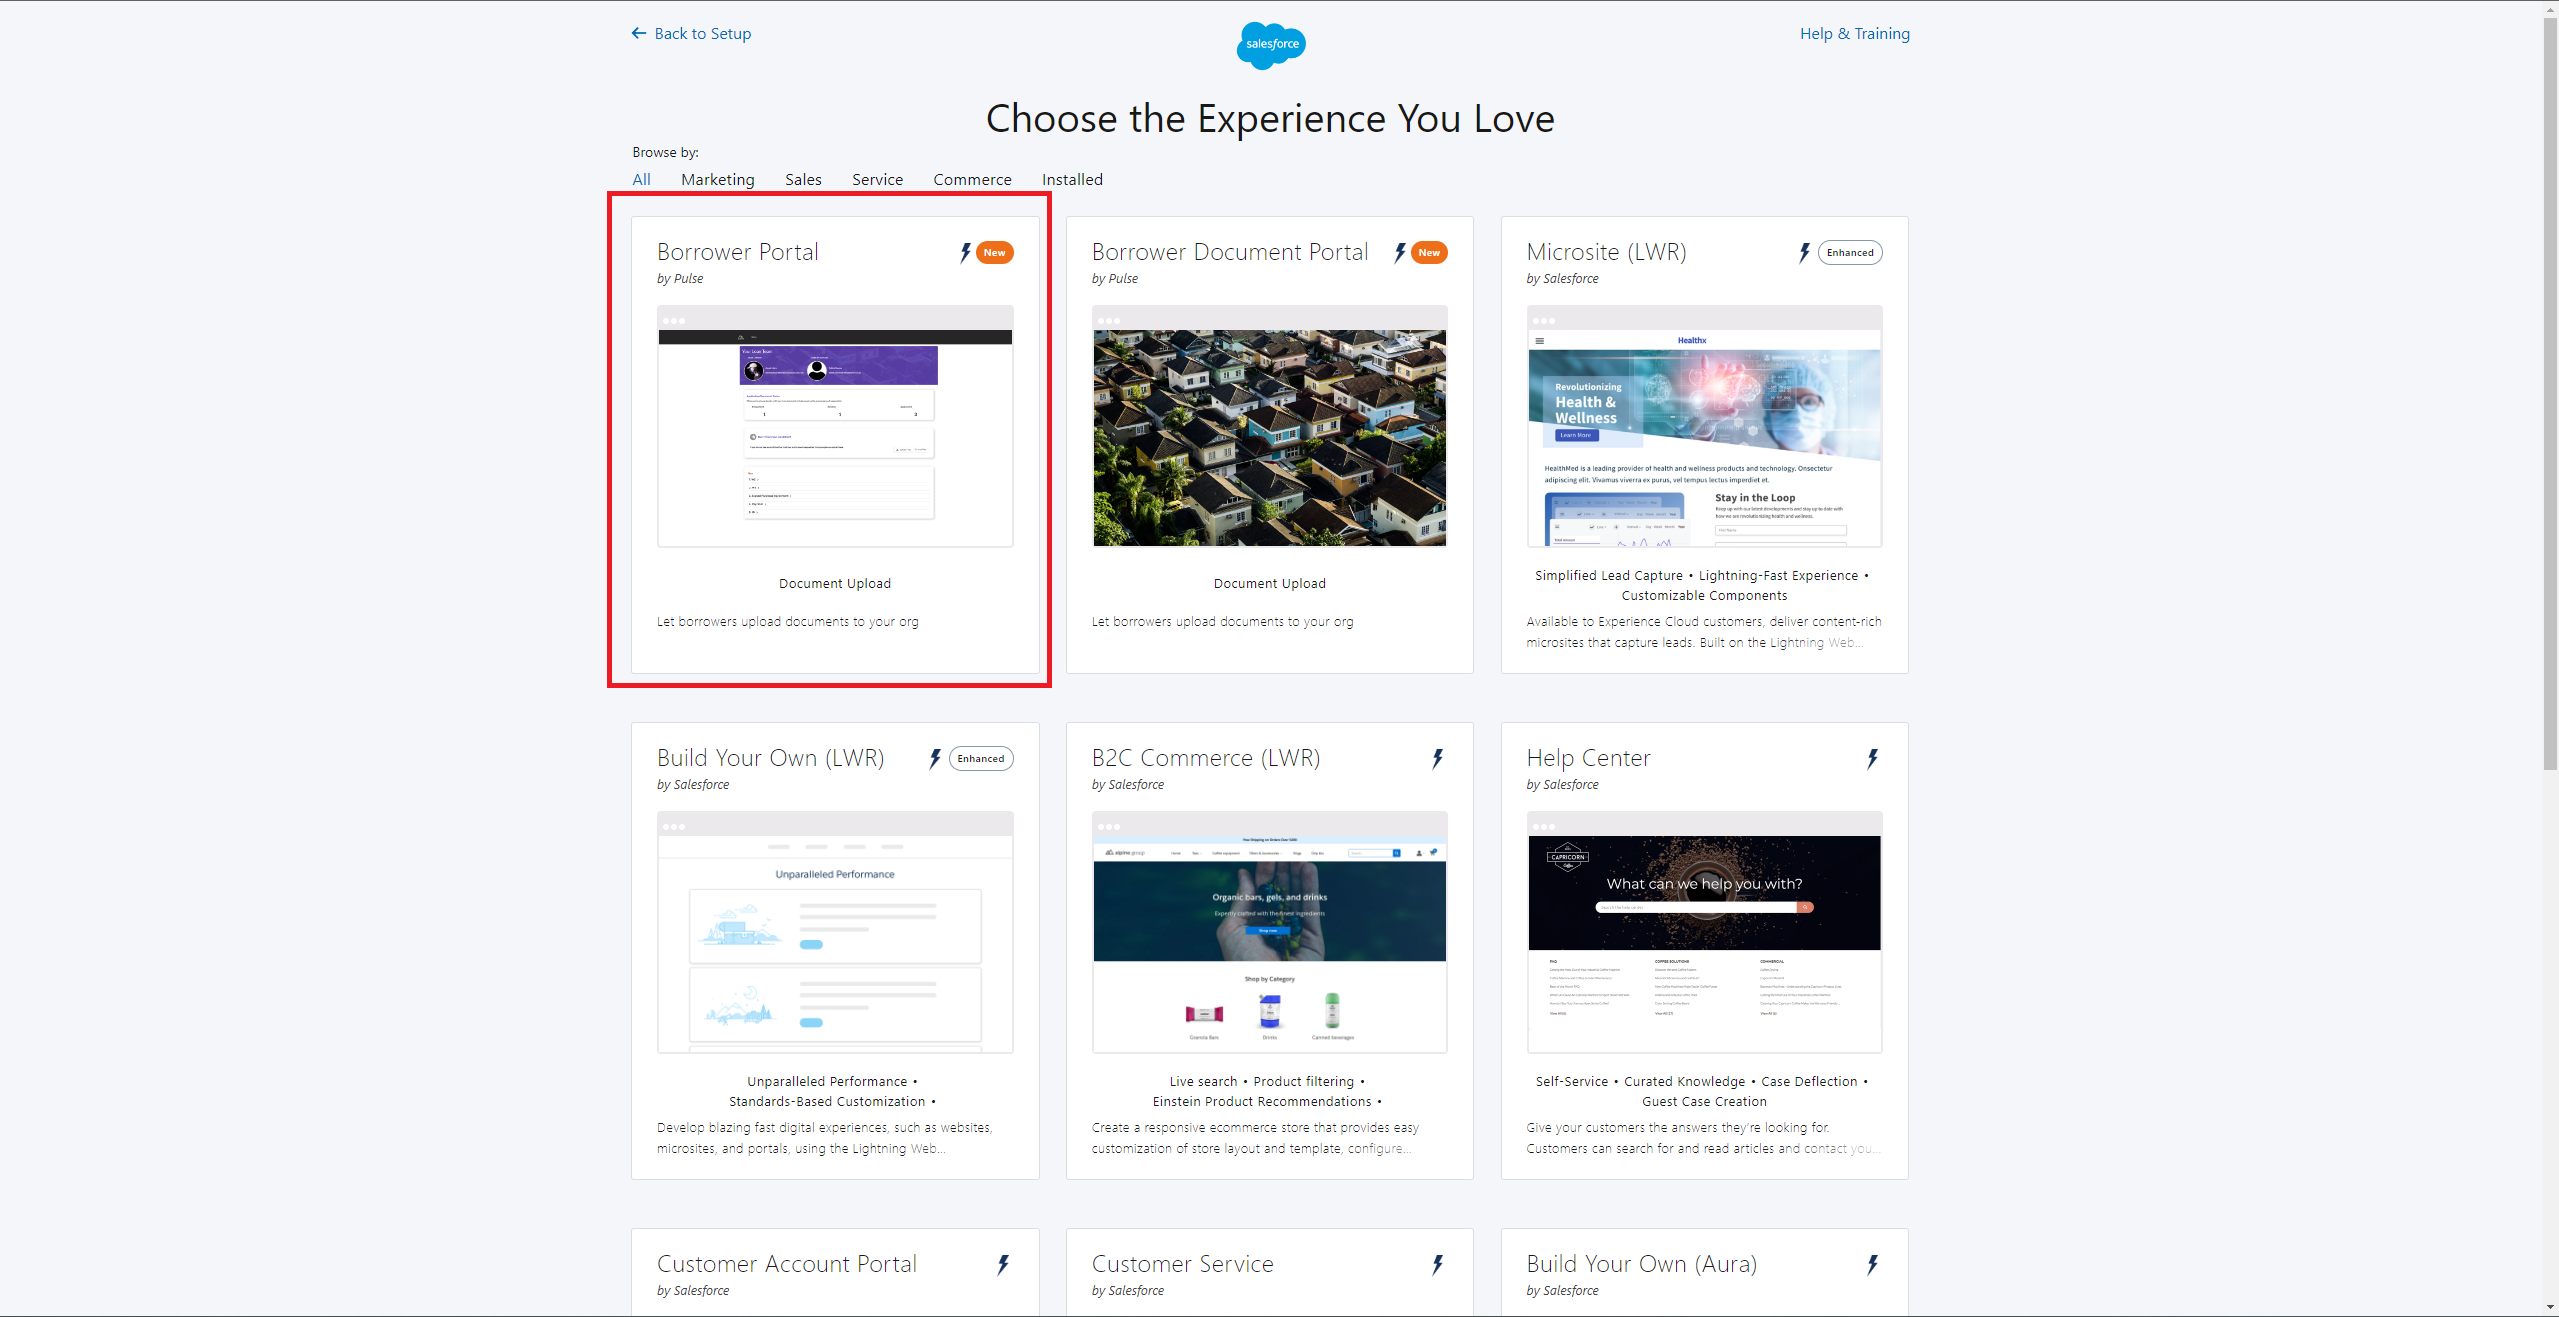
The following screen will open:

Select “Get Started.” The following page will open:

Enter the name you would like the Borrower Portal to use (for this example we’ll use Pulse Borrower Portal)
Enter the URL extension “Documents” (example: Pulsemortgage.com/documents
Click “Create”
Once the site has been created, choose “Builder”
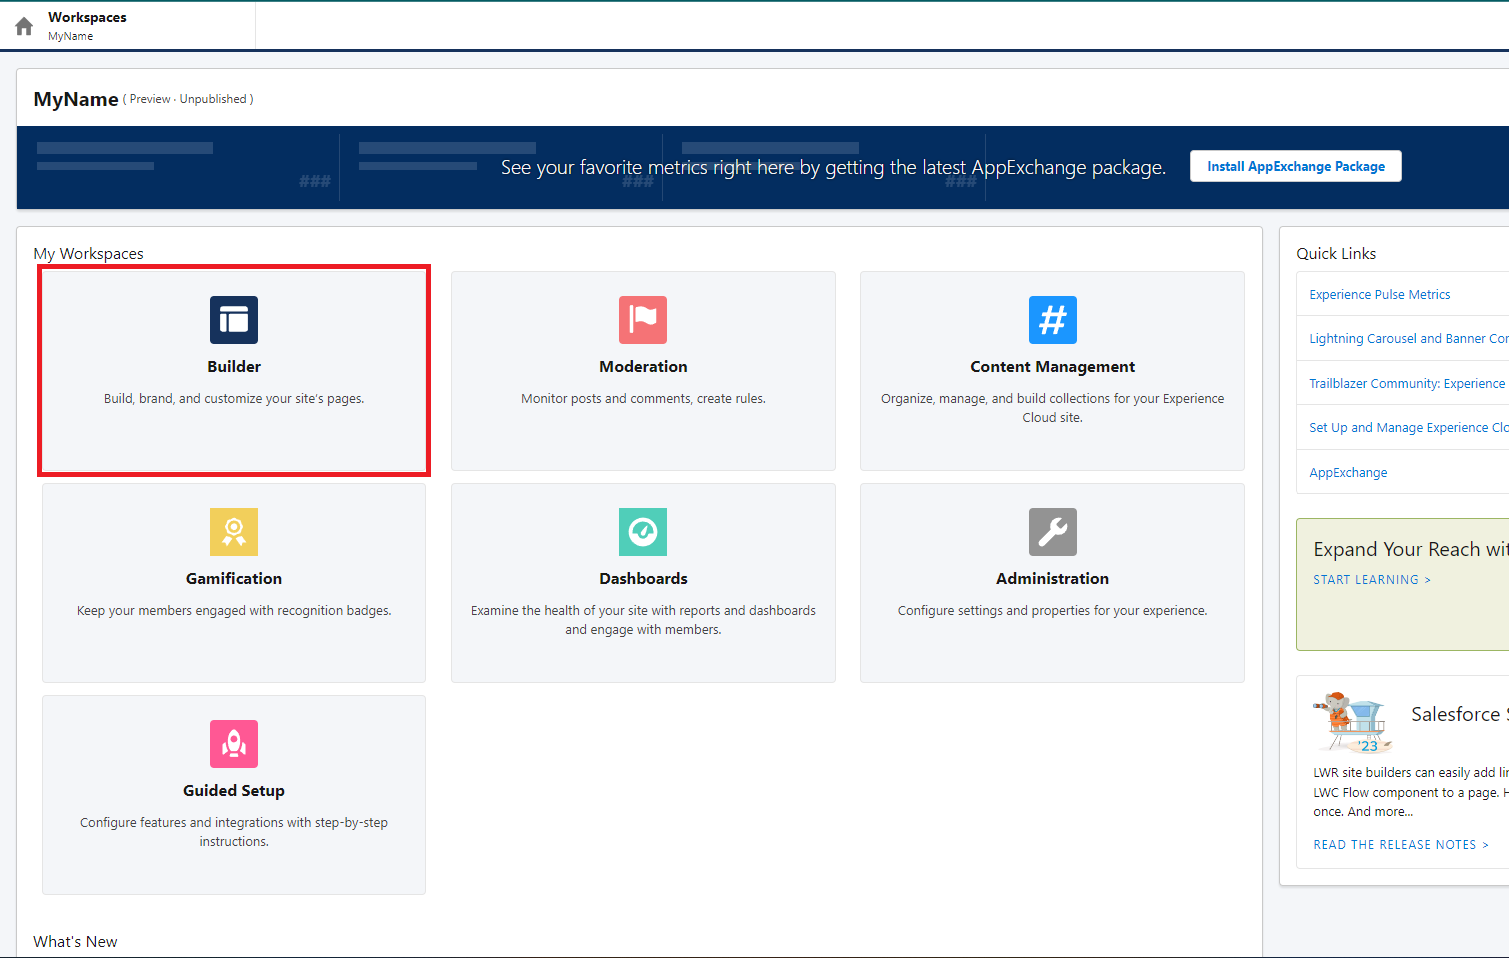
🎨Customizing Your Borrower Portal
This is a required setting. Please click the Settings icon located at the top left of the screen and ensure the “Guest users can see and interact with the site without logging” field is checked.
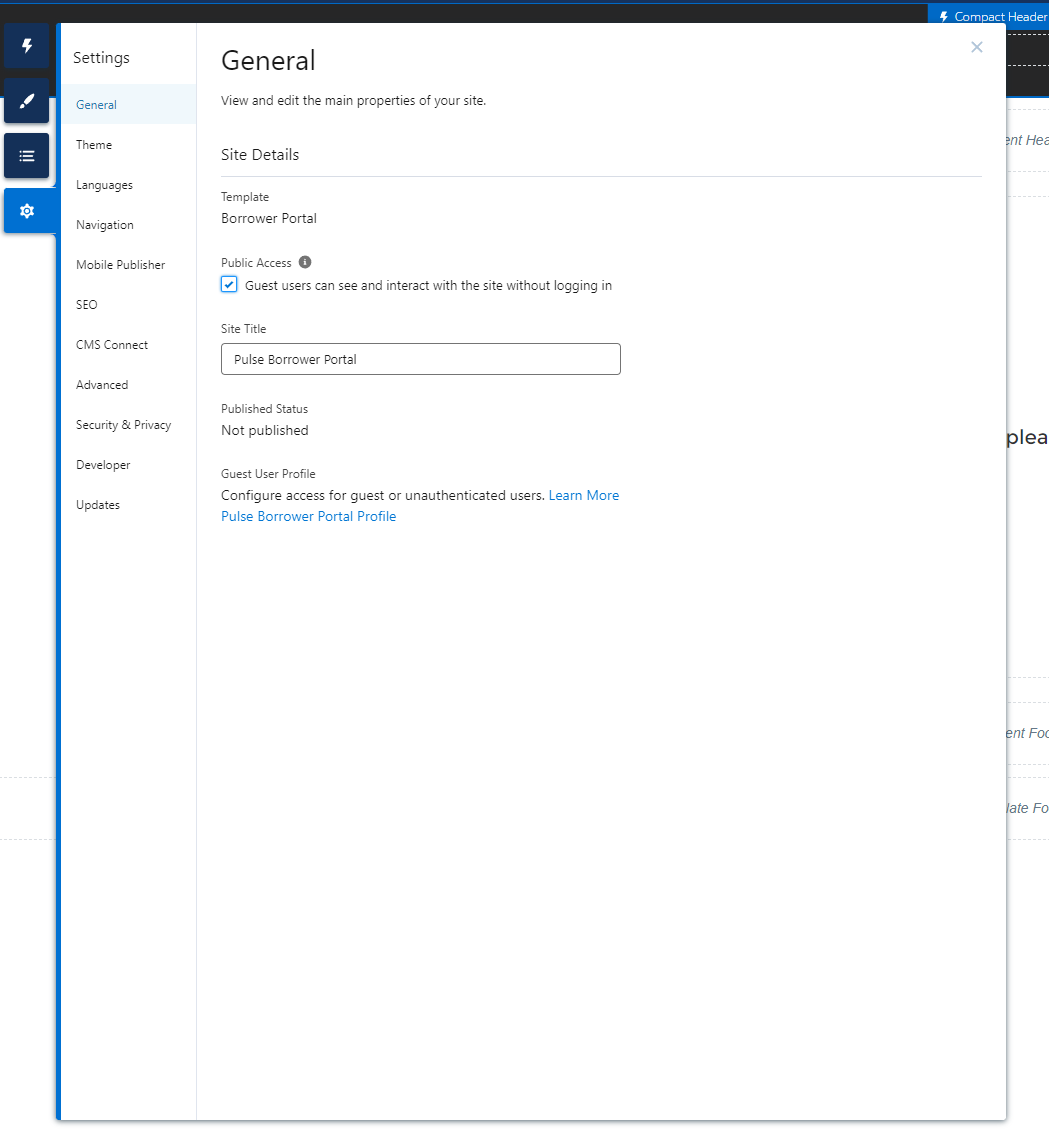
The following setting will remove the “Home” and “Topic” from the header.
Hide the Home Link
Select the paintbrush icon at the top left of the screen and then choose “Edit CSS” from the dropdown menu:
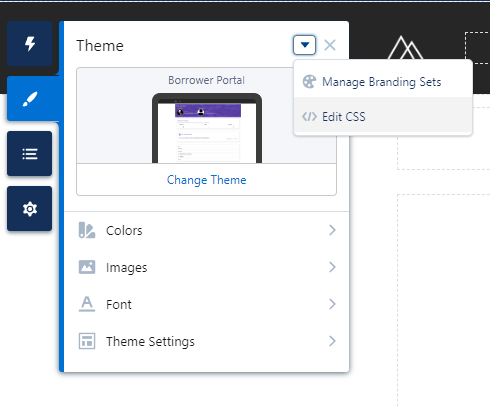
Copy this code segment and paste it into the Code Editor and press Save.
- CSS
.stellaInnerHeader {
    display: none;
}
Set your Company Logo
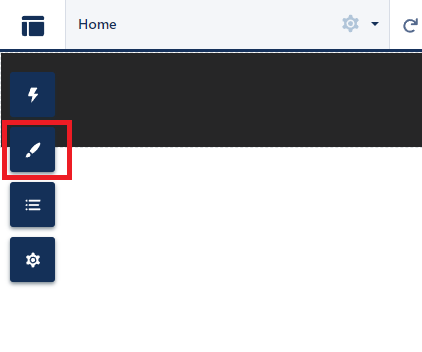
1. Select the paintbrush icon at the top left of the screen:
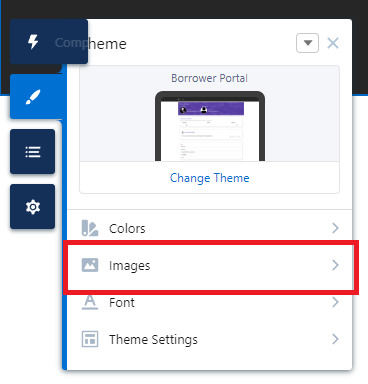
Select Images
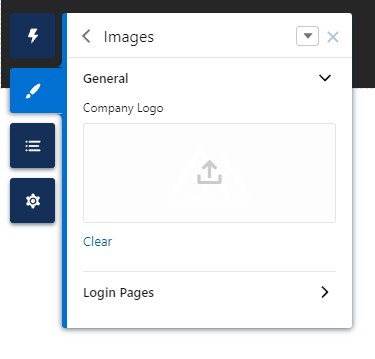
Select Company logo, and upload your company logo
Click on the paintbrush icon and select “Colors”
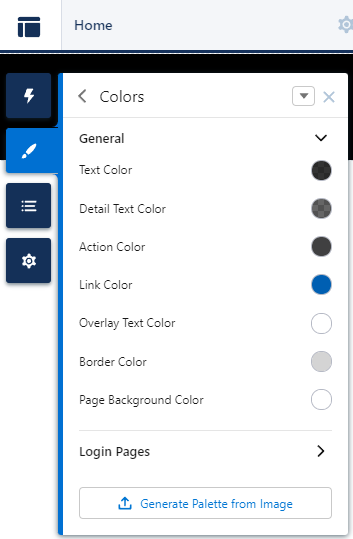
Customize your colors or generate a palette from an image
Click on the navigation bar, the following window will open:
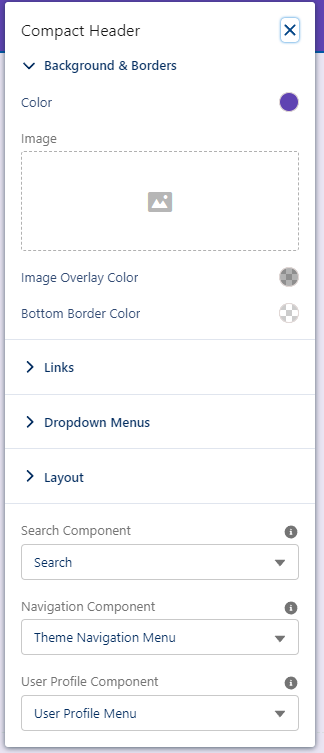
Customize your header
Publish your site
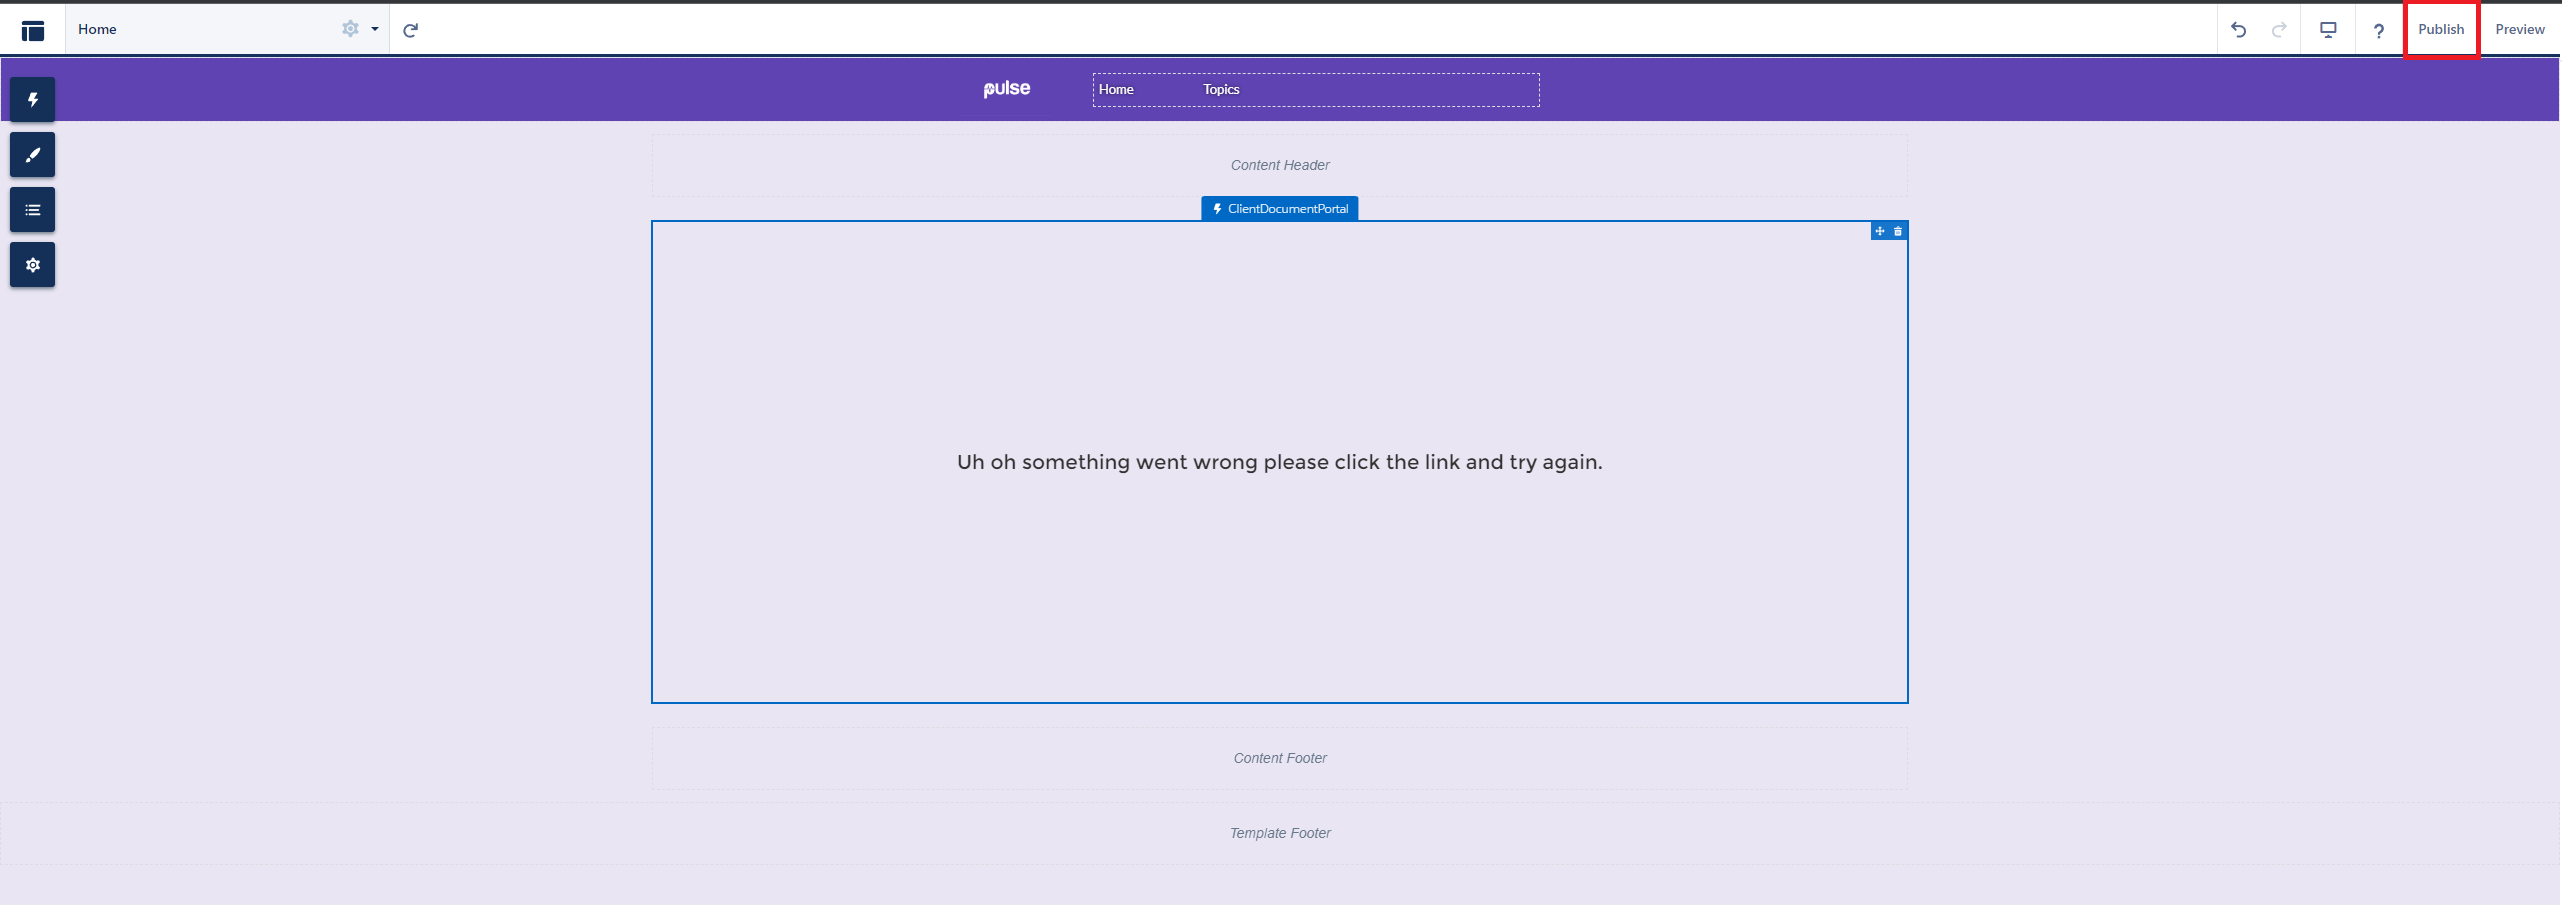
The “Uh Oh…” Prompt is expected
Return to the Onboarding Wizard and select the blue ☑️ next to “Upload Portal Logo” and “Set Brand Colors”

Set Domain Name
Click the “Setup Portal Site” button

Enable the checkbox for “I have read and accepted the Salesforce Sites Terms of Use” then click “Register My Salesforce Site Domain
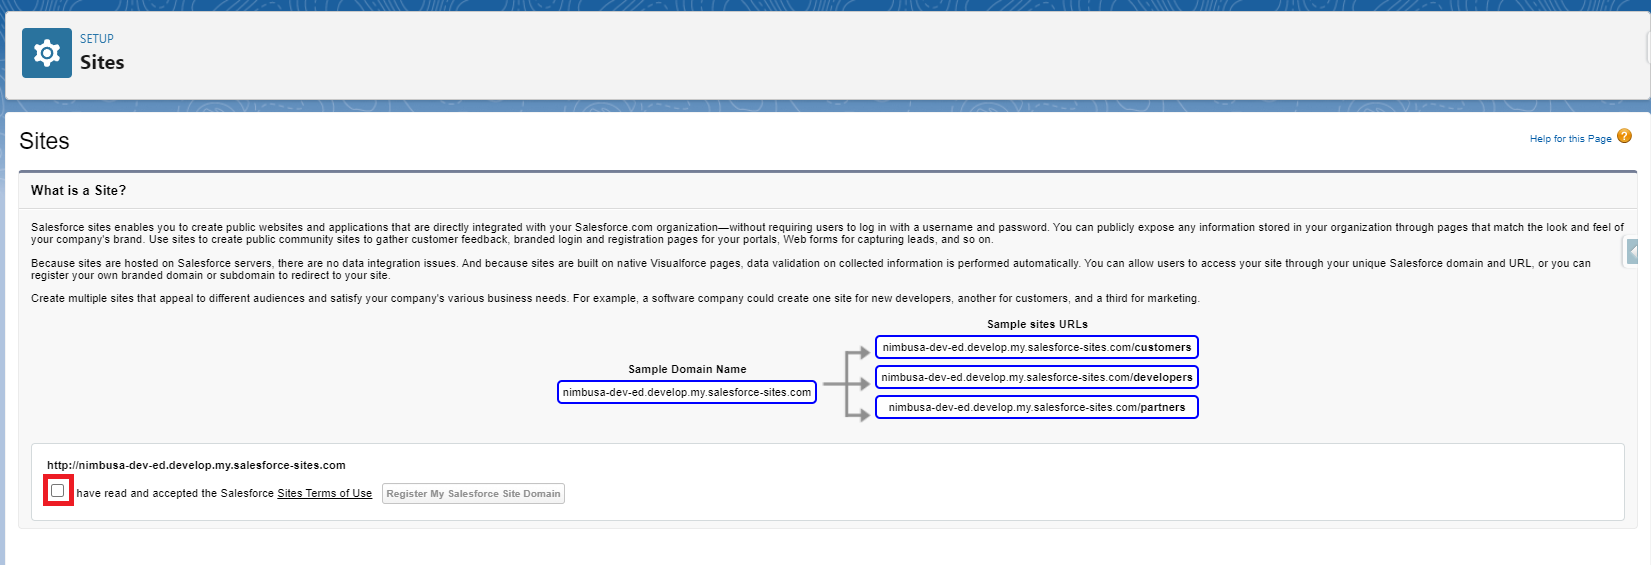
Please apply the permission sets for the Guest Site User.
Please click on the Site Label:

Please select Public Access Settings:

Please select View Users:

Please select the Full Name of the User:

Please select the Edit Assignments button:

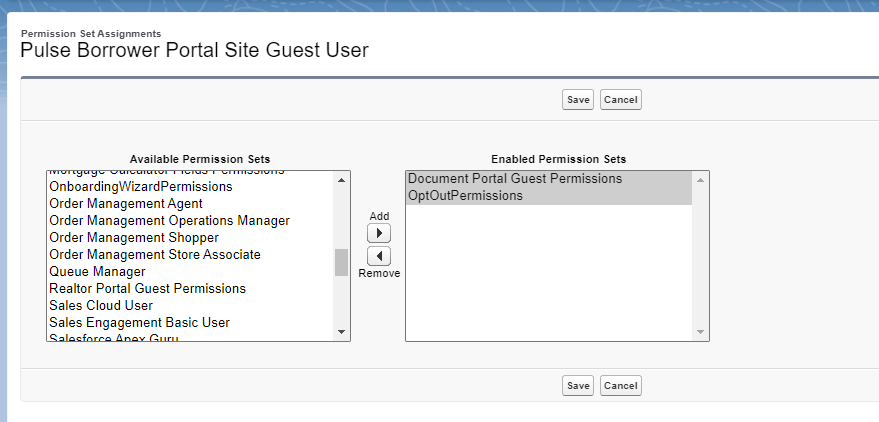
Please select the following permissions:
🫱🏽🫲🏽Configure Sharing Settings
In Salesforce click on the gear icon

The Salesforce setup page will open.
In the “Quick Find” bar type “Sharing Settings” and select it from the list.
The following page will open:
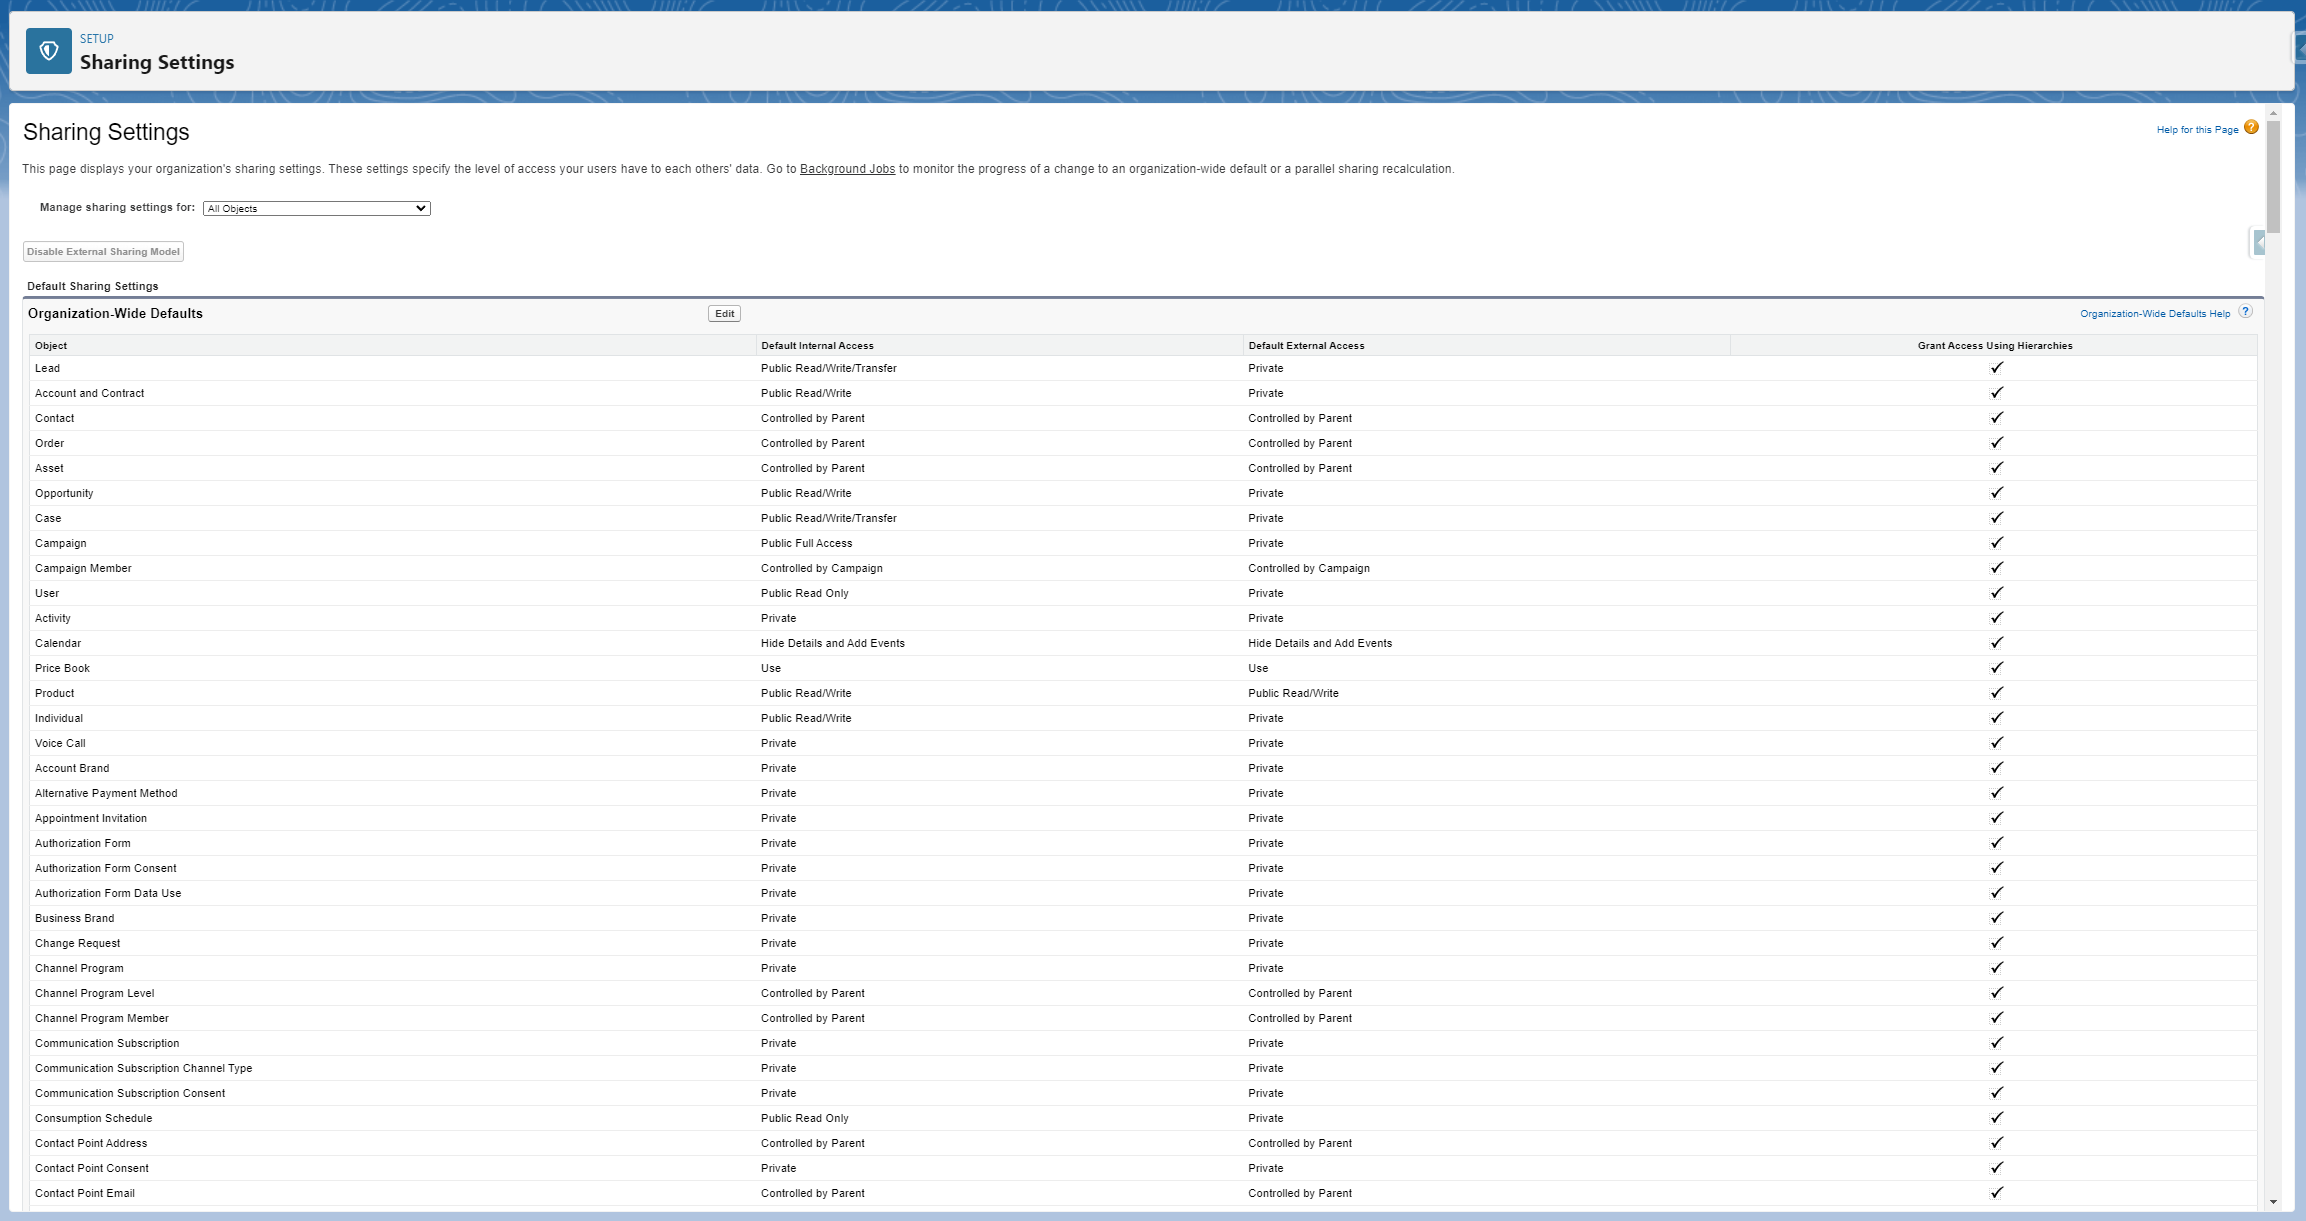
In the “Manage sharing settings for:” dropdown, select “Opportunity”
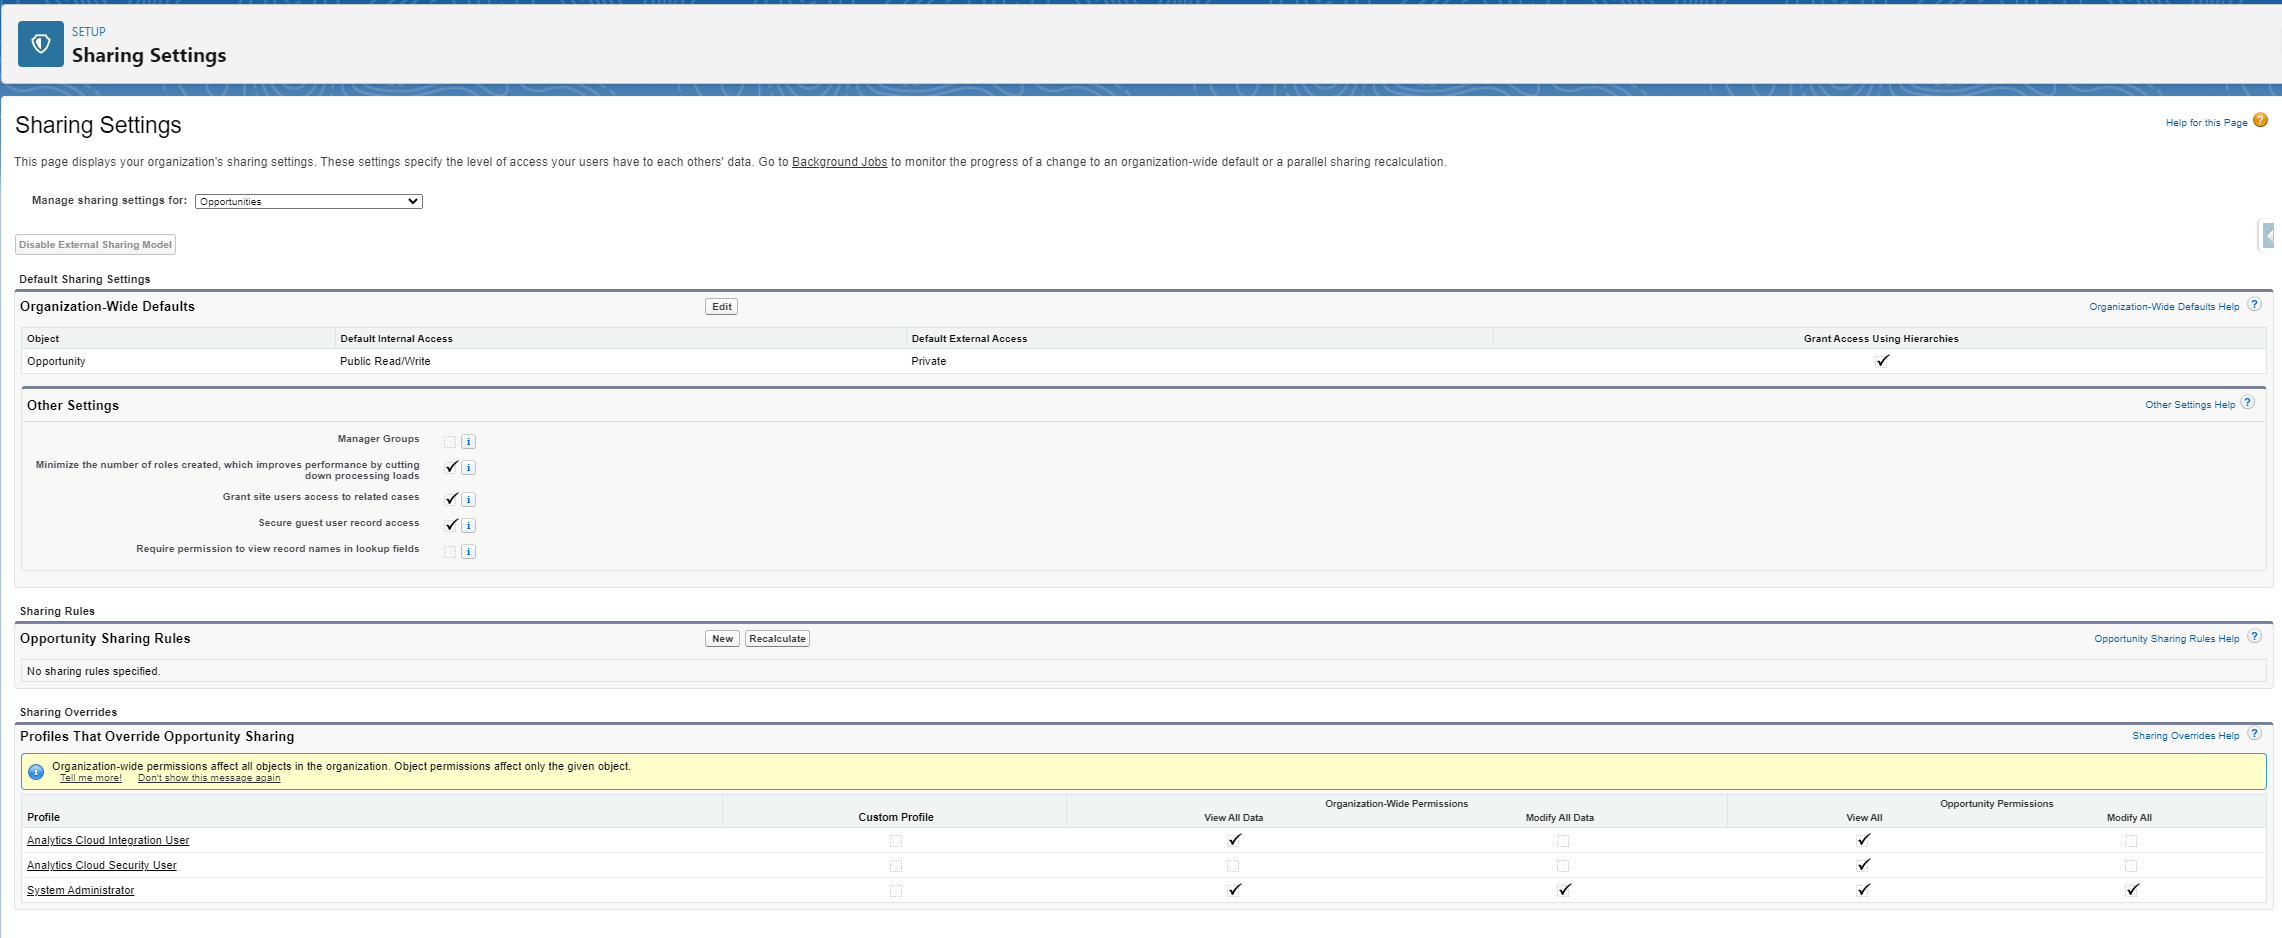
In the “Opportunity Sharing Rules” section, click “New”

The following page will open:
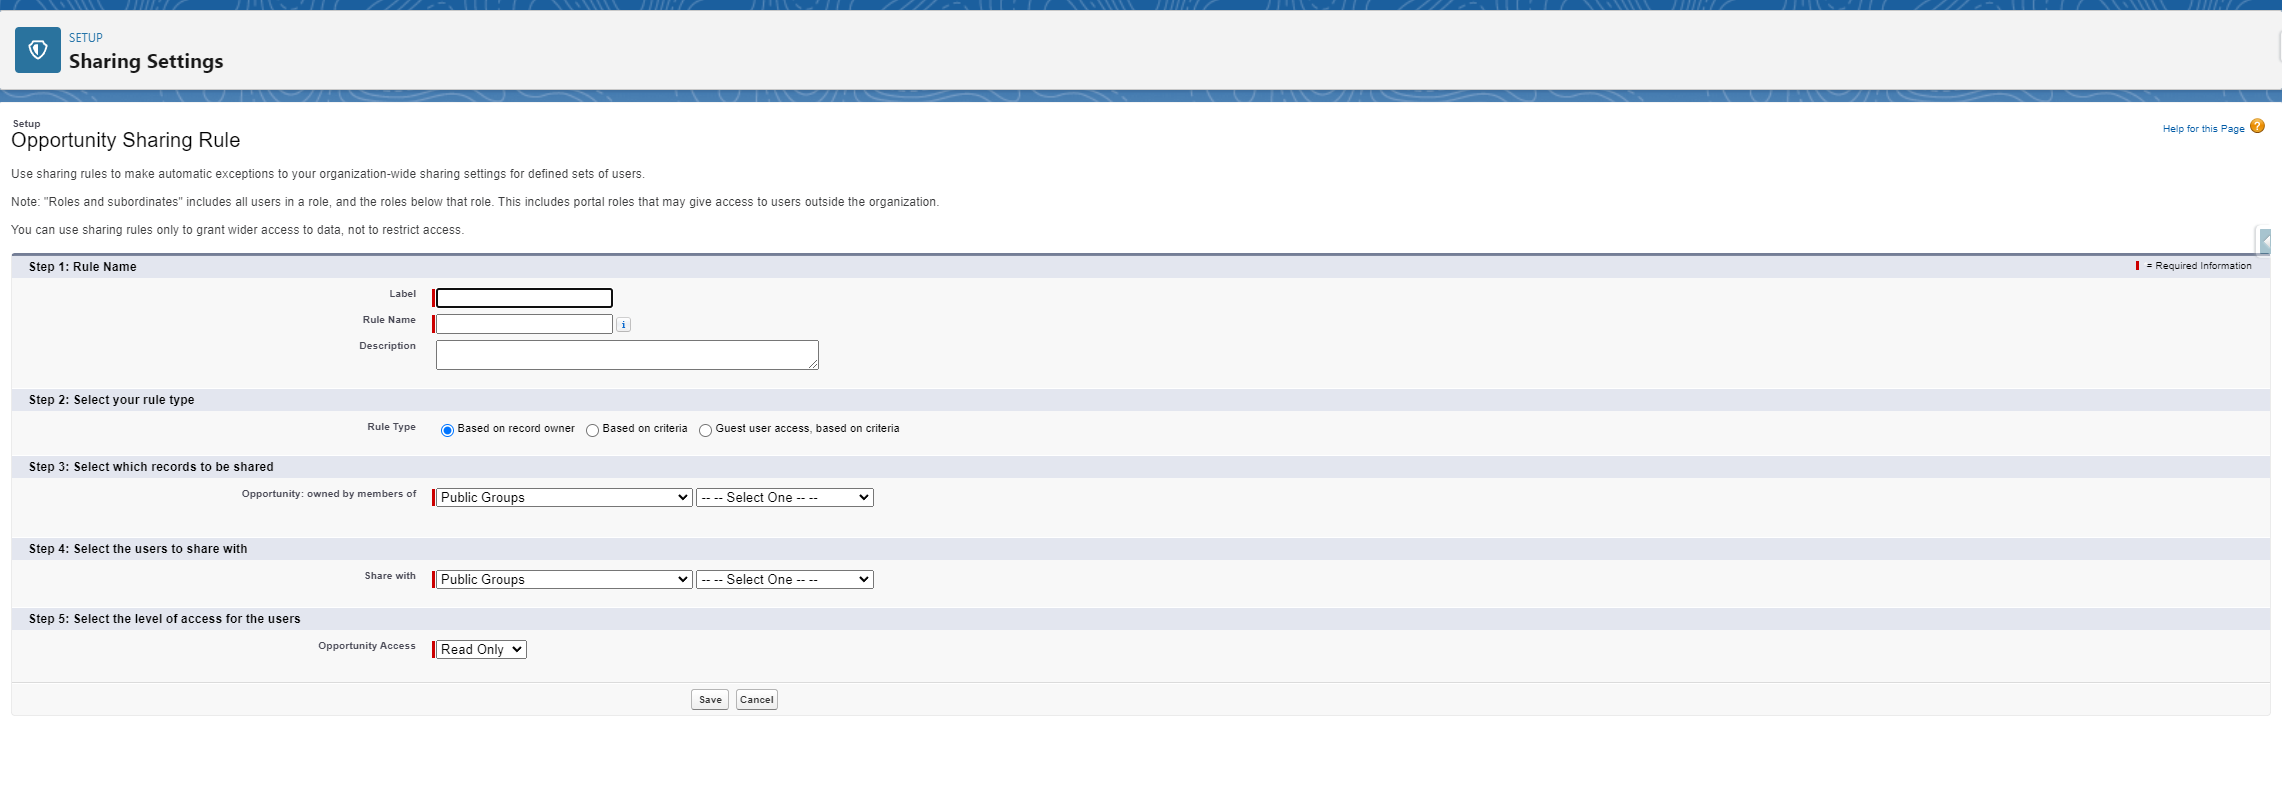
Enter the following information in each field:
Label: Borrower Portal Sharing Rule
Rule Name: (Auto Populates)
Rule Type: Guest user access, based on criteria
Share with: (Your Borrower Portal Site Name) Guest User
Opportunity Access: Read Only
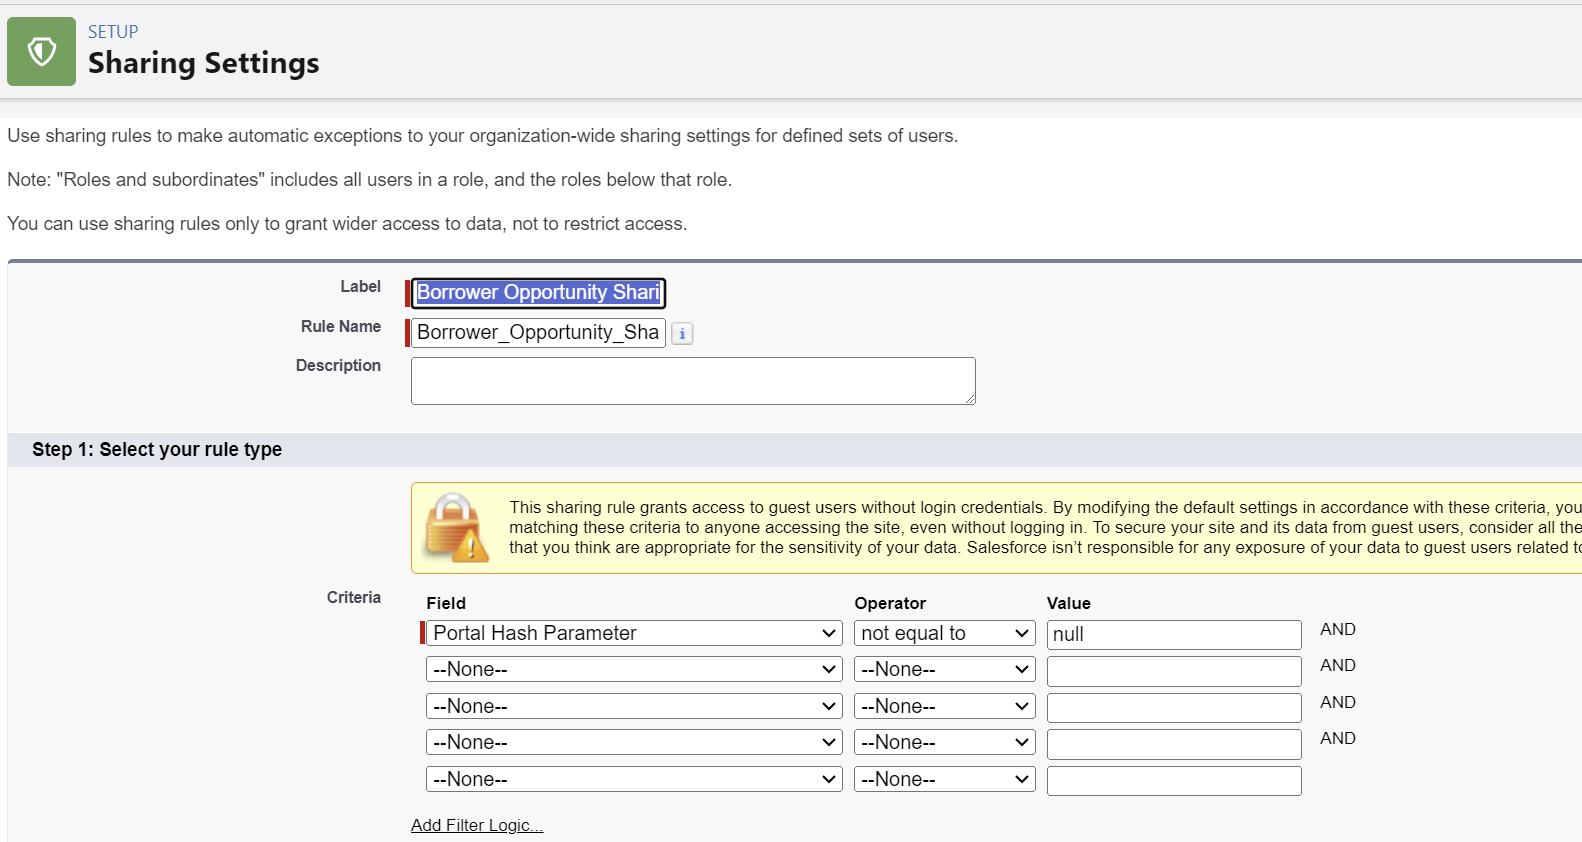
Portal Hash Parameter NOT EQUAL to NULL
Save your changes
You will be navigated back to the Sharing Setting page. In the “Manage sharing settings for:” dropdown, select “Accounts”
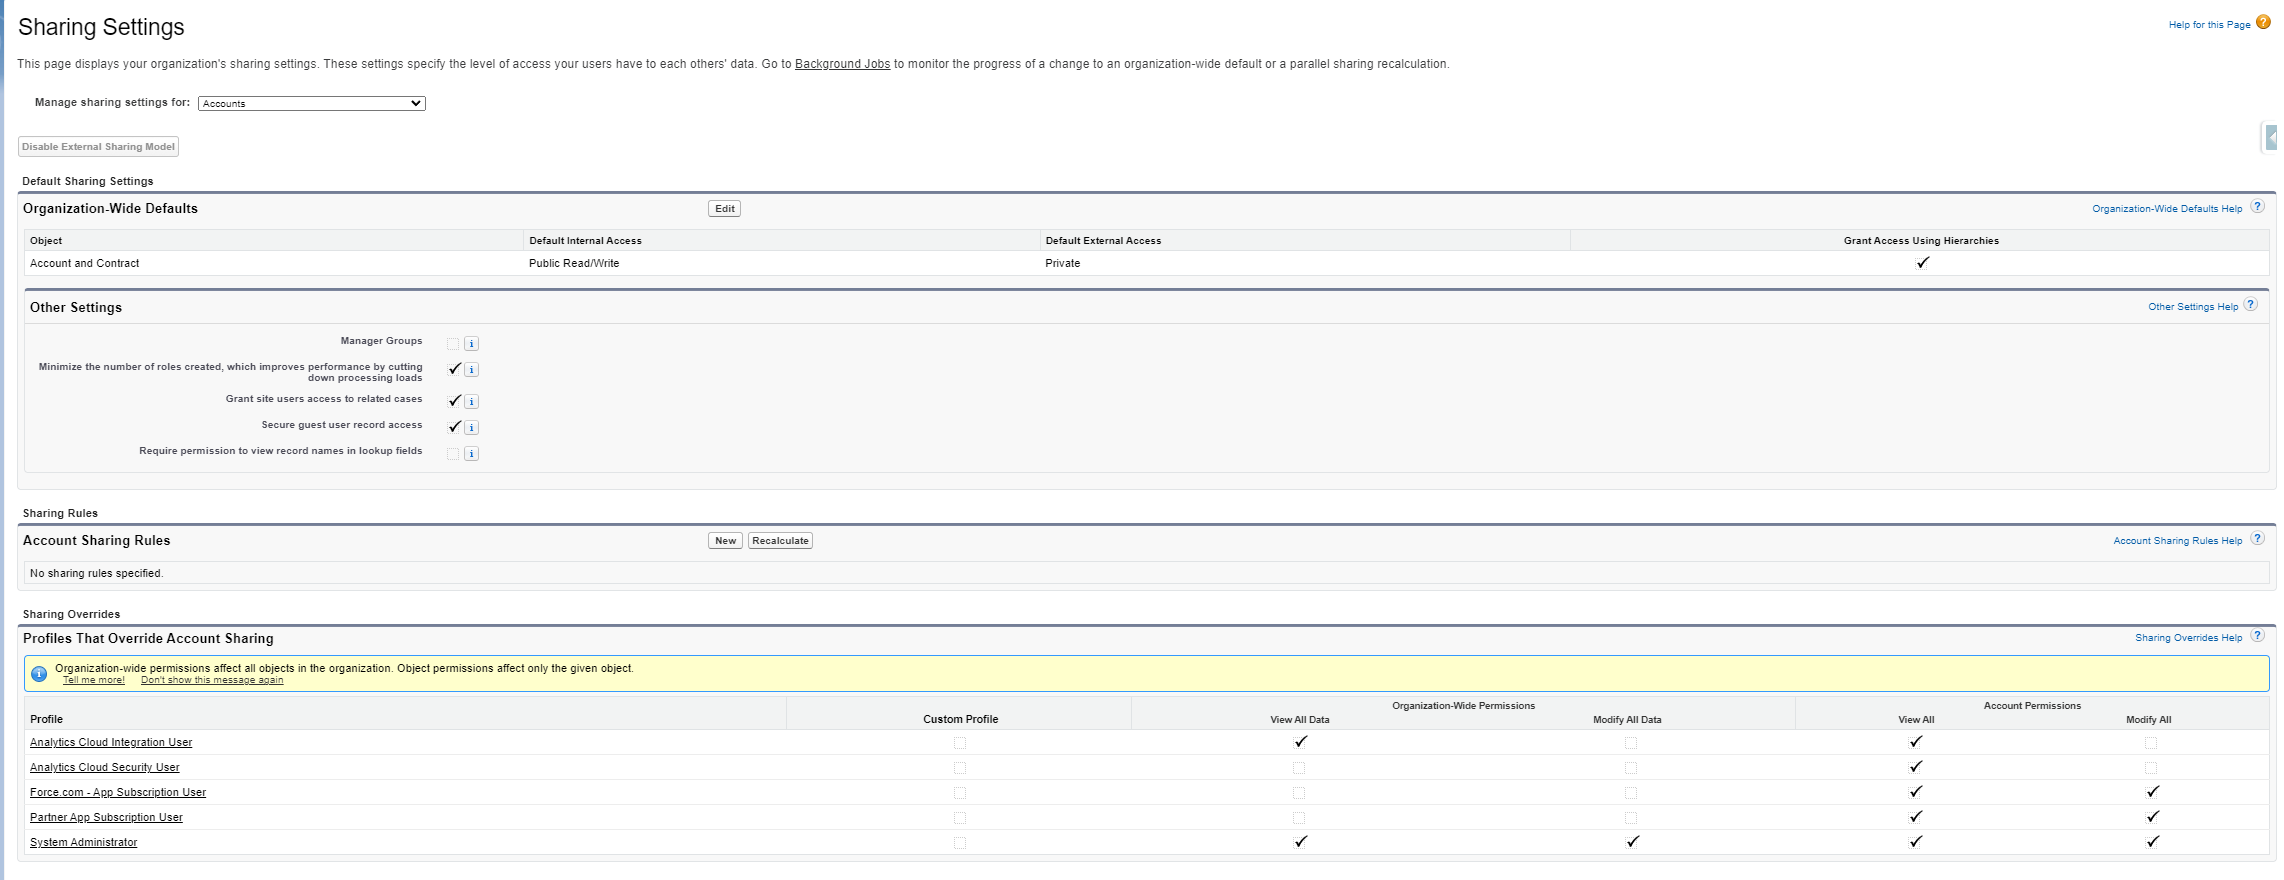
In the “Account Sharing Rules” section select “New”

Enter the following information in each field:
Label: Broker Portal Sharing Rule
Rule Name: (Auto Populates)
Rule Type: Guest user access, based on criteria

Account Name not equal to abc123
Share with: (Your Borrower Portal Site Name) Guest User
Default Account and Contract Access: Read Only

Save your changes
You will be navigated back to the Sharing Setting page. In the “Manage sharing settings for:” dropdown, select “Leads”
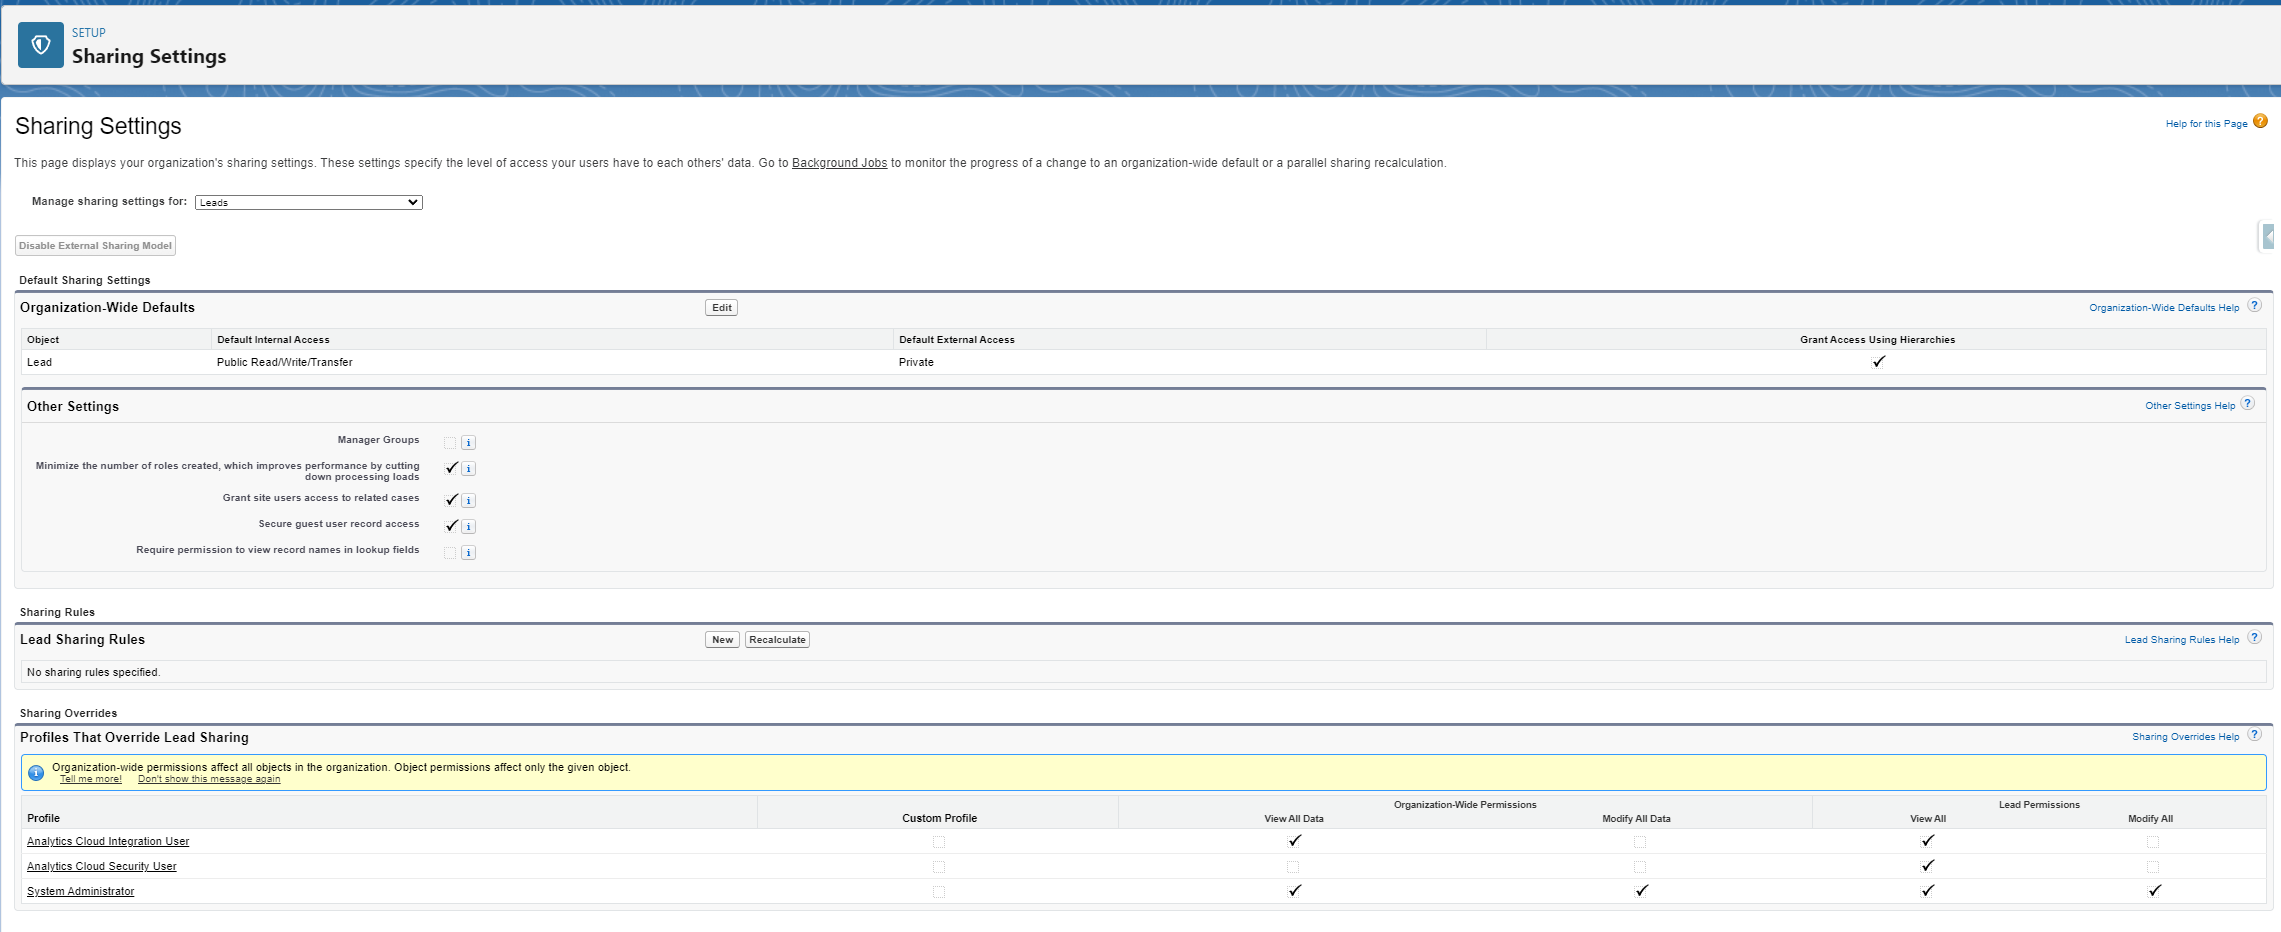
In the “Lead Sharing Rules” section, select “New”

The following page will open:
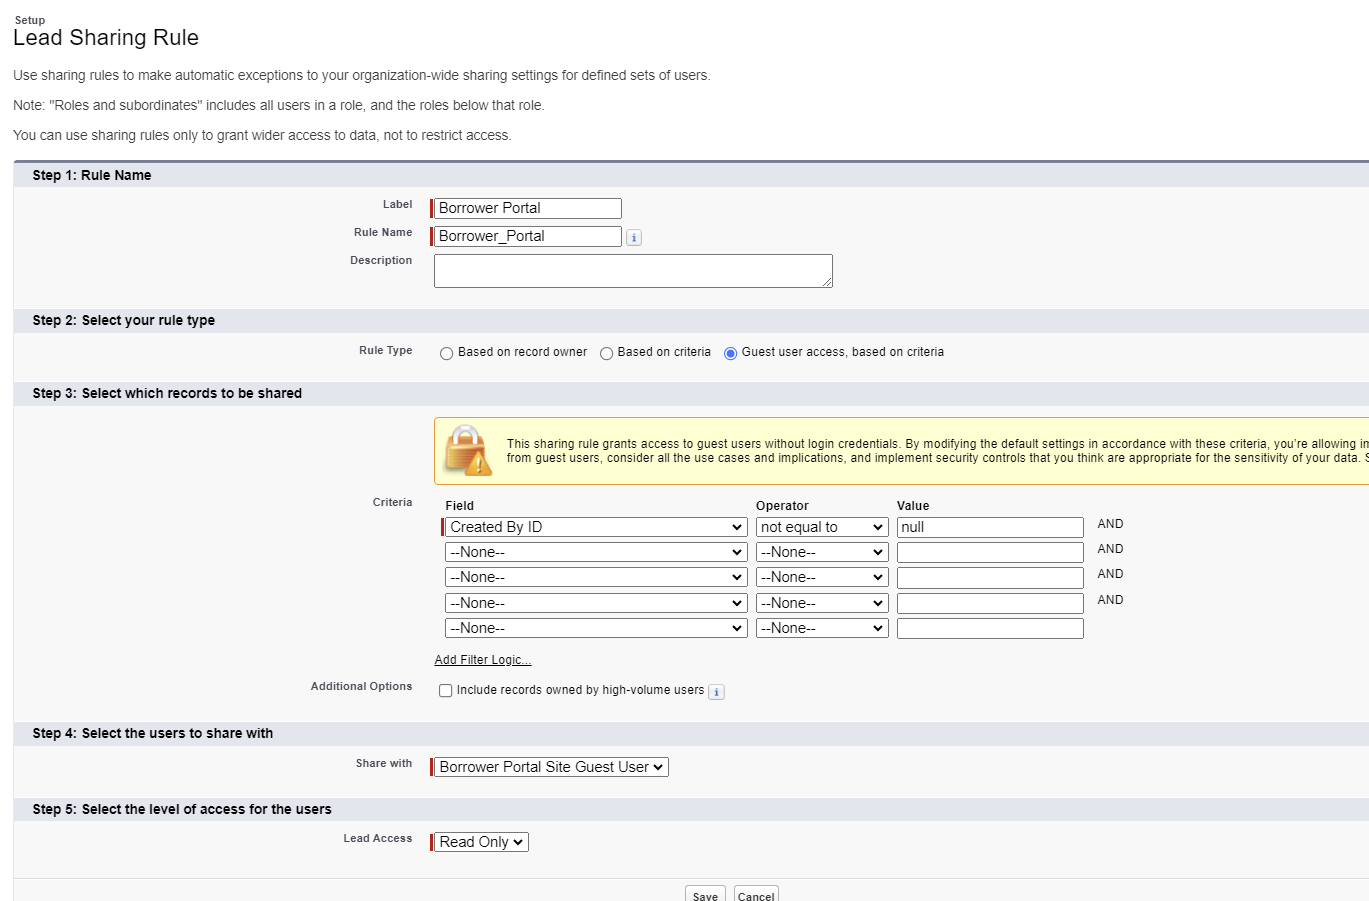
Enter the following information in each field:
Label: Broker Portal Sharing Rule
Rule Name: (Auto Populates)
Rule Type: Guest user access, based on criteria
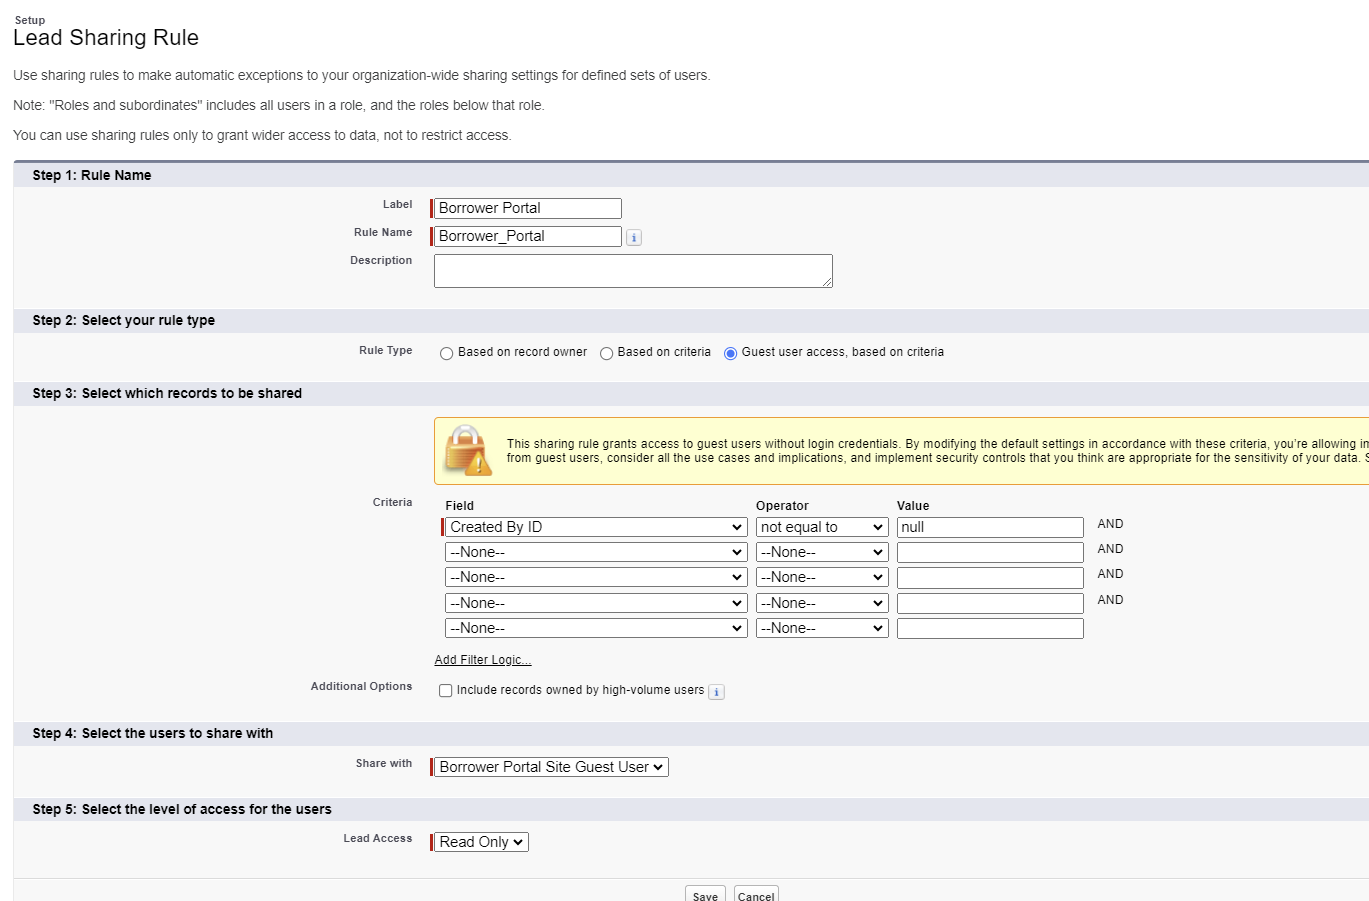
Created By ID not equal to null
Share with: (Your Borrower Portal Site Name) Guest User
Lead Access: Read Only
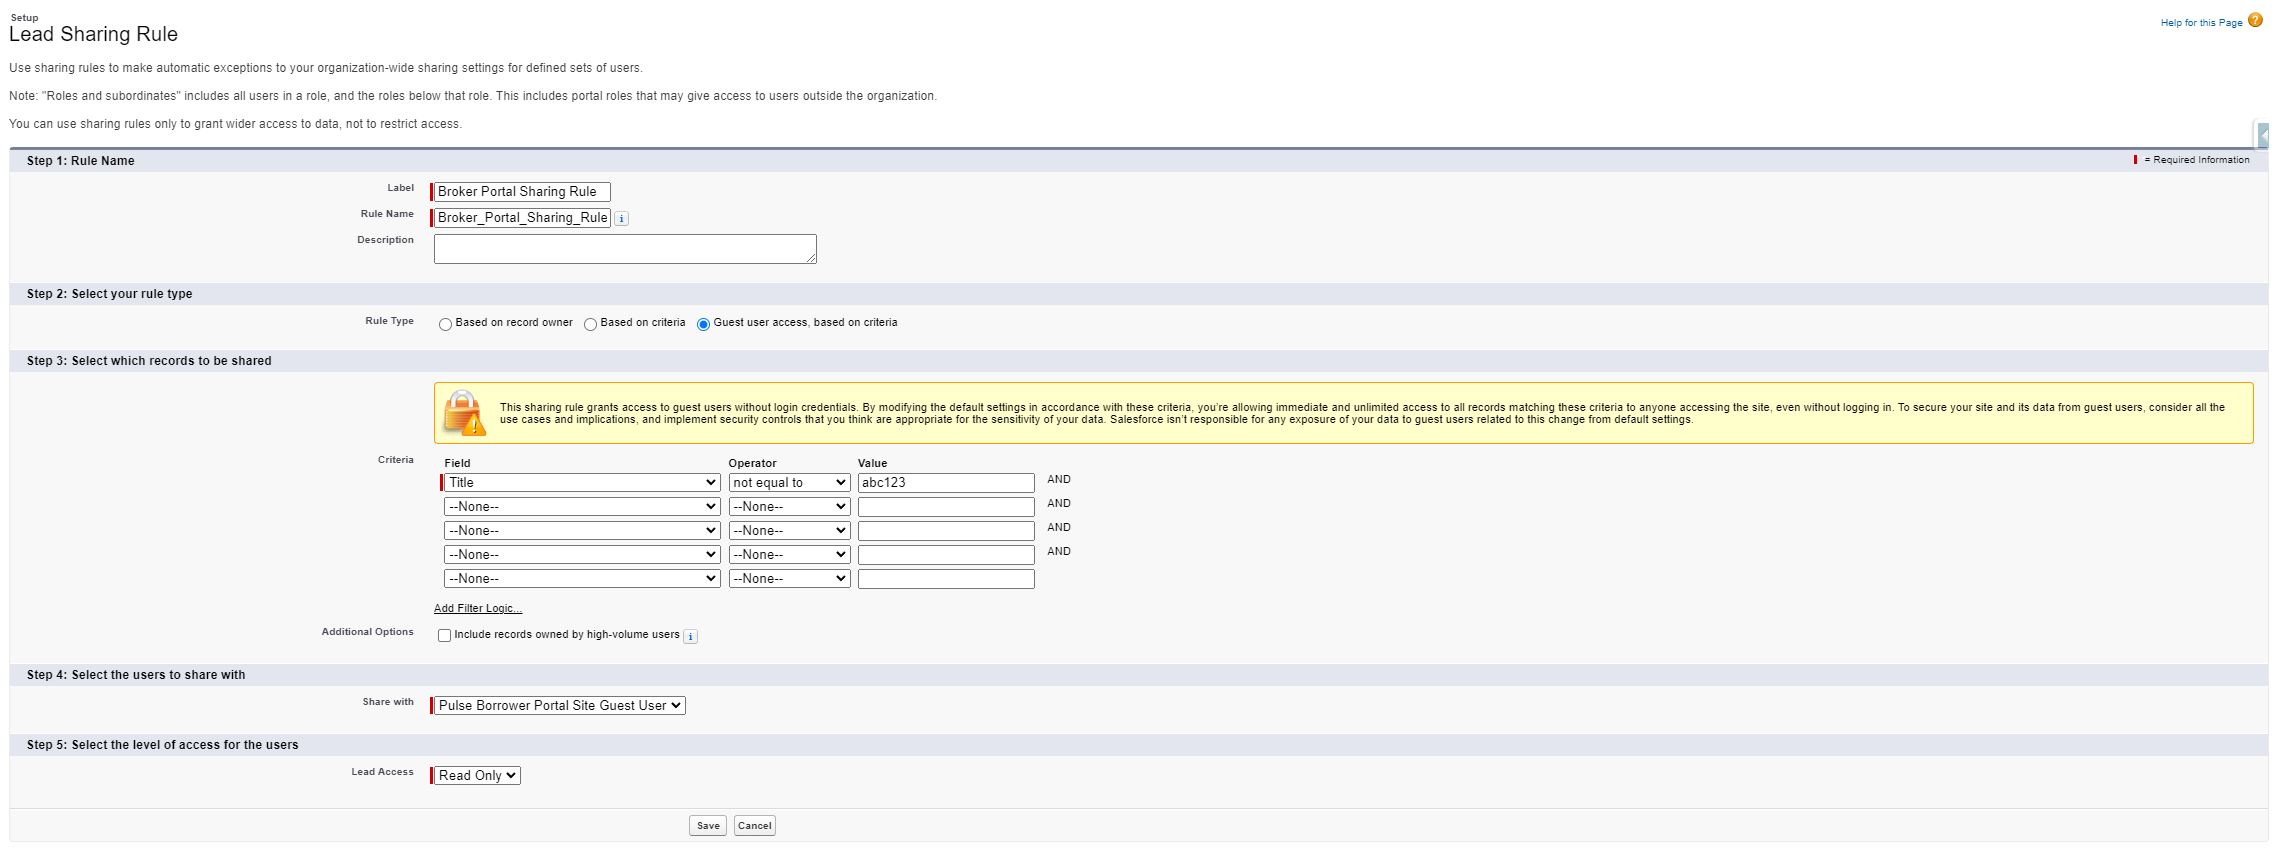
Save your changes
You will be navigated back to the Sharing Setting page. Scroll down to “User Sharing Rules” and select “New”

Enter the following information in each field:
Label: Broker Portal Sharing Rule
Rule Name: (Auto Populates)
Rule Type: Guest user access, based on criteria
Criteria: First Name not equal to blank
Share with: Borrower Portal Site Guest User
Access Level: Read Only
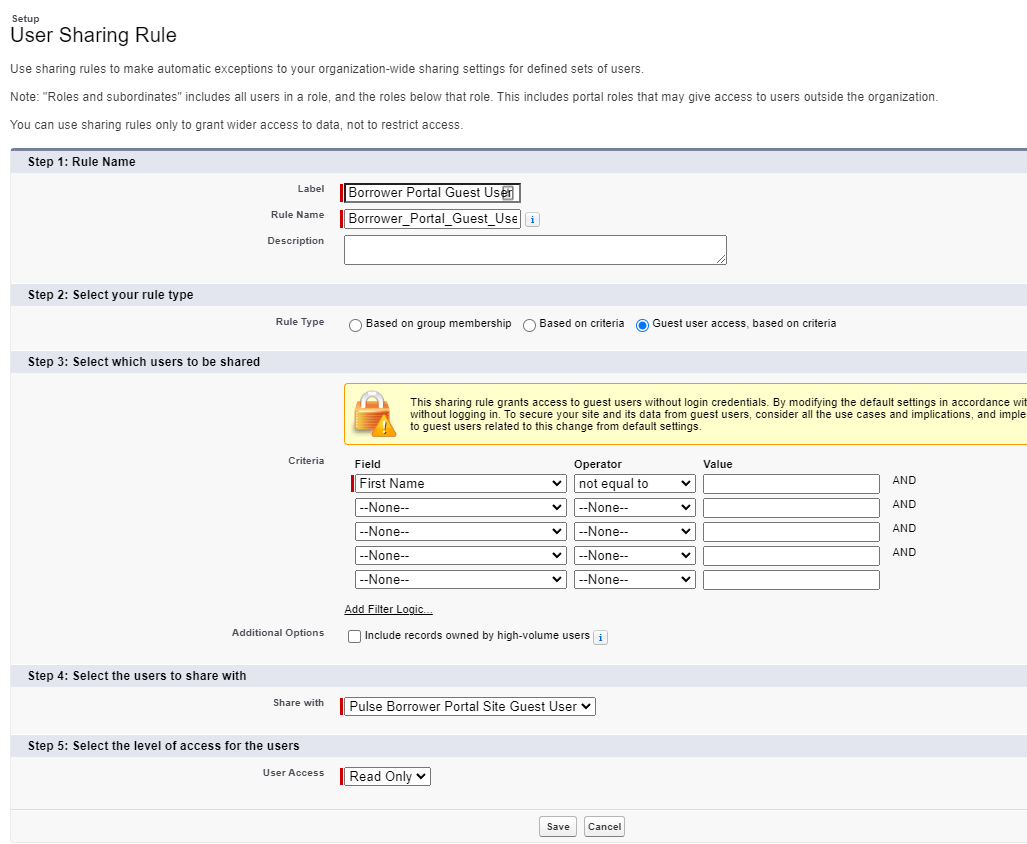
Save your changes
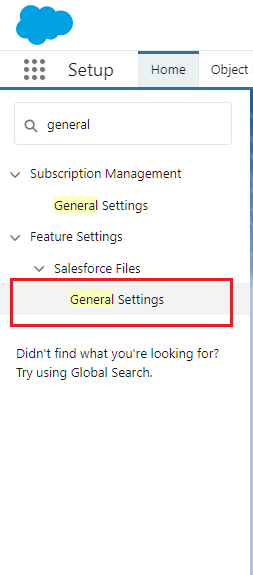
Return to the Salesforce “Setup” page and in the Quick Find box type “General Settings”
Under “Feature Settings” select General Settings
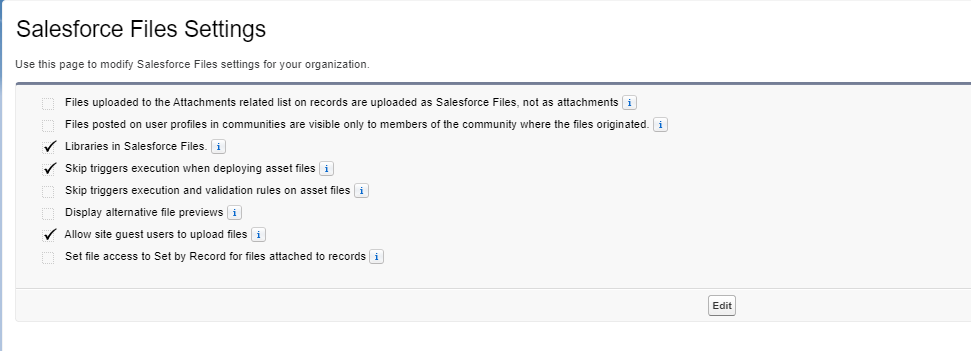
In the “Salesforce File Settings” page, click on “Edit” and mark the box labeled “Allow site guest users to upload files”
Save your changes
Navigate back to the Onboarding Wizard
Click the blue ☑️ next to the “How to Configure Sharing”

🪟Overview
Now that you've established your customized Borrower Portal, granted borrowers access, and aligned it with your company's branding, you're prepared to initiate the next step: Drip Campaigns!
