🧩UWM Integration
Effortlessly connect with our trusted partners at UWM (United Wholesale Mortgage) to enhance the efficiency of your operations. We'll provide step-by-step guidance, ensuring that your integration is both swift and trouble-free.
Before proceeding with this step, please ensure you have the following details ready:
Credentials for each of your branches from UWM (You can seek assistance from your Account Executive to obtain this information).
ClientID
ClientSecret
📦Create the Loan Condition Permission Set

Click the button to create a permission set. This can be assigned to Users and will give them access to see Loan Conditions in Salesforce.
✏️Create Auth Providers
Auth Providers
Click the “Create Providers” button in the Onboarding Wizard:

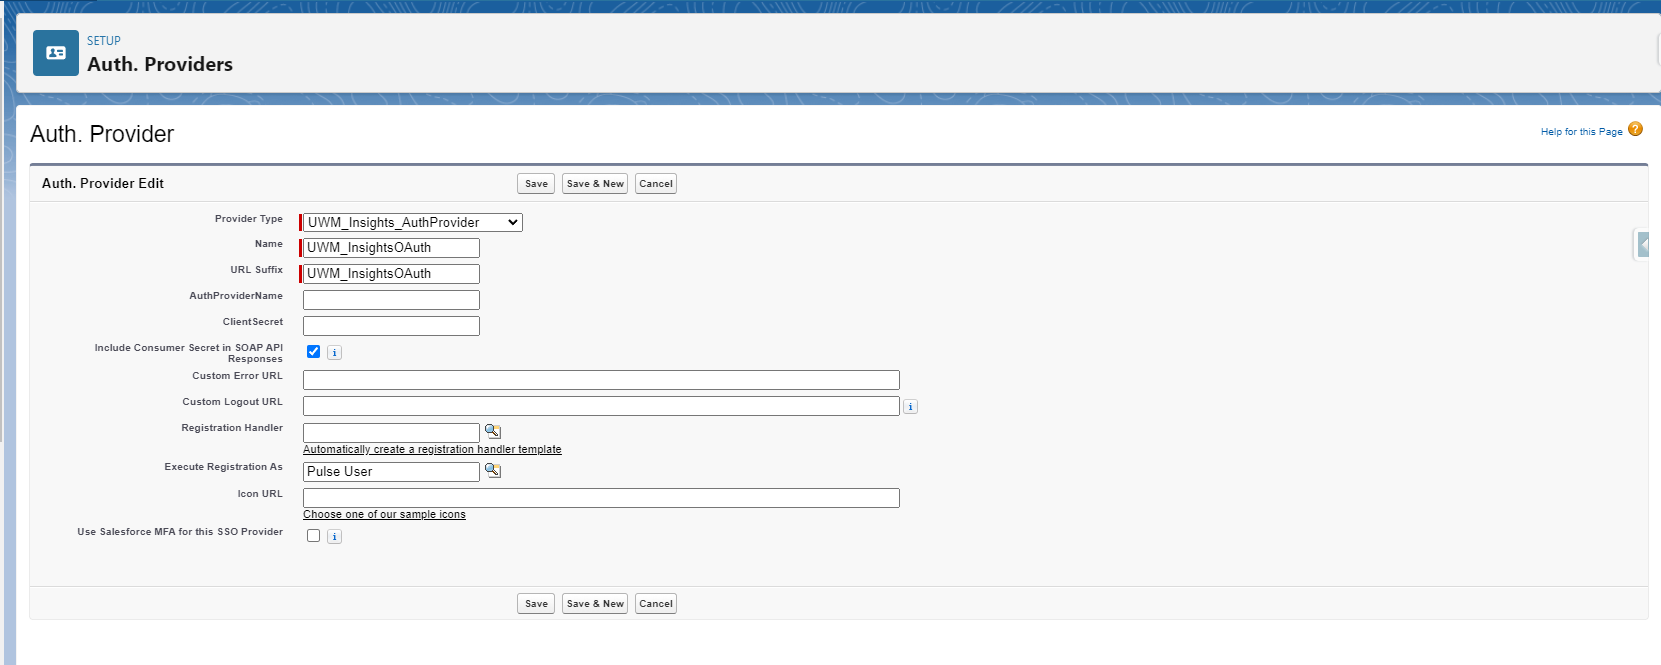
Click “New” to create a new Auth. Provider:

Carefully enter the “Name” and “URL Suffix” and ensure they match the details below
From the “Provider Type” picklist select “UWM_Insights_AuthProvider” and enter the following details:
Name: “UWM_InsightsOAuth”
URL Suffix: “UWM_InsightsOAuth”
AuthProviderName: Enter your UWM Client ID credential
ClientSecret: Enter your UWM Client Secret credential
Execute Registration As: Select your Salesforce Admin user
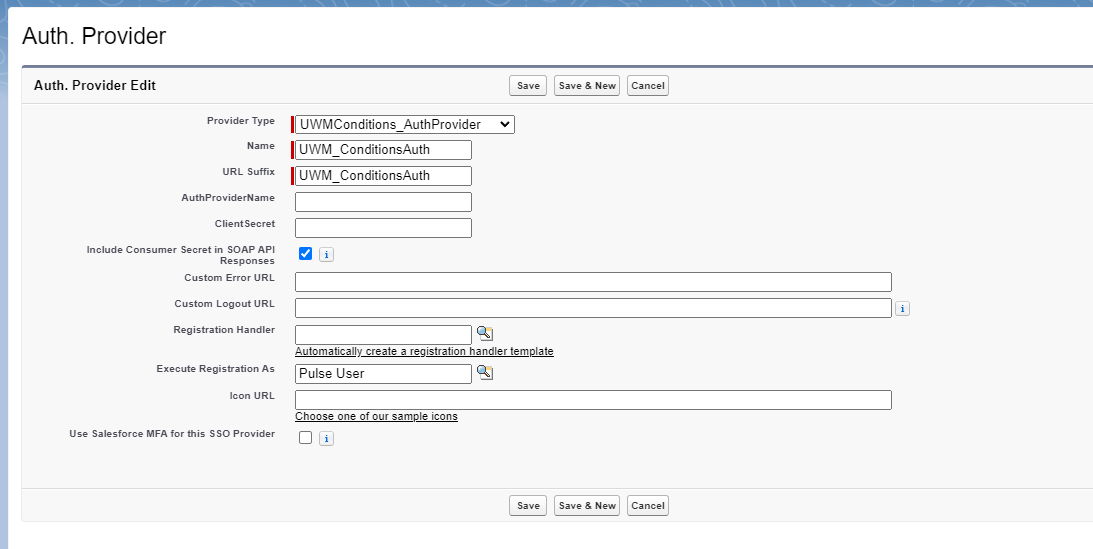
Click “Save & New” and enter the following details:
Provider Type: UWMConditions_AuthProvider
Name: “UWM_ConditionsAuth”
URL Suffix: “UWM_ConditionsAuth”
AuthProviderName: Enter your UWM Client ID credential
ClientSecret: Enter your UWM Client Secret credential
Execute Registration As: Select your Salesforce Admin user
Once you have created both Auth Providers, navigate back to the Onboarding Wizard.
🔑 Create Named Credentials
Click the “Create Credentials” button

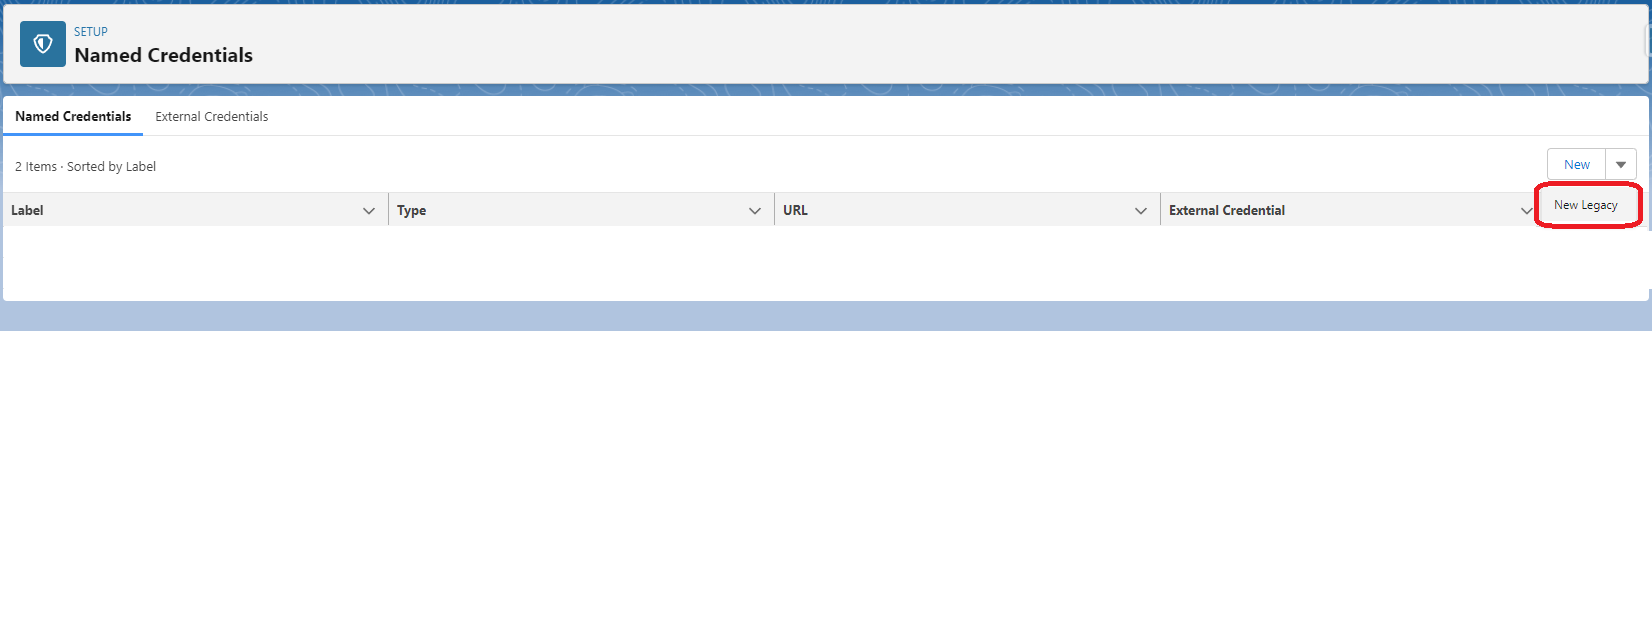
From this screen, click the dropdown arrow next to the “New” button and select “New Legacy”
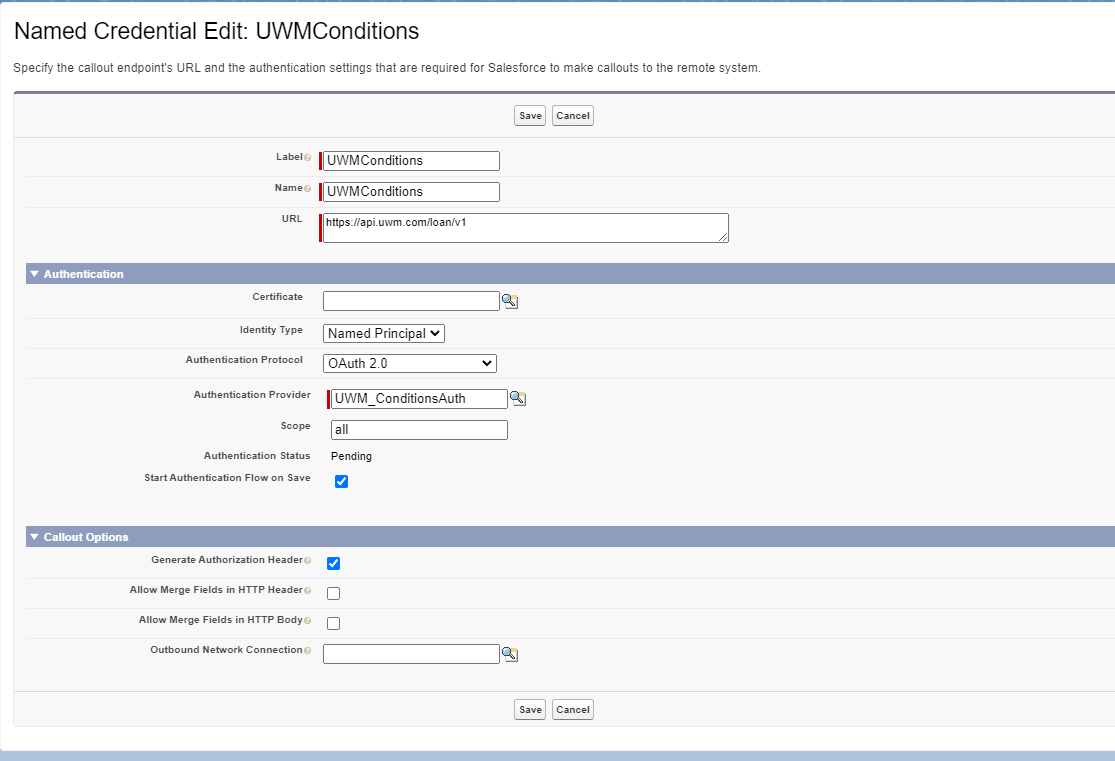
Create the UWMConditions Named Credential:
Label: UWMConditions
Name: UWMConditions
Identity Type: Named Principal
Authentication Protocol: OAuth 2.0
Authentication Provider: UWM_ConditionsAuth (click the magnifying glass next to this field to select this option)
Scope: all
Start Authentication Flow on Save: Checked
Generate Authentication Header: Checked
*Once you click Save, the page will refresh and the Authentication Status will change from “Pending” to “Authenticated.
Navigate to the Onboarding Wizard and click “Create Providers” once more.

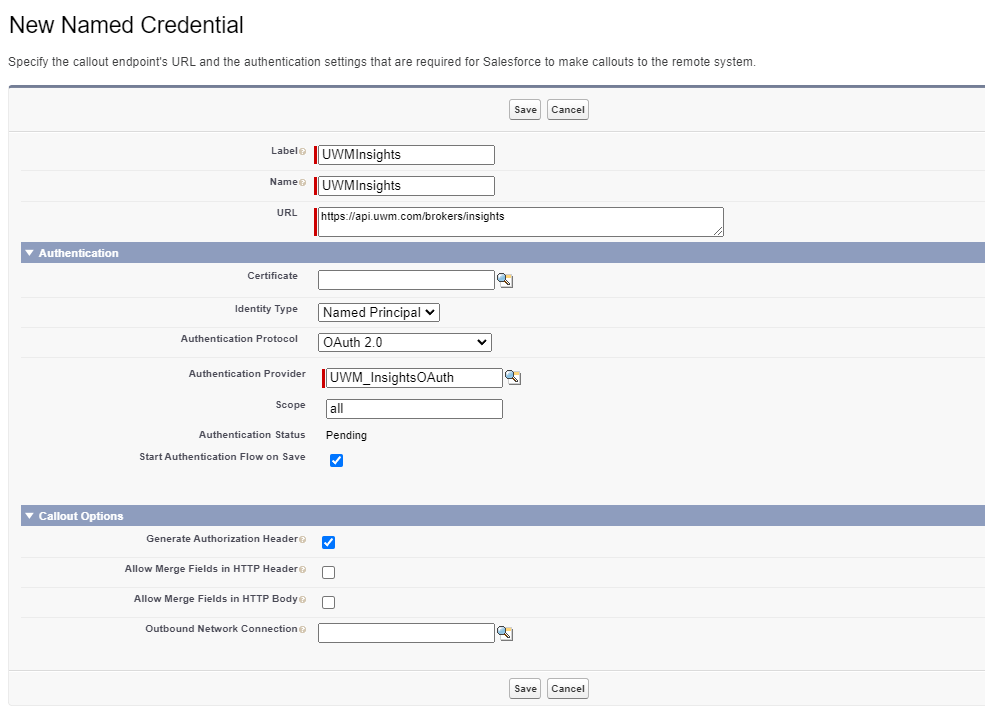
Create the UWMInsights Named Credential. Be sure to click the dropdown arrow next to the “New” button and select “New Legacy”
Label: UWMInsights
Name: UWMInsights
Identity Type: Named Principal
Authentication Protocol: OAuth 2.0
Authentication Provider: UWM_InsightsOAuth (click the magnifying glass next to this field to select this option)
Scope: all
Start Authentication Flow on Save: Checked
Generate Authentication Header: Checked
🌐Translate Loan Stages
Now, we will synchronize UWM's loan stages with the corresponding stages used by your company. UWM uses distinct terminology for various stages in the loan process, so we'll need to align UWM's loan stages with your corresponding stages. Make sure you have your loan stage information readily available.
Click on “Map Statuses to UWM.”

the following page will open in a new tab:
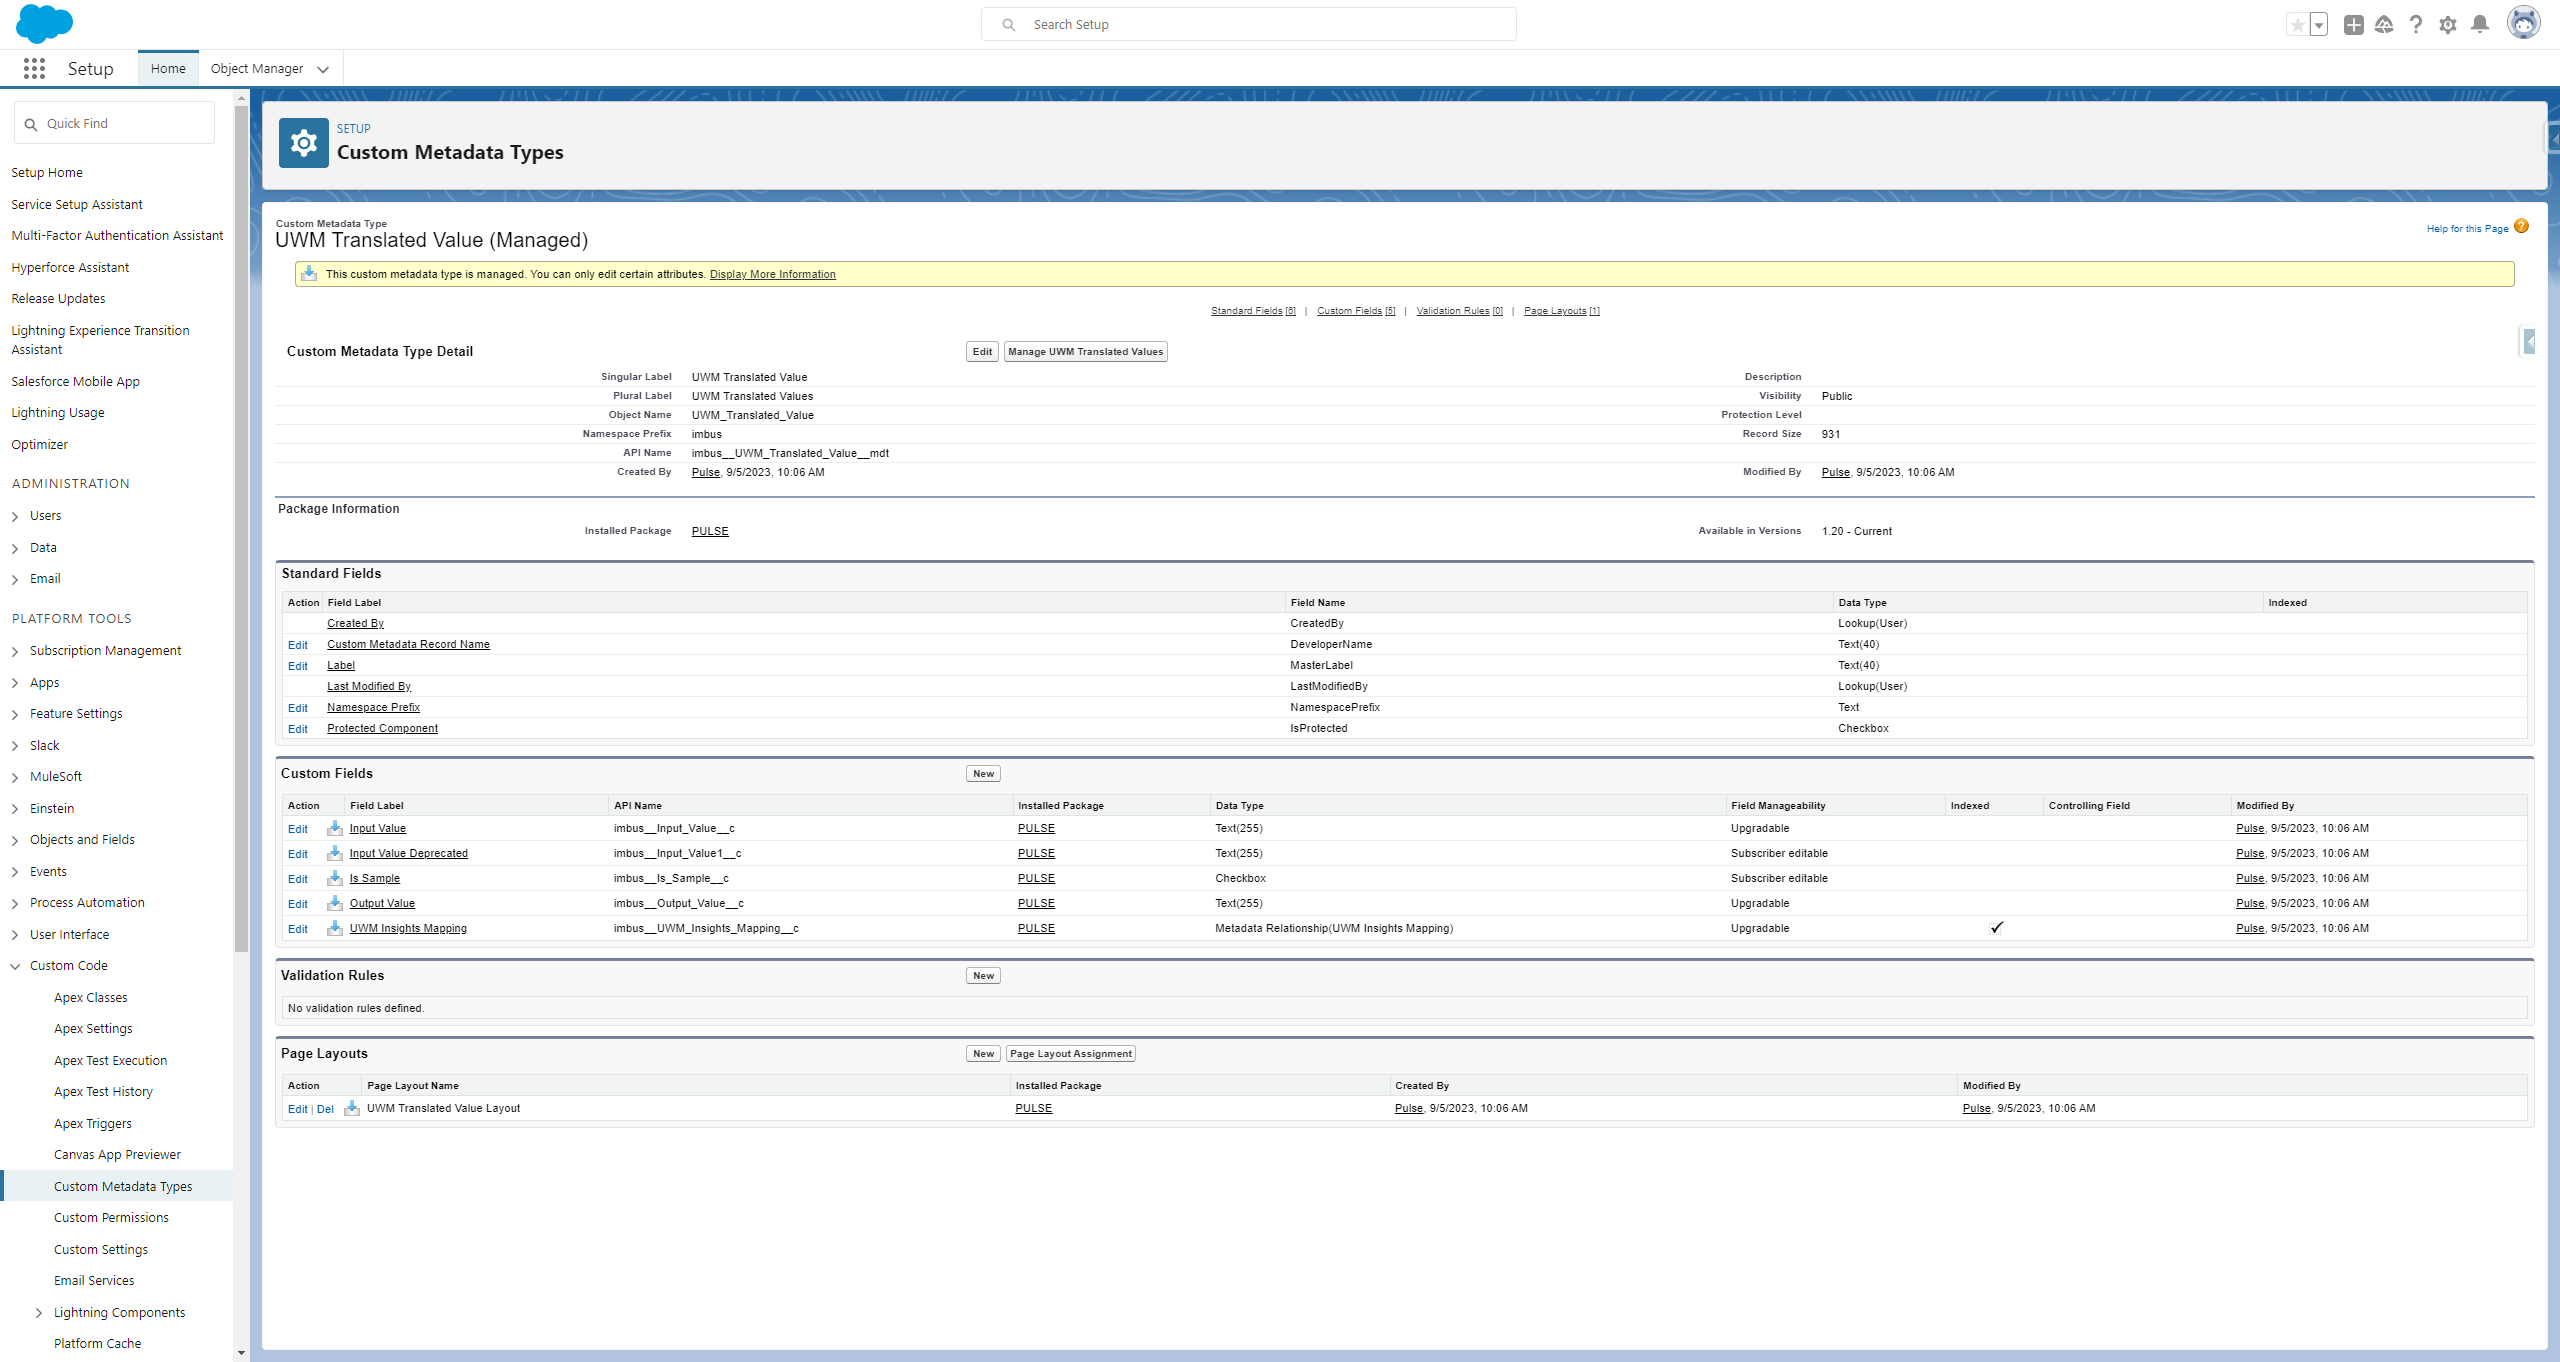
Click on “Manage UWM Translated Values”, you will be navigated to this page:
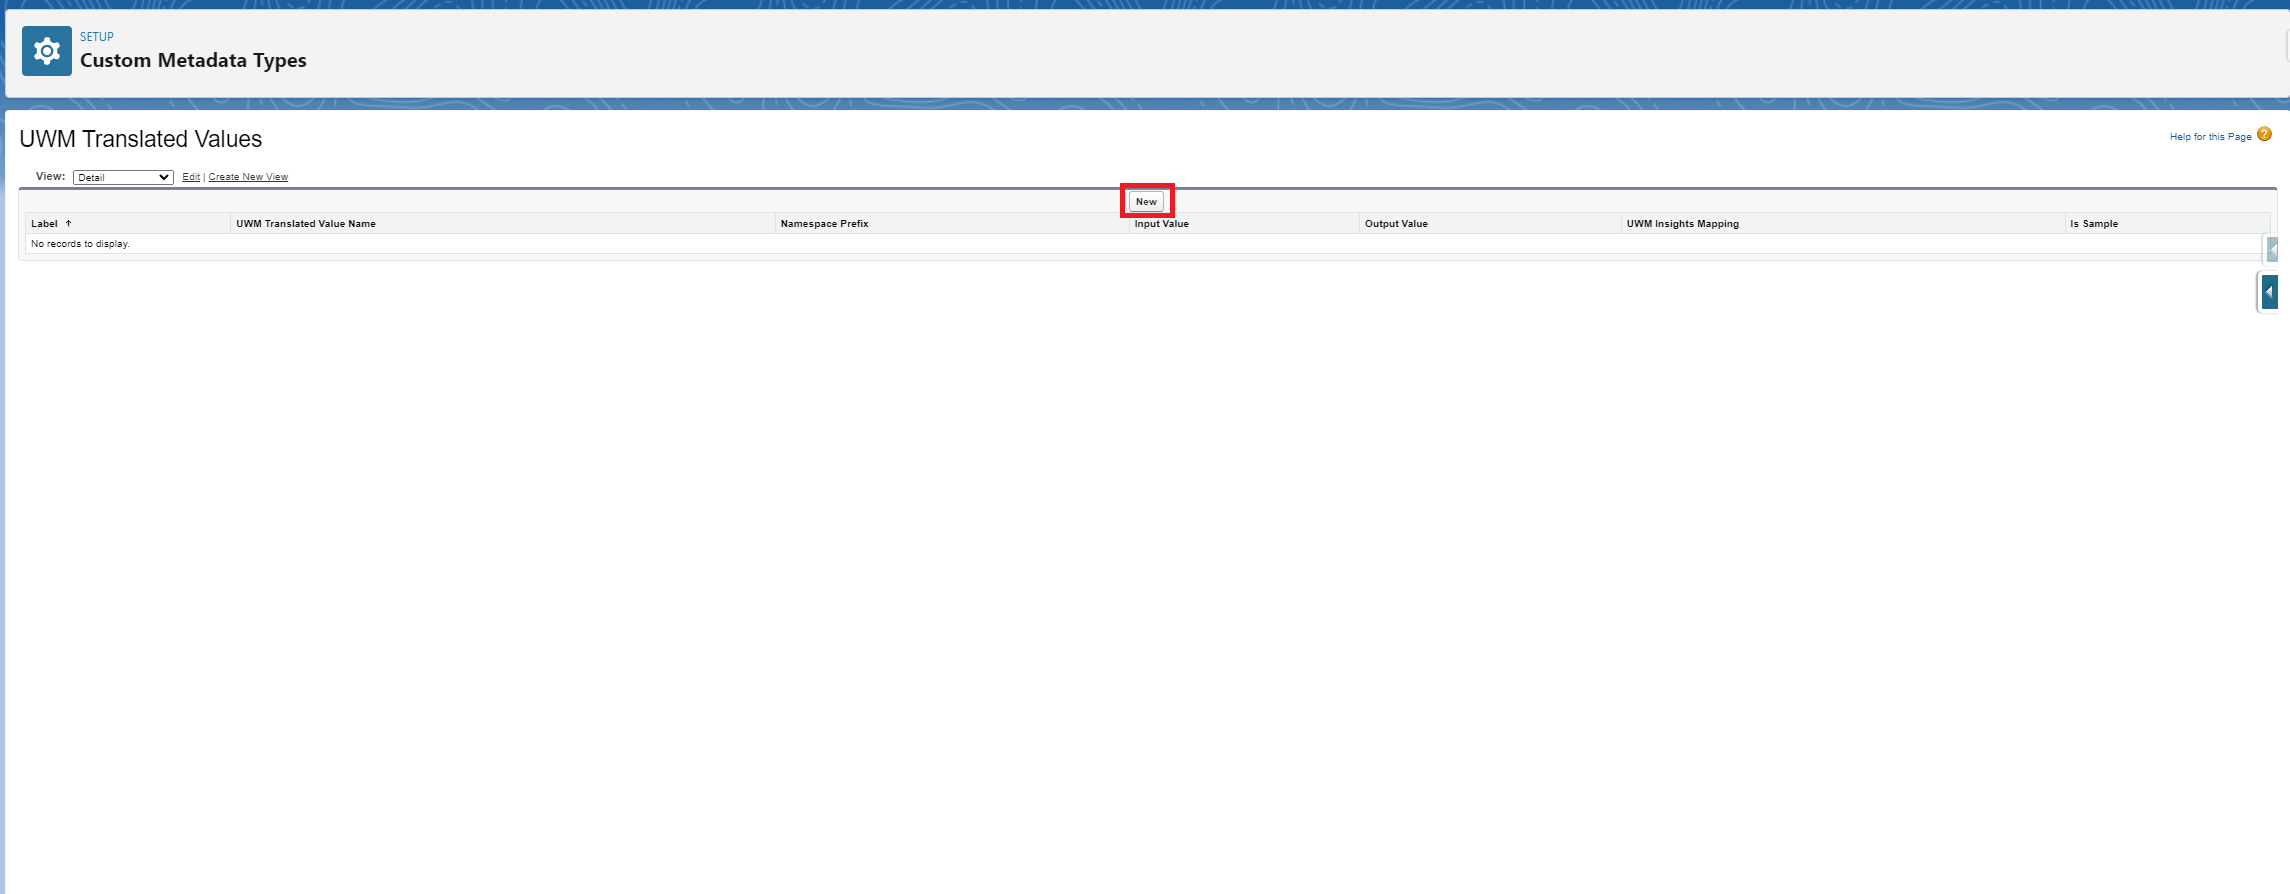
Click on “New”, you will be navigated to this page:

For each of your company’s loan stages, do the following - For this example we’ll be using the “Application Approved” stage.
Label
Enter your company's loan stage name: "Application Approved."
UWM Translated Value Name
This field is auto-generated based on the label field: "Application_Approved."
Input Value
Use the API field sent by UWM: "App_Pass_Approved."
Output Value
Indicate what your company calls the loan stage: "Application Approved."
Input Value Deprecated
Keep this field blank.
Protected Component
Leave this unchecked.
UWM Insights Mapping
Click the search tool, and in the new window, select "StageName."

Select “Save & New”, repeat step 3.
When you have mapped all loan stages, navigate back to the Onboarding Wizard and click the blue ☑️ next to “Map Statuses to UWM.”

Create Condition Group Keys:
Click the “Create Metadata Records” to get started on creating the Condition Groups that will sync from UWM.

From this screen, click the new button:
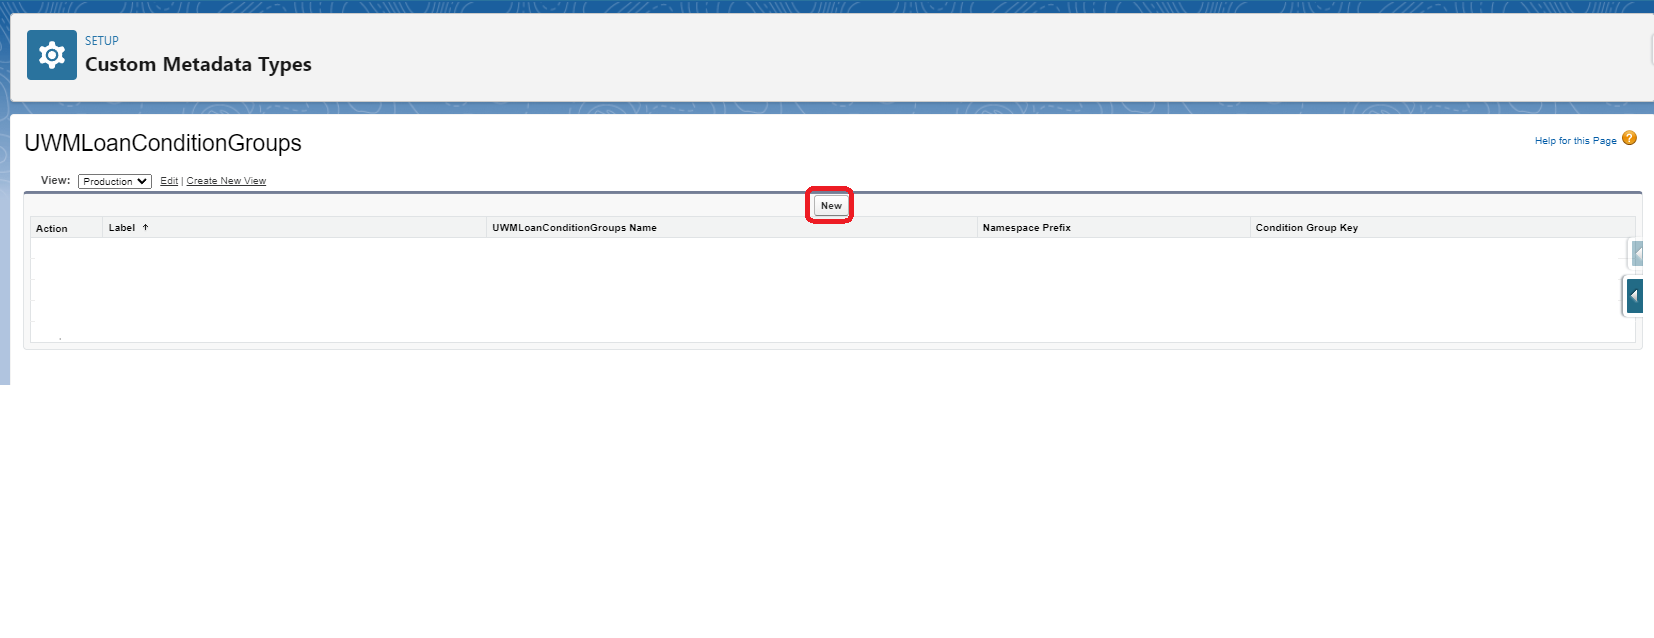
Create the Underwriter II (PTD) Condition Group
Label: Underwriter II (PTD)
UWMLoanConditionsGroups Name: Underwriter_II_PTD
Condition Group Key: Underwriter II (PTD)

Create the Closing (PTF) Condition Group
Label: Closing (PTF)
UWMLoanConditionsGroups Name: Closing_PTF
Condition Group Key: Closing (PTF)

Create the Project Review (PTD) Condition Group
Label: Project Review (PTD)
UWMLoanConditionsGroups Name: Project_Review_PTD
Condition Group Key: Project Review (PTD)

Create the Senior Underwriter (PTD) Condition Group
Label: Senior Underwriter (PTD)
UWMLoanConditionsGroups Name: Senior_Underwriter_PTD
Condition Group Key: Senior Underwriter (PTD)

Create the Master Condition Group
Label: Master
UWMLoanConditionsGroups Name: Master
Condition Group Key: Master

🏷️Customize Borrower Labels
During this step, you'll have the opportunity to review the conditions integrated into our application. Additionally, we will guide you through the process of editing any condition labels as needed.
Click the “Take Me to Preloaded Loan Conditions” to see the Loan Condition References that have been automatically created

Please make sure that you are viewing “All” Loan Condition References
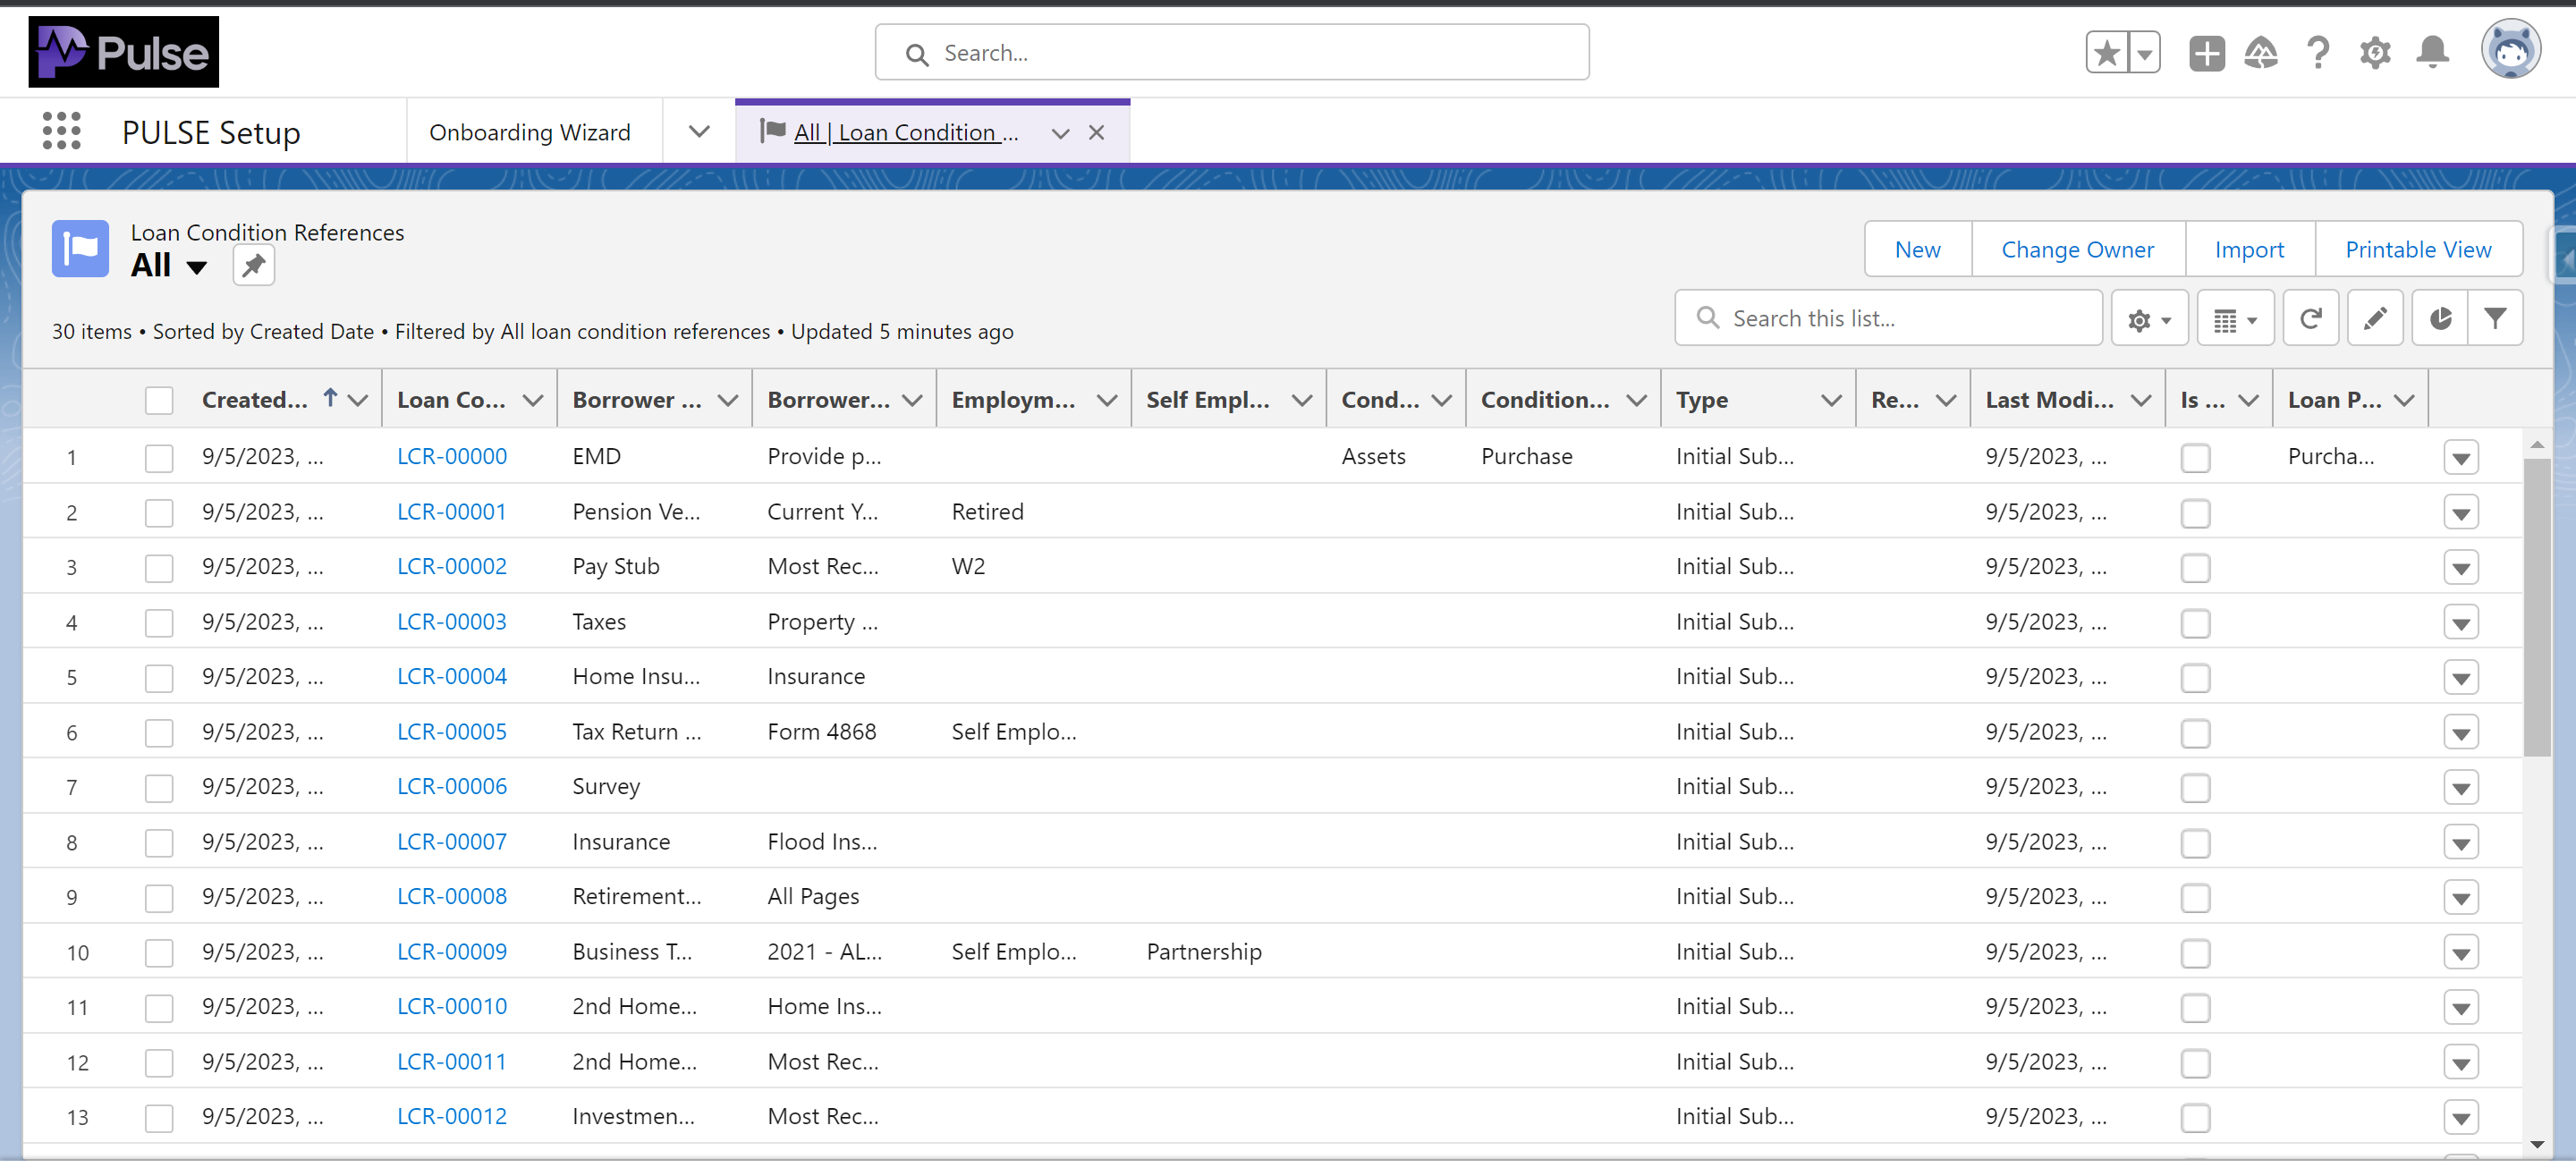
Take a moment to examine the contents of the "Borrower Label" and "Borrower Description" columns. These entries represent what your borrowers will encounter if any of these conditions occur on their loans.
To modify the Borrower Label, select the pencil icon next to the value you wish to edit. To modify the Borrower Description, please click into the reference record.

Click the blue ☑️ next to “Take Me to Preloaded Loan Conditions” to complete this step.

✅ Enable UWM Integration
Now please configure the Integrations. Be sure to put a valid email address for error notifications. Common errors to look out for are Loan Numbers that are typed incorrectly into Salesforce.
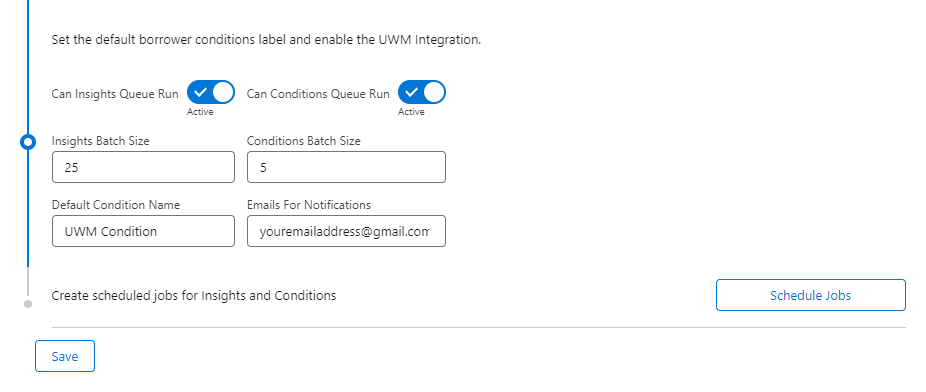
Enter the following details to enable the integration:
CanConditionQueueRun: Active
CanInsightsQueueRun: Active
Condition Batch Size: 5
Default Condition Name: UWM Condition
Insights Batch Size: 25
Click “Schedule Jobs” and then click "Save."
🪟Overview
You've successfully integrated with UWM, ensuring operational efficiency. You prepared essential details, aligned loan stages, set up branches, customized borrower labels, and established default labels. The next step is to build milestones to further enhance your mortgage management process and borrower communication. Click here for step three!
