🗻Milestones
Milestones serve as important notifications to inform your borrowers when specific conditions are fulfilled. In this step, we will set up the email address from which your borrowers will receive communications, and we will demonstrate how to create milestones that will be sent when loans achieve a set status.
📧Creating the Org-Wide Email Address
In the onboarding wizard, click on “Org-Wide Address Setup.”

The following page will open in a new tab:
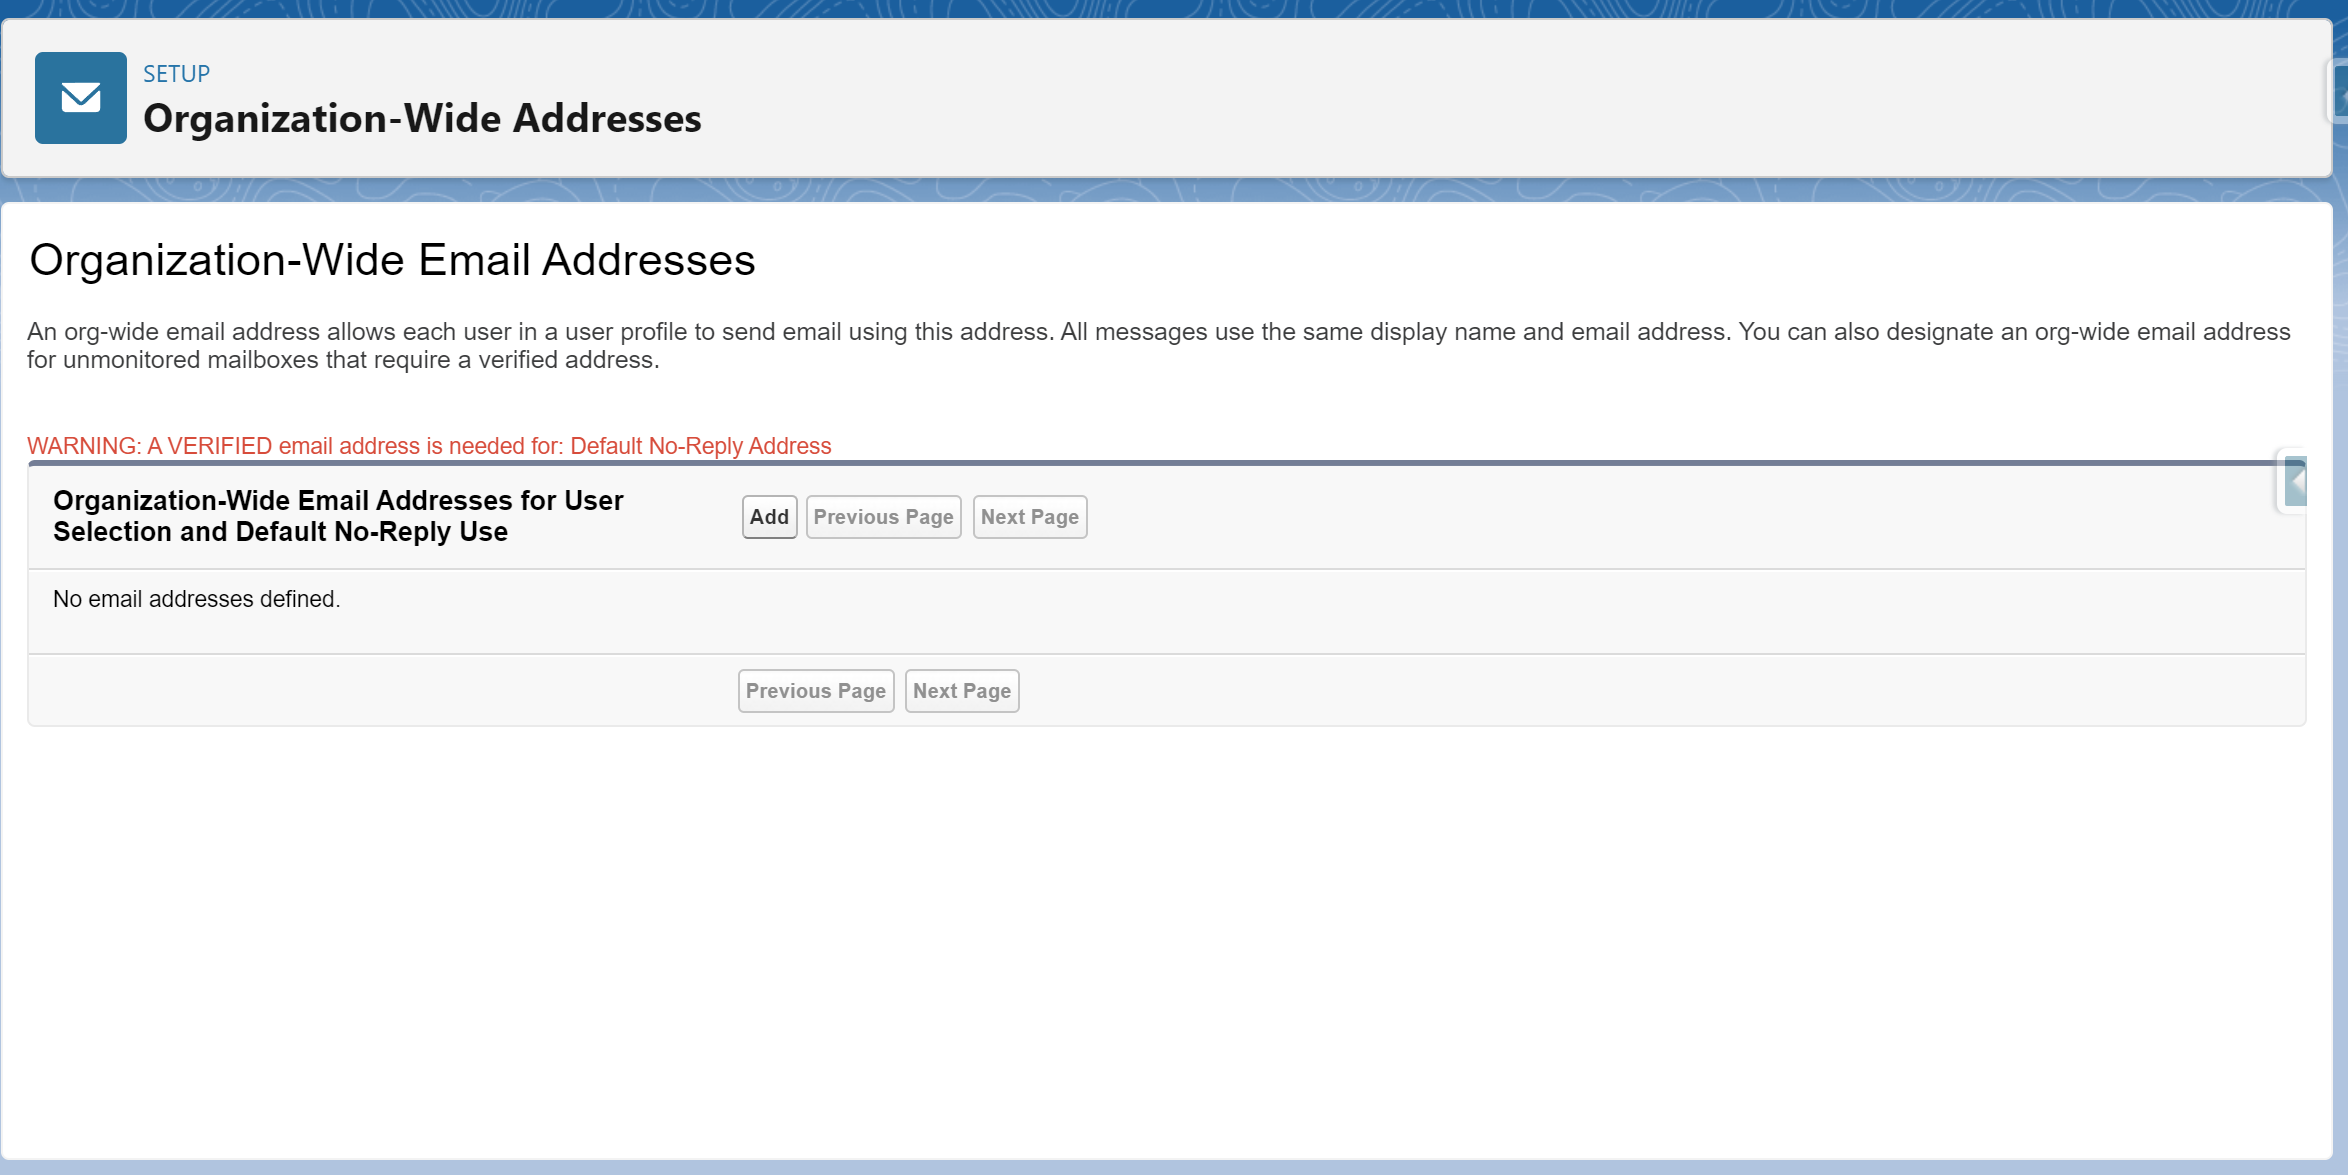
Select "Add," and you'll be directed to the following screen:
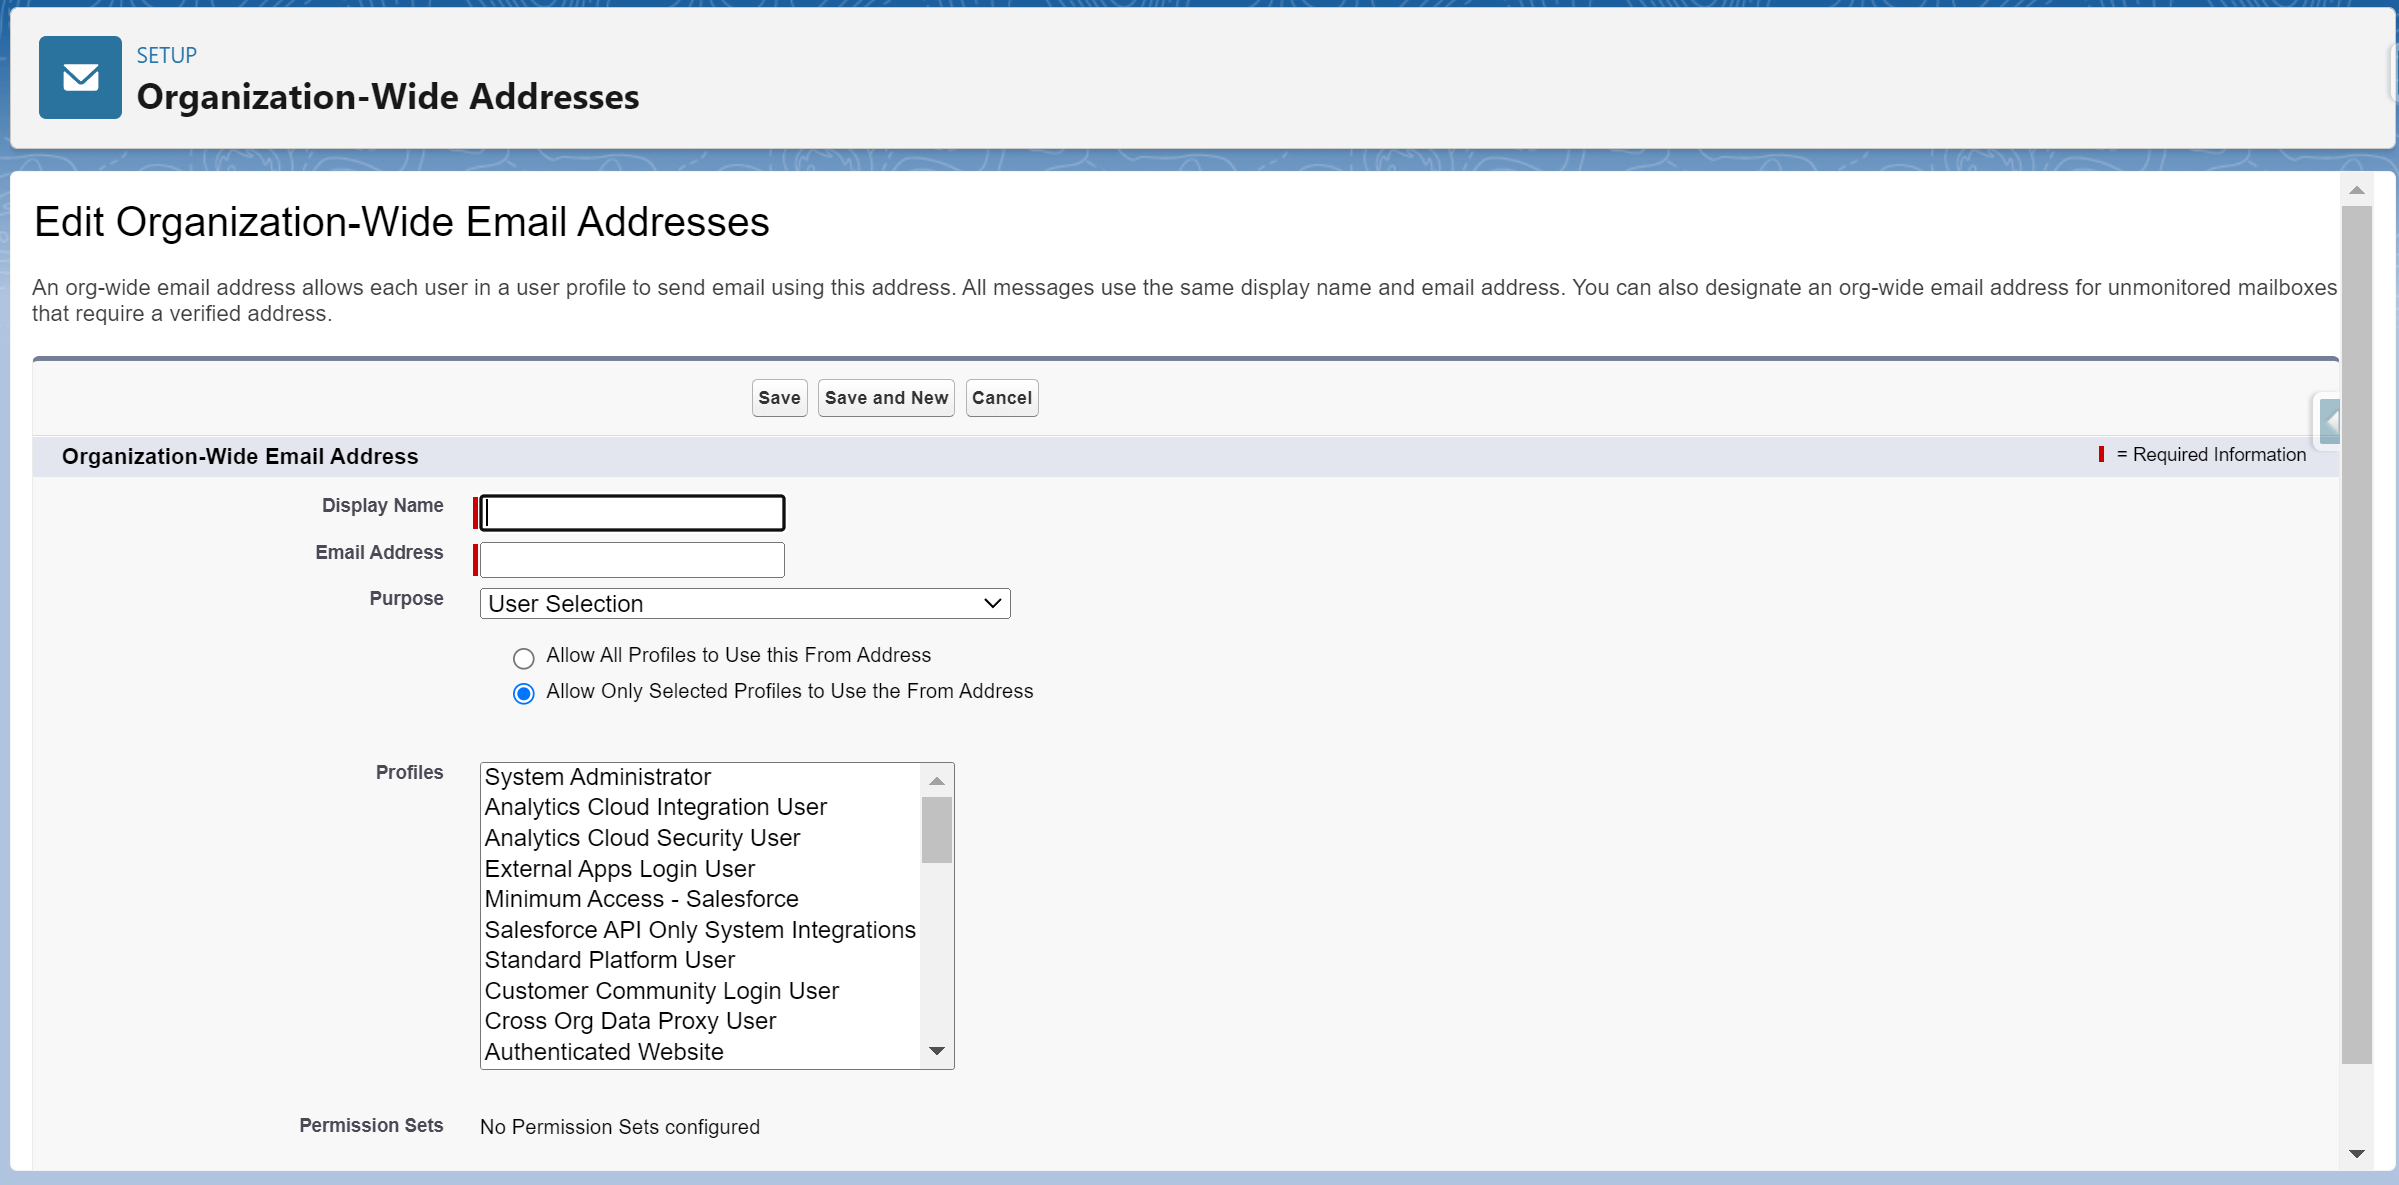
Enter the desired display name (example: WeAreLoans).
Enter the desired email address (example: Notification@WeAreLoans.com).
Your Borrower will see the the values entered in the “Display Name” and “Email Address” fields
Select “User Selection” in the “Purpose” drop down.
If this is your first Org-Wide email address select “Allow All Profiles to Use this From Address”
Click “Save” and navigate back to the Onboarding Wizard.
Click the blue 🔃button.
Select the new email from the dropdown:

📐Configure Your Email Templates
In the Onboarding Wizard click on “Configure Email Templates.”

You will be navigated to the following page:
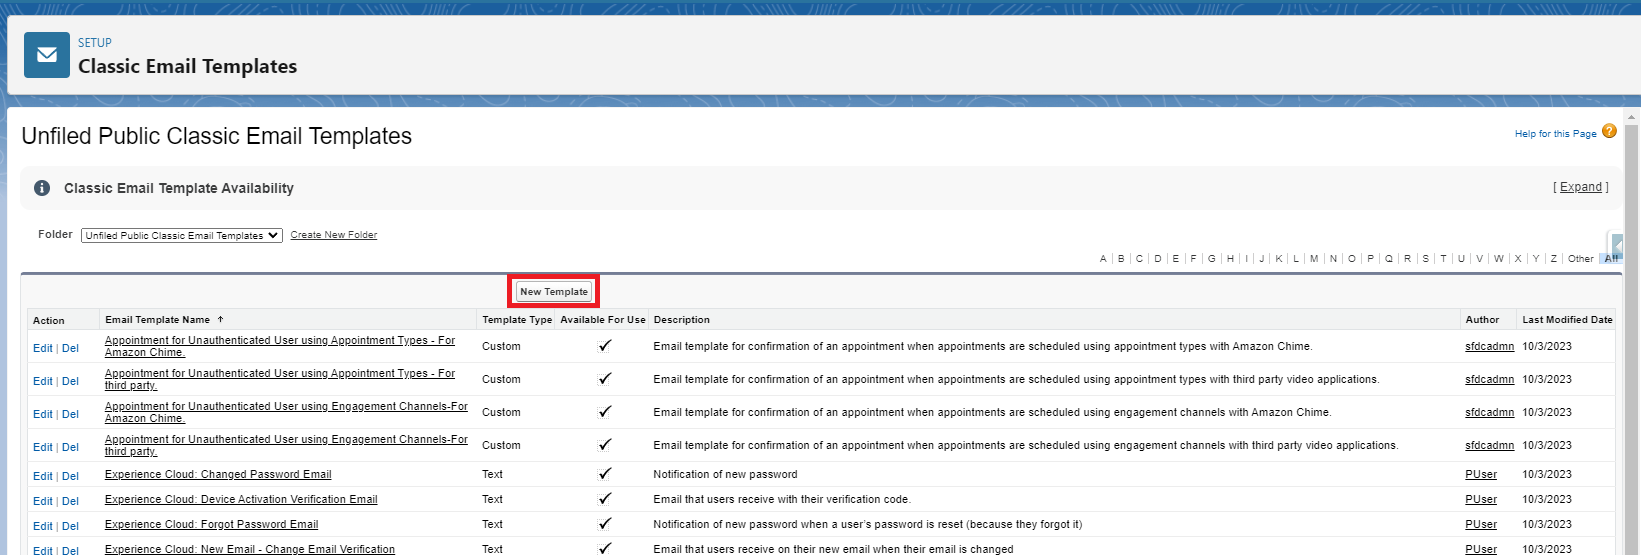
Click “New Template” and you will be navigated to this screen:
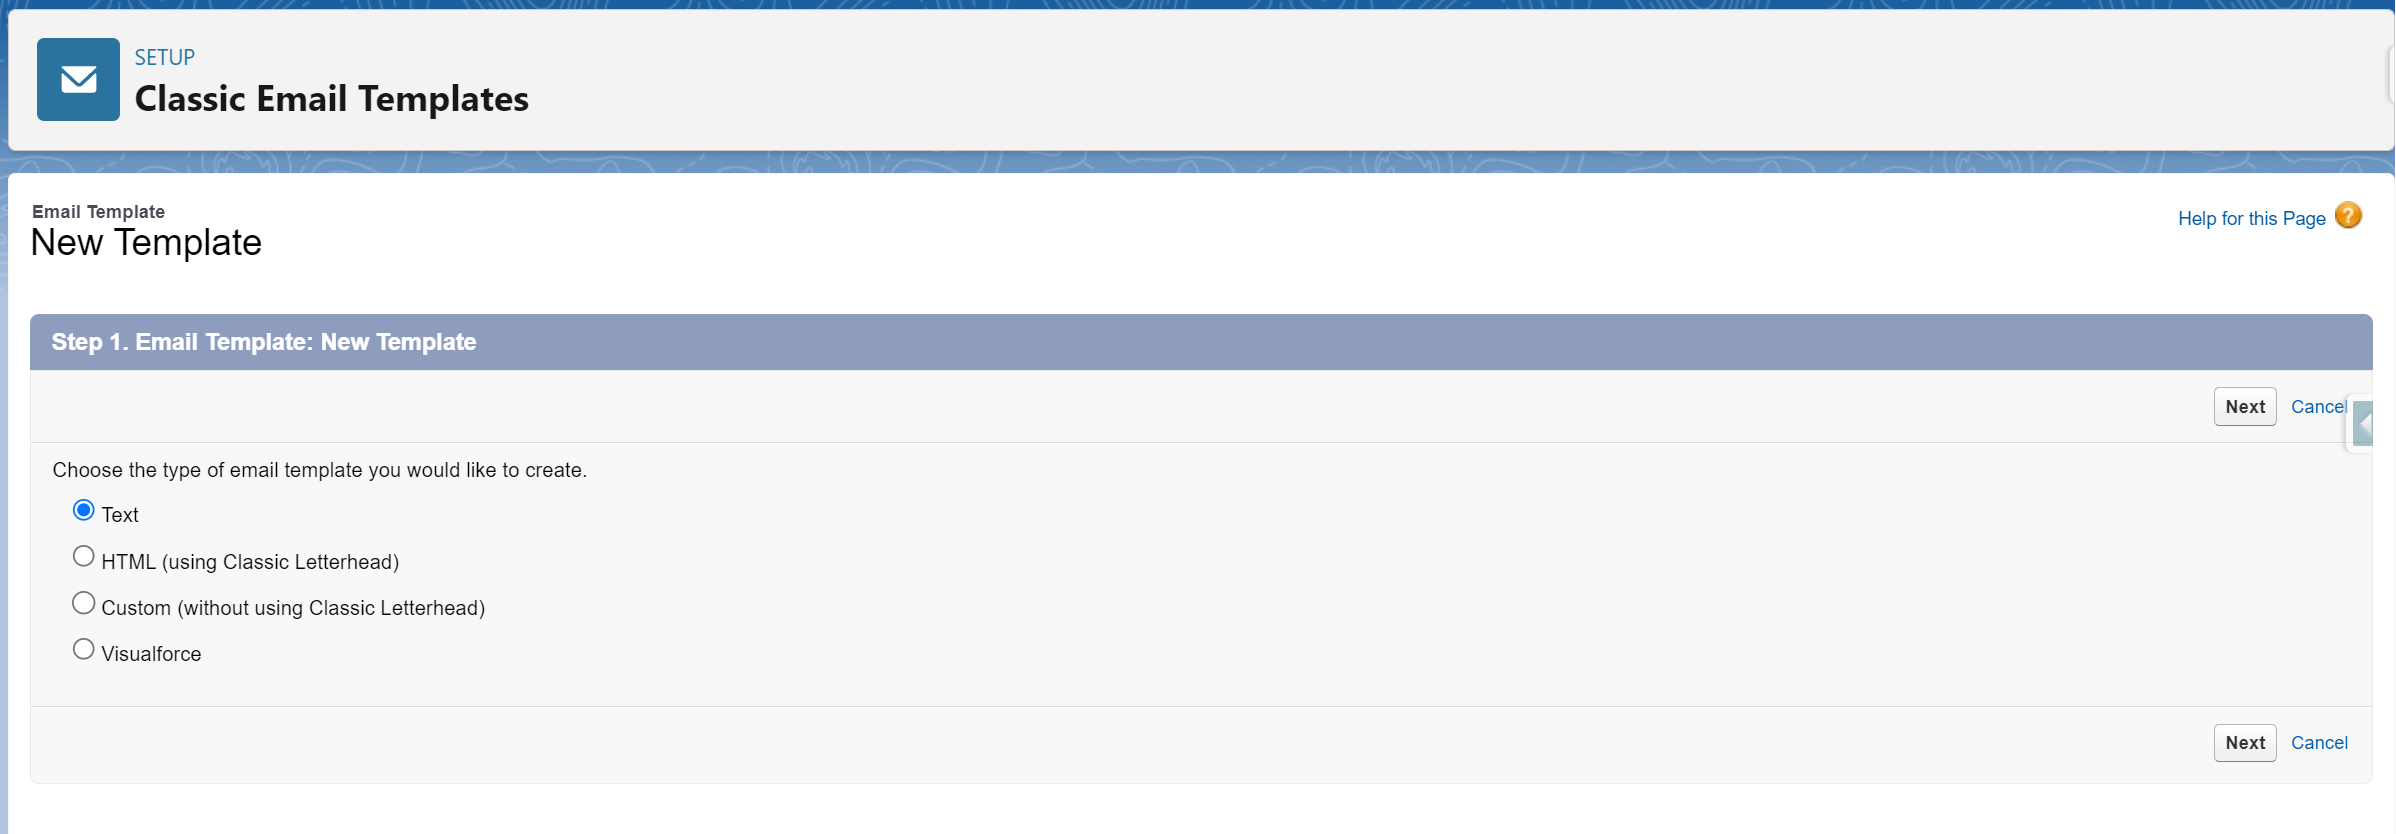
Select the type of email template you would like to create.
Follow the steps here to learn how to create your own email template.
Once you have created your email template, return to the “Classic Email Templates Screen.”
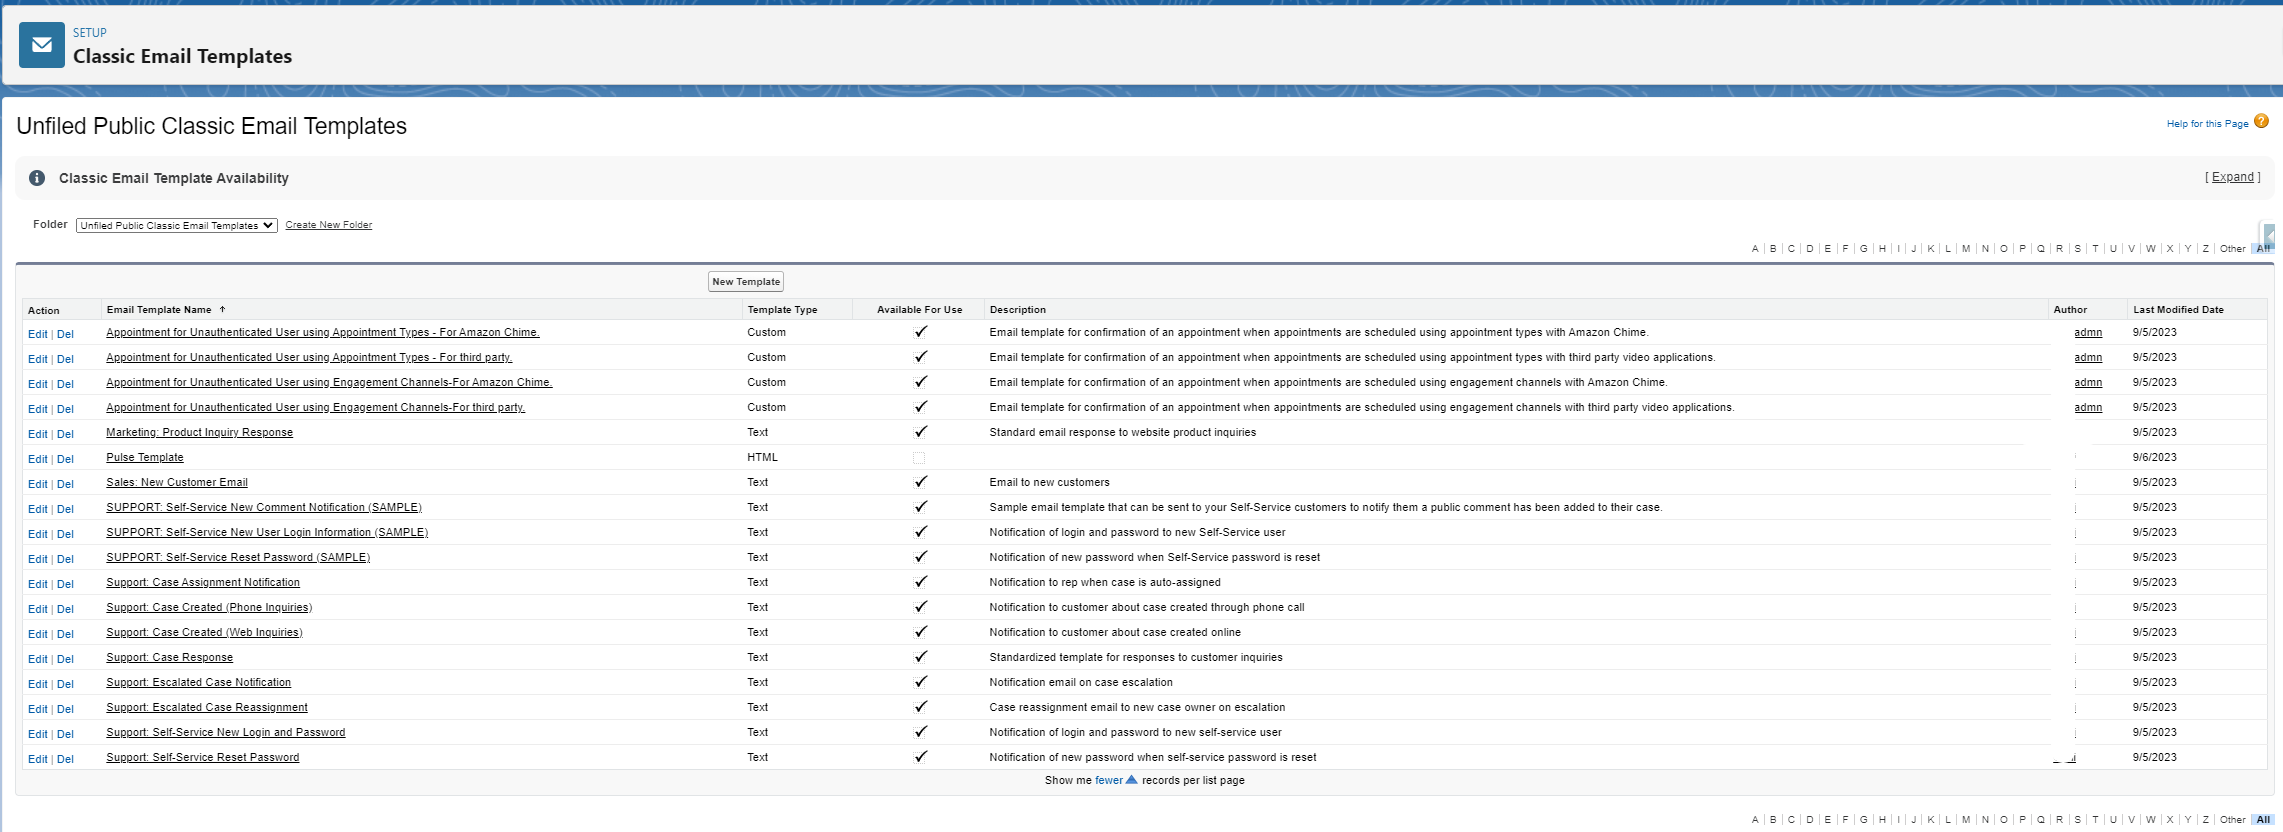
Choose the email template you created in step 2.

From the URL, copy the template ID.

You will need this ID in the following step. The leading “2F” should be ignored.
💎Configure Your Milestones
In the Onboarding Wizard click on “Configure Milestones”:

you will be navigated to the following page:
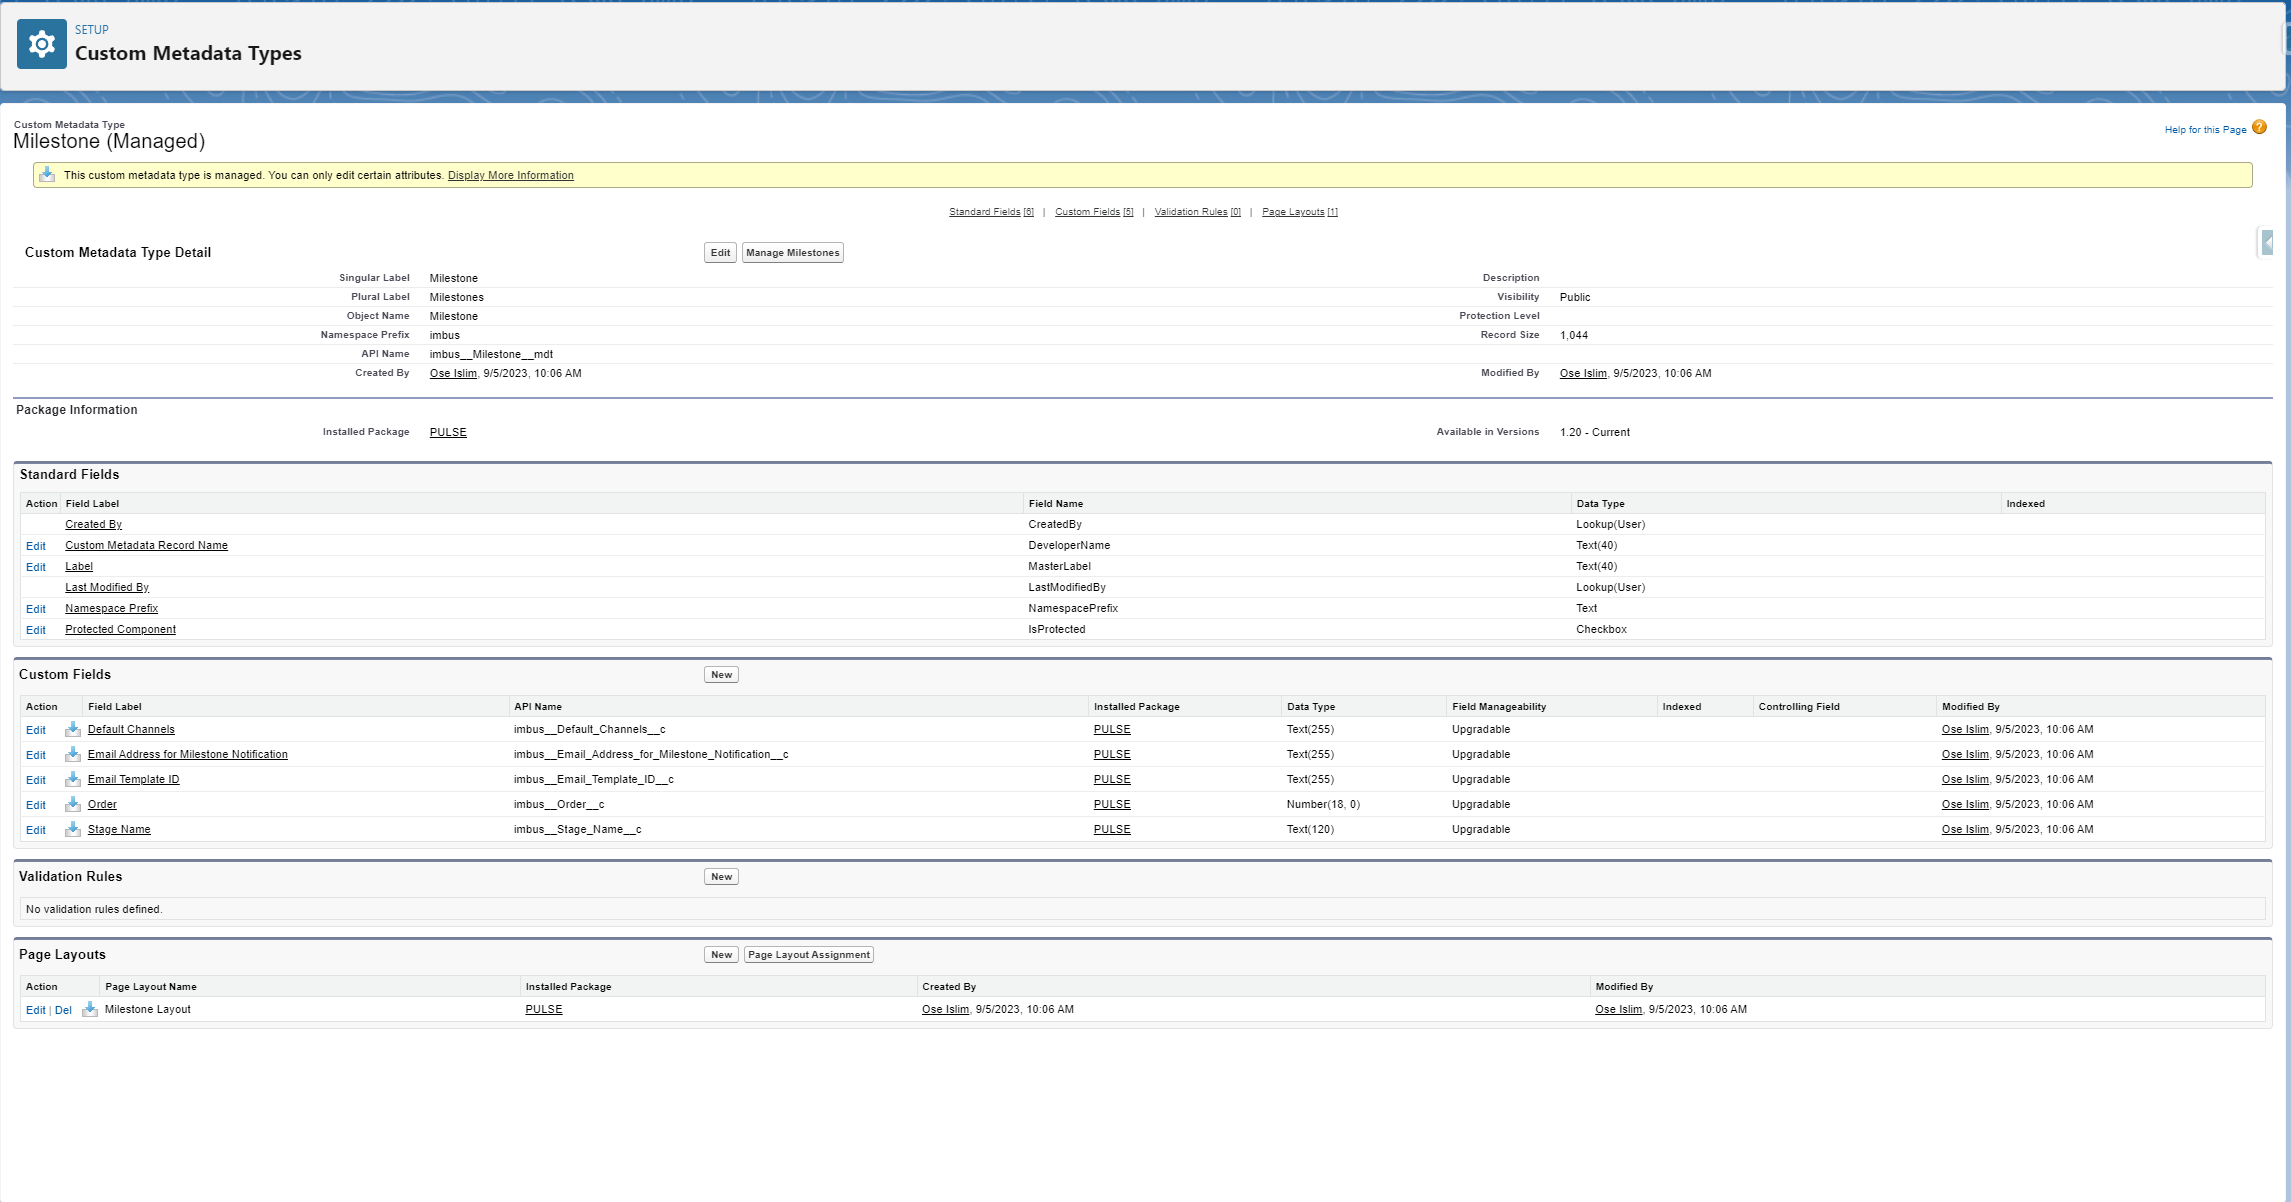
Click on “Manage Milestones.” You will be navigated to the following page:

Click on “New.” You will be taken to the following screen:

In the "Label" field, indicate the name of this milestone (For this example, we'll use "Application Approved").
Confirm that the "Milestone Name" field has automatically populated.
In the “Default Channels” field, enter “Email”
Within the "Email Template ID" field, input the ID you obtained during step 5 of the previous section.
In the "Order" field, specify the sequence in which this milestone should be presented among your established milestones.
Within the "Stage Name" field, insert the specific loan stage at which this milestone will be dispatched. This should match your Stage Name in from the Opportunity Object.

Click on “Save”
You will be navigated to the following screen:

From the URL, copy the Milestone ID:

You will need this ID during step 4 in following portion of this guide
The Milestone ID will always begin with an “m.” Do not copy the preceding “2F”
Repeat step 3 for each of your milestones
Return to the Onboarding Wizard
Click the blue ☑️next to “Configure Milestones”

🌊Setup Templated Flow
This section will cover how to setup automation to send the Milestone Emails that were created during this portion of the Onboarding Guide. Please follow the steps carefully.
In the Onboarding Wizard click on “Setup Flow Automation”:

The following page will open in a new window:
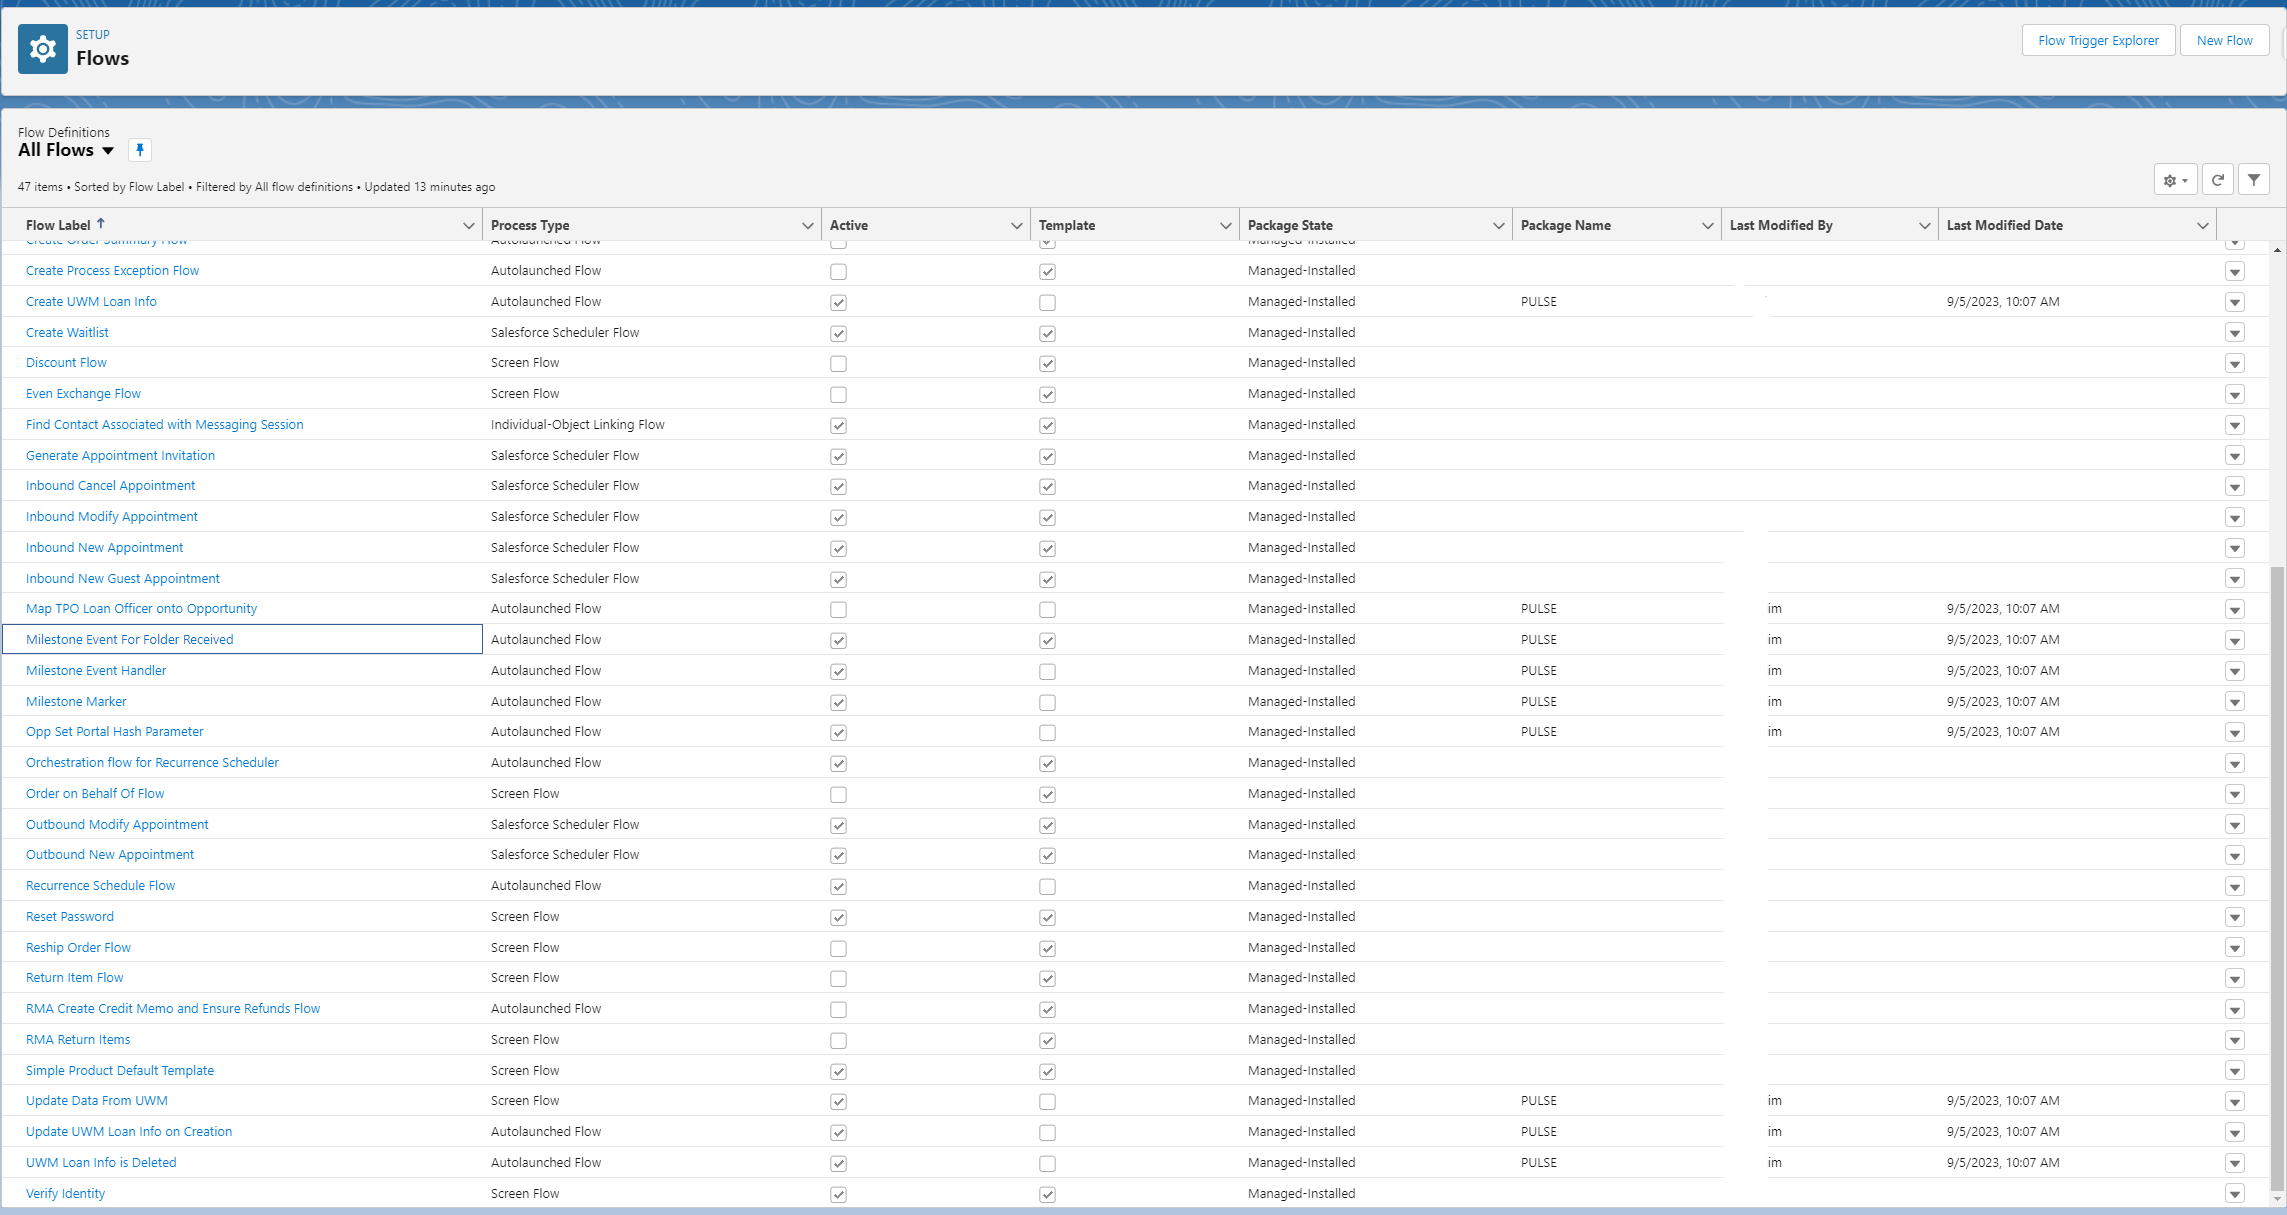
Select the “Milestone Event For Folder Received” flow from the list:
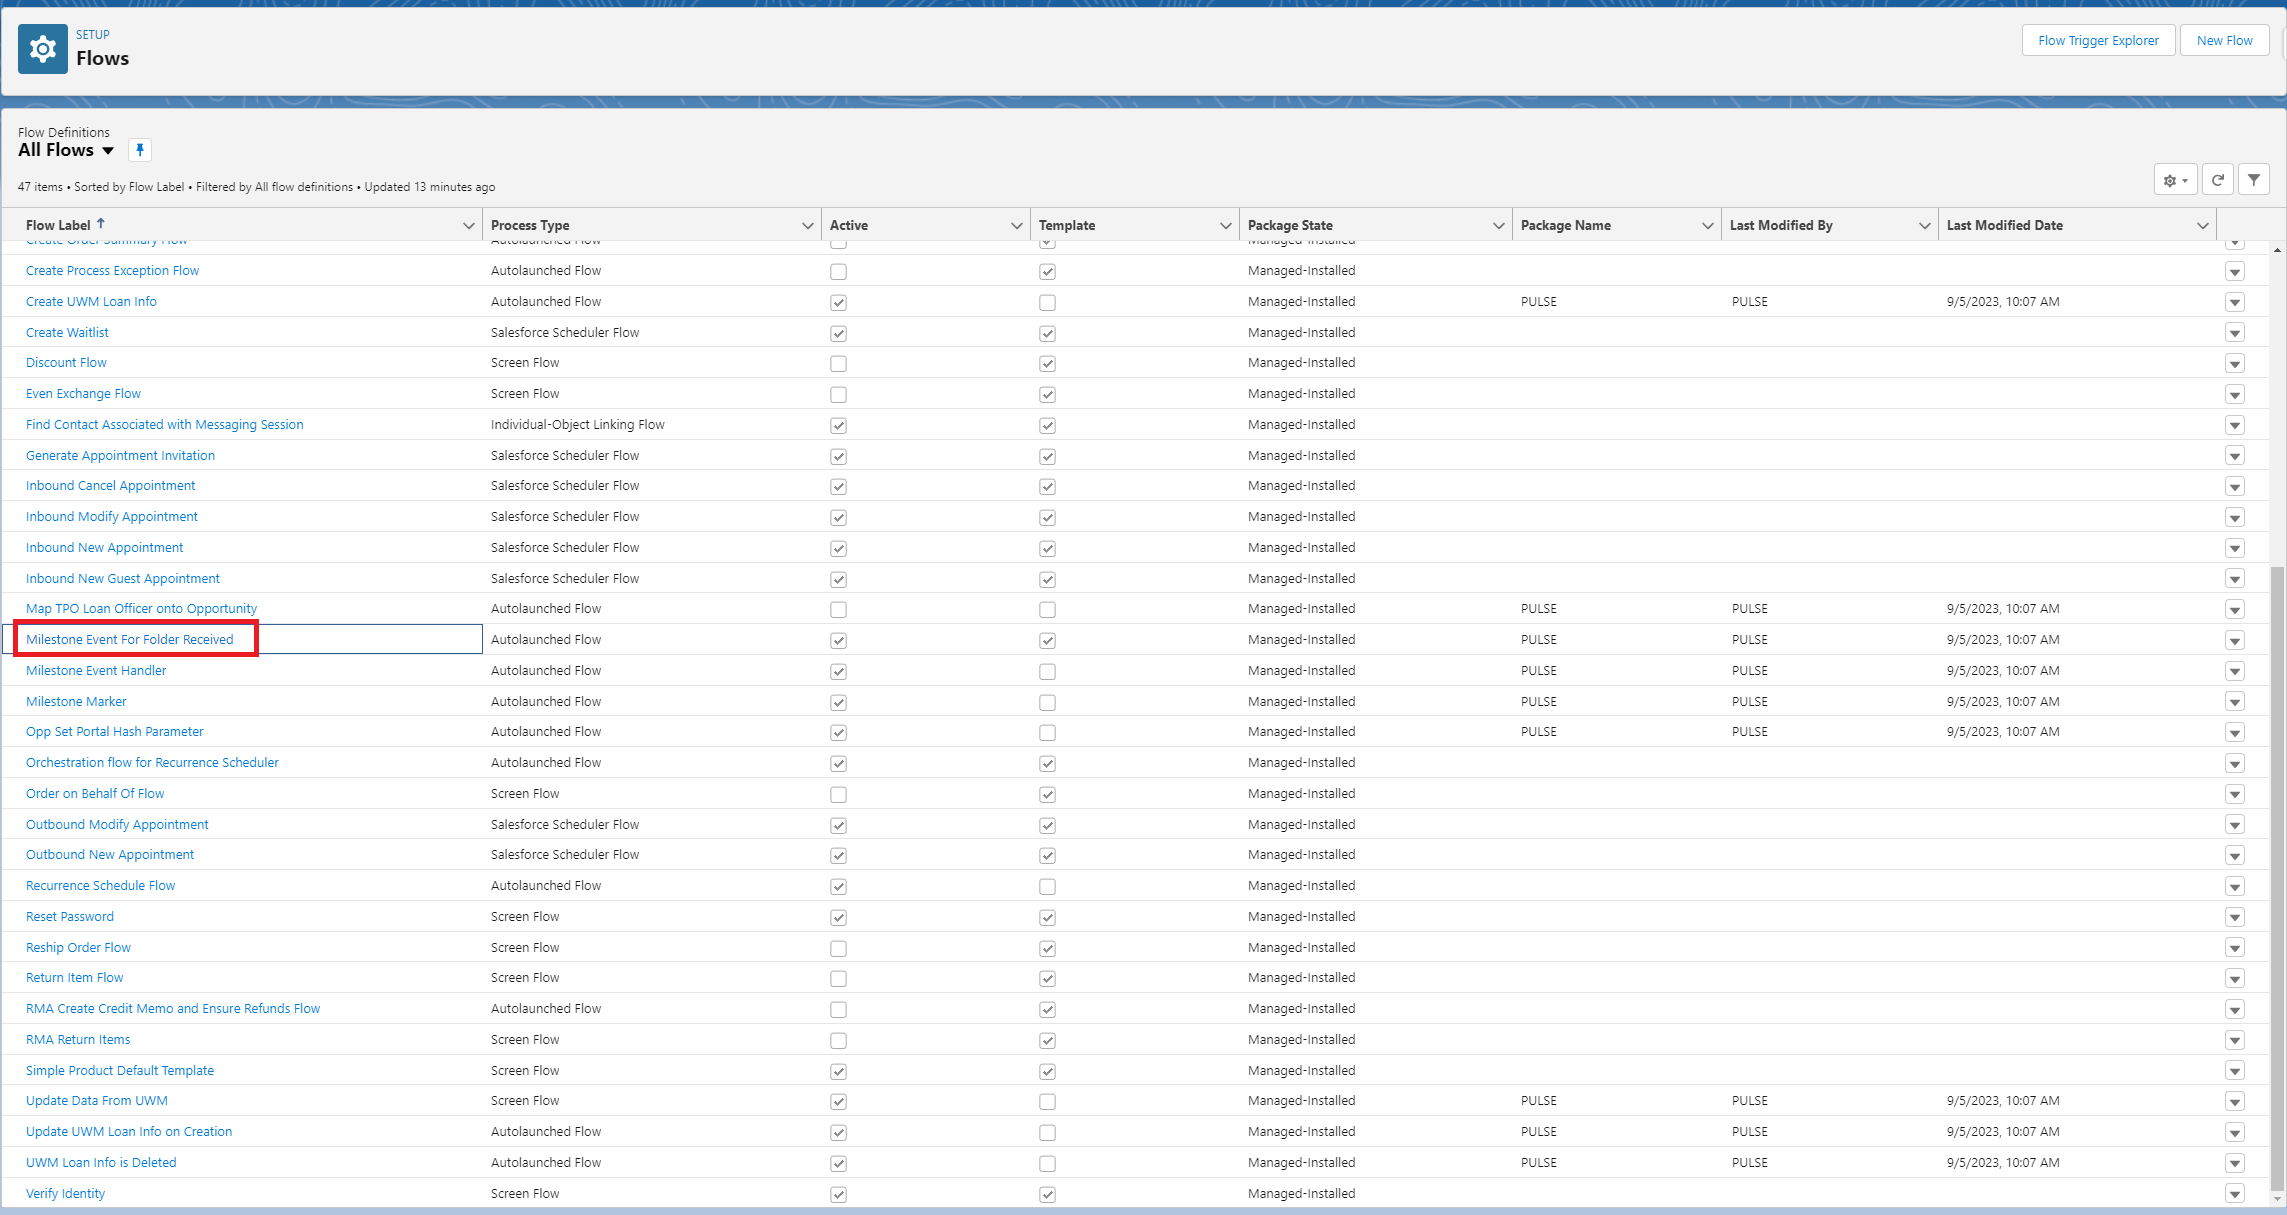
The flow will now open:
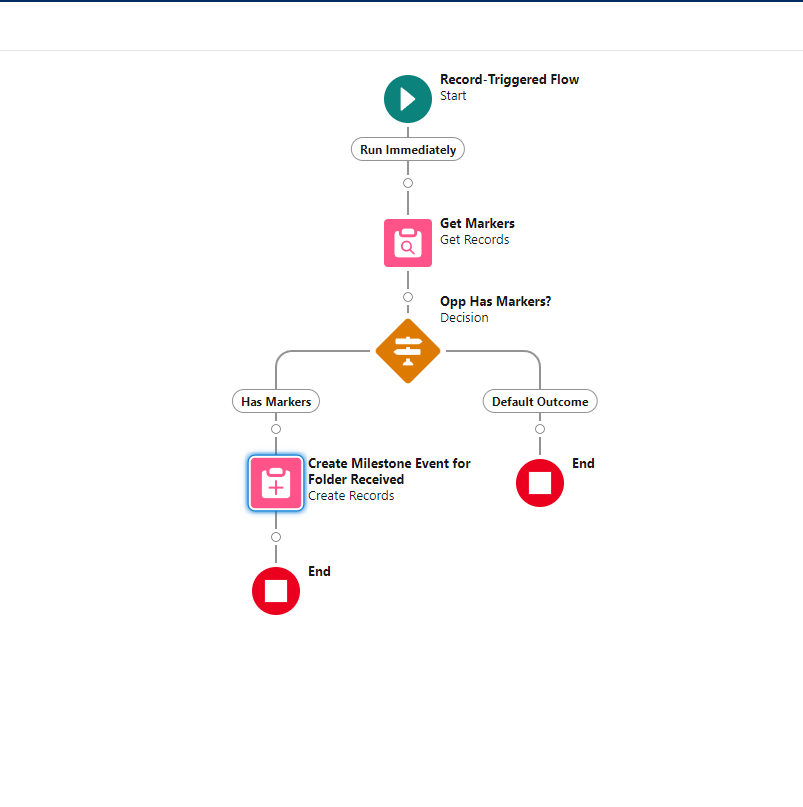
Double click the “Create Milestone Event for Folder Received” node:
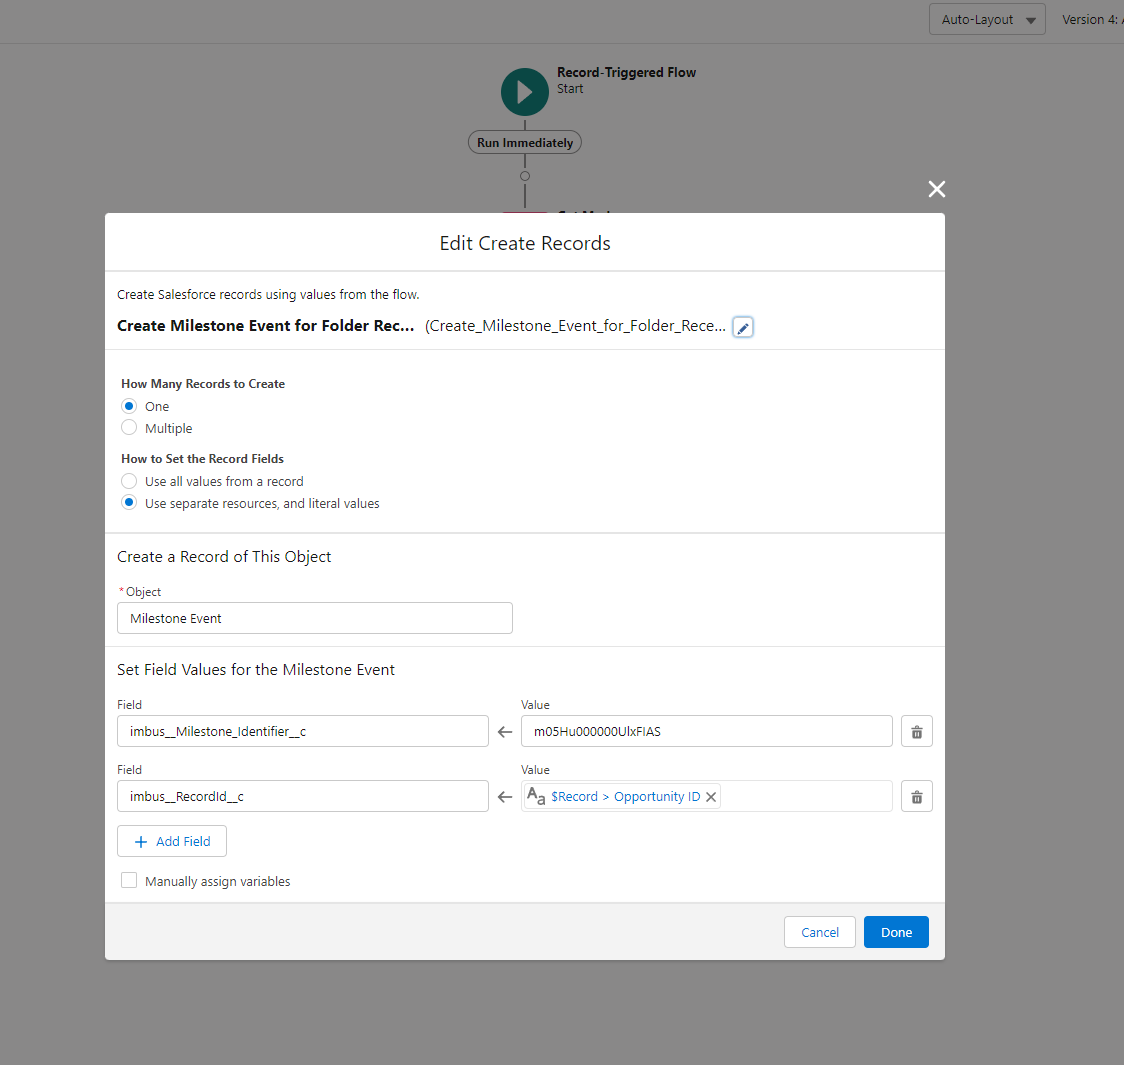
In the “Value” field, enter the milestone ID for the milestone you collected in step 3 of the previous section. (for this example we will use m01Hs000000YDfJ)
Click “Done”
Select “Save As”:

The following window should open:
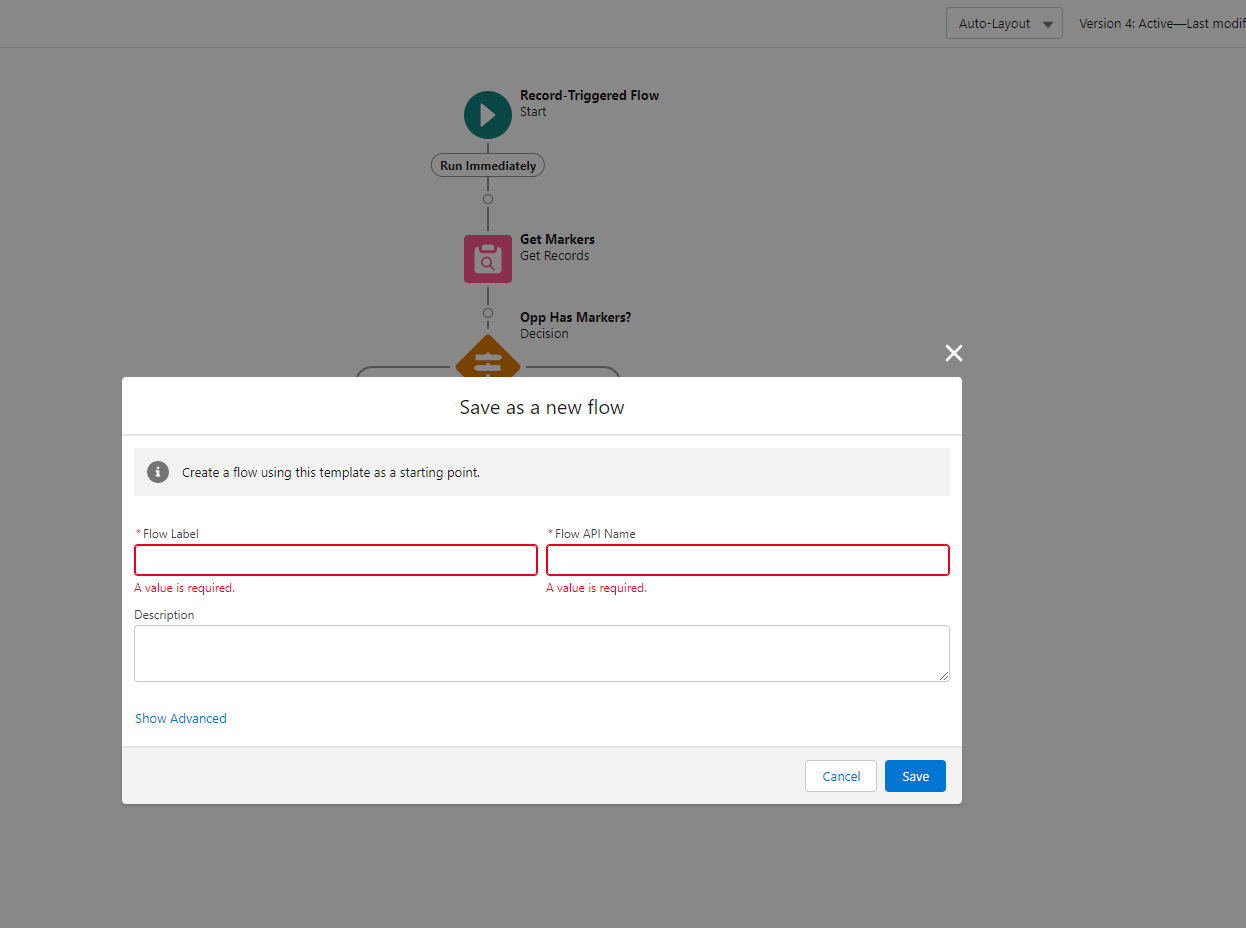
In the “Flow Label” field, input the name of this Milestone (For this example we’ll use Milestone Event for Application Approved”)
Validate that the flow API Name field automatically populated
In the “Description” field, give a brief description of when this milestone will be sent
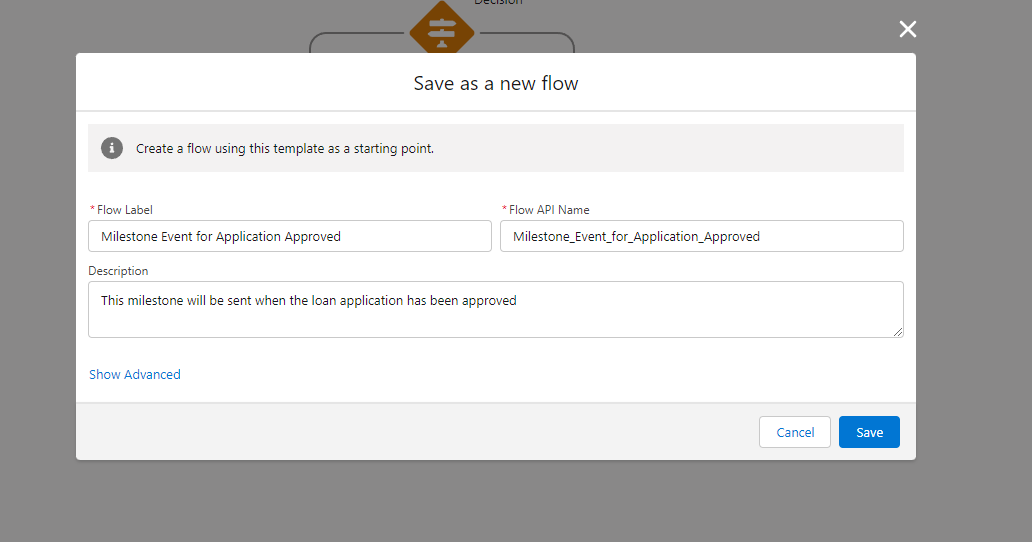
Click “Save”
Once the Flow has been saved, click “Activate” to turn the Milestone Feature on:

Repeat this section for each of your milestones
Return to the Onboarding Wizard
Click the blue ☑️ next to “Setup Flow Automation”

Click Save
🪟Overview
Well done! You've skillfully set up milestones to be sent automatically upon a loan reaching a particular stage. Milestones serve as vital tools for keeping borrowers updated about their loan's progress. You're now fully prepared to proceed with configuring Enhanced Notes!
